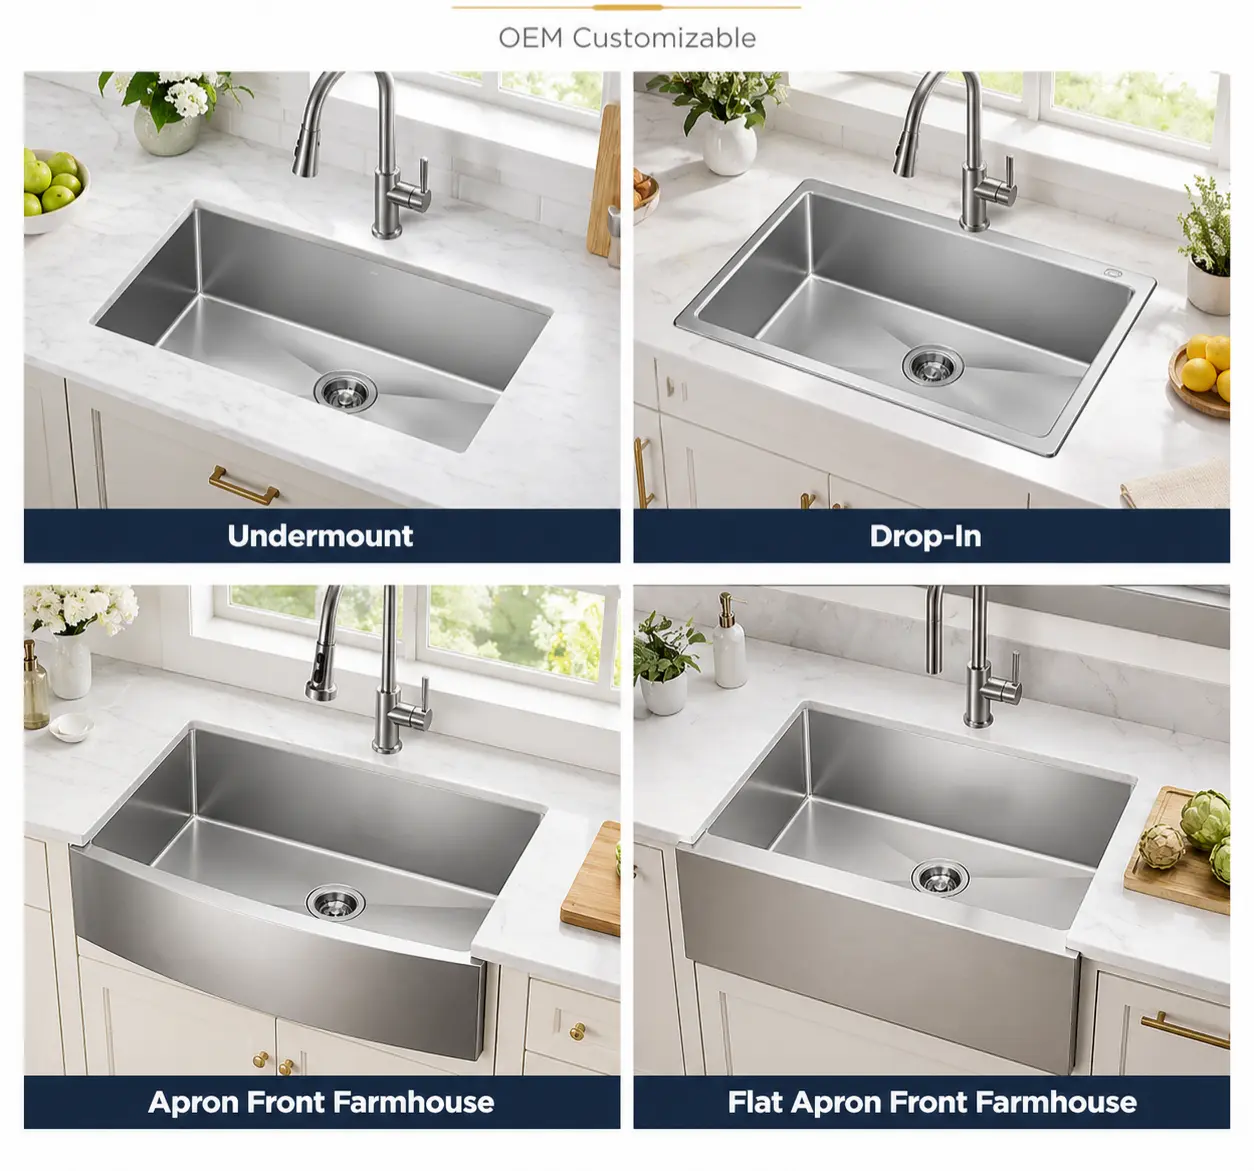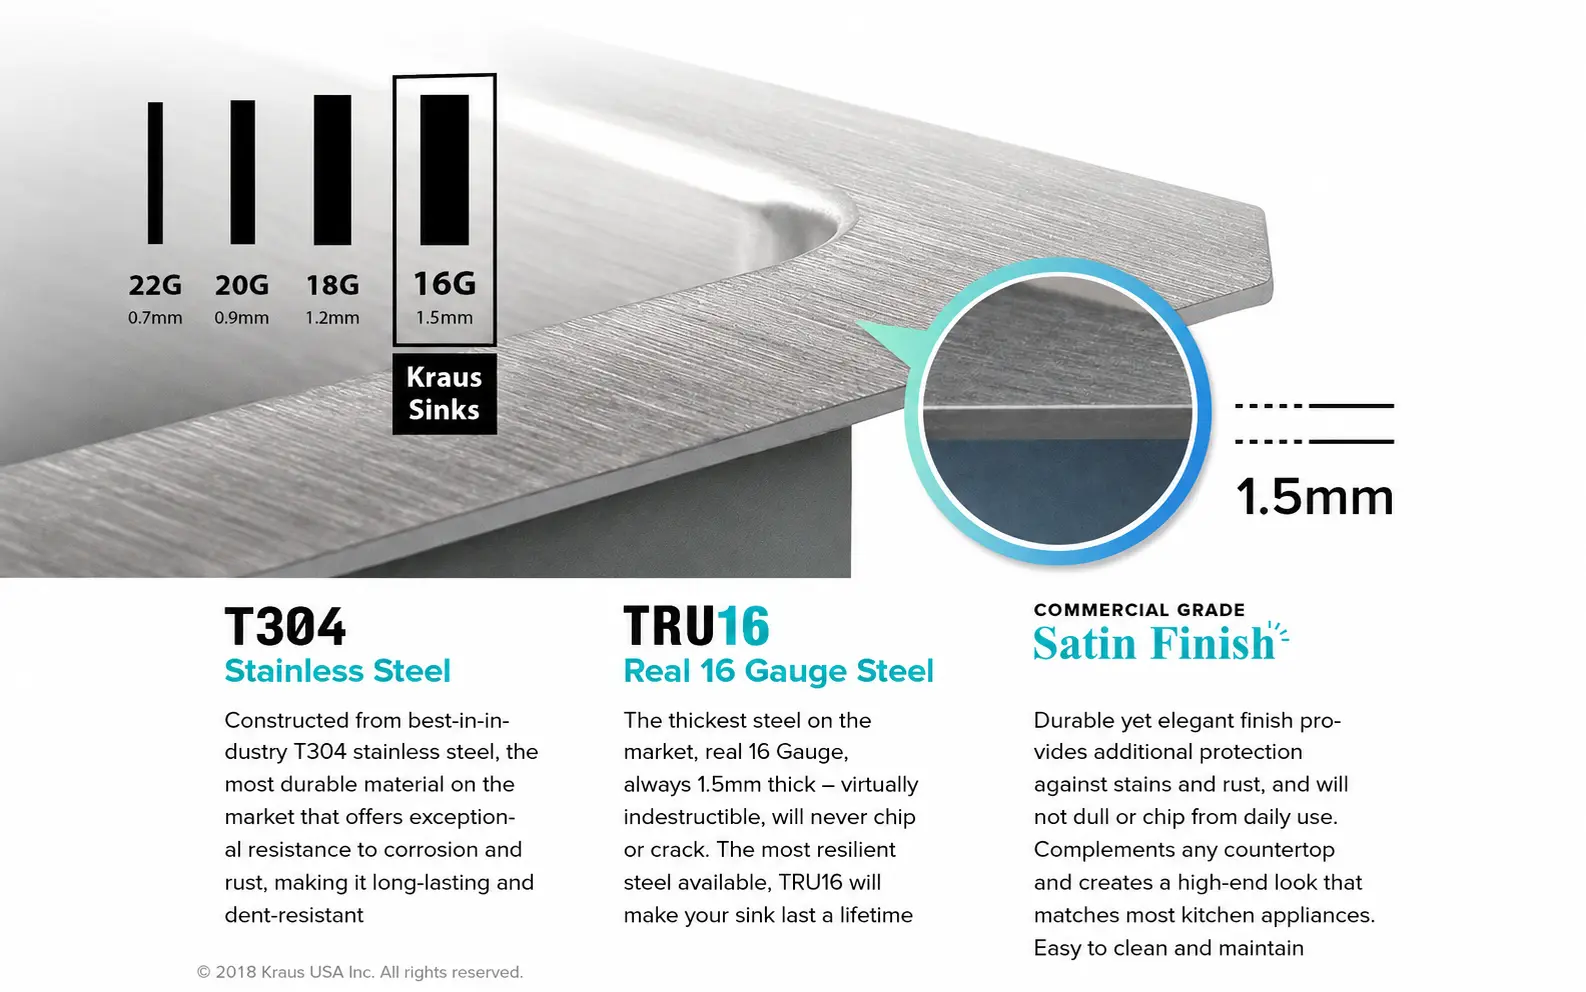
Fine scratches on a stainless steel sink are usually normal wear. Stainless steel is durable and corrosion-resistant, but cookware, cutlery, cleaning tools and trapped grit can still mark its surface.
A quality or handling problem is more likely when scratches are deep, present before use, inconsistent with the approved grain, repeated across multiple sinks, caused by loose packaging, or accompanied by coating loss, pitting or deformation.
The existence of a line does not decide the claim. Its timing, depth, direction, location, finish type and repeat pattern do.
Direct Answer
- Fine scratches after use: normally cosmetic wear.
- Grey lines that change after cleaning: often metal transfer, not a true scratch.
- Deep or random marks found before installation: possible manufacturing, packing or handling damage.
- Color loss on PVD or coated sinks: coating damage and should not be treated like ordinary brushed steel.
- Small cavities or rough pits: possible corrosion, not a simple scratch.
Do not polish the sink before documenting the mark. An attempted repair can erase evidence or create a larger finish mismatch.
The Four-Step Scratch Diagnosis
Step 1: Clean Without Abrading
Use mild detergent, warm water and a soft cloth or sponge. Rinse and dry the sink completely.
This removes water film, grease, soap residue and some metal-transfer marks that can imitate scratches.
Do not begin with:
- Steel wool
- Metal brushes
- Aggressive scouring pads
- Strong acids
- Chloride or bleach soaking
- Unverified scratch-removal compounds
Step 2: Identify the Mark
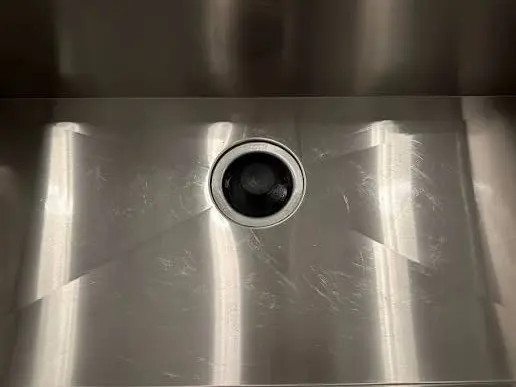
Ask:
- Is it a line, patch, pit, dent or missing coating?
- Does it follow the factory grain?
- Is the metal displaced or only discolored?
- Does the mark change when viewed from another angle?
- Can you see a physical groove after the surface is clean and dry?
Step 3: Establish the Timeline
Record when it was first visible:
- Before unpacking
- Immediately after unpacking
- After removing protective film
- After installation
- After cleaning
- After first use
- After weeks or months of use
Timing helps separate production, packaging, installation and household causes.
Step 4: Compare with the Approved Finish
Compare the sink with:
- The approved physical sample
- An unused area of the same sink
- Other units from the same batch
- The agreed appearance specification
Do not compare only with an edited product photograph. Lighting, camera processing and viewing angle can hide or exaggerate surface marks.
Quick Classification Table
| What You See | Likely Category | Usually Normal? | First Action |
|---|---|---|---|
| Fine lines after cookware use | Normal use scratches | Yes | Clean, dry and observe over time |
| Grey or black line from a pan | Metal transfer or scuff | Often | Try approved mild cleaning |
| Fine lines following the grain | Finish or normal wear | Often | Compare depth and direction with surrounding grain |
| Deep line with displaced metal | Gouge | No | Document and identify when it occurred |
| Random cross-grain marks before use | Production, packing or handling damage | No | Photograph before installation |
| Swirl marks after cleaning | Incorrect cleaning method | No, but use-related | Stop abrasive cleaning |
| Patchy grain near a welded corner | Finish inconsistency | Possible quality issue | Compare with the golden sample |
| Paired marks under grid feet | Grid movement or trapped debris | Use/accessory issue | Remove grid and inspect feet and debris |
| Color layer removed | Coating damage | No | Do not abrade; request technical review |
| Tiny cavities or pits | Possible corrosion | No | Stop chemical exposure and investigate |
| Rust-colored streak | Iron transfer, residue or corrosion | Not enough information | Determine whether it is removable or a cavity |
Why Stainless Steel Shows Scratches
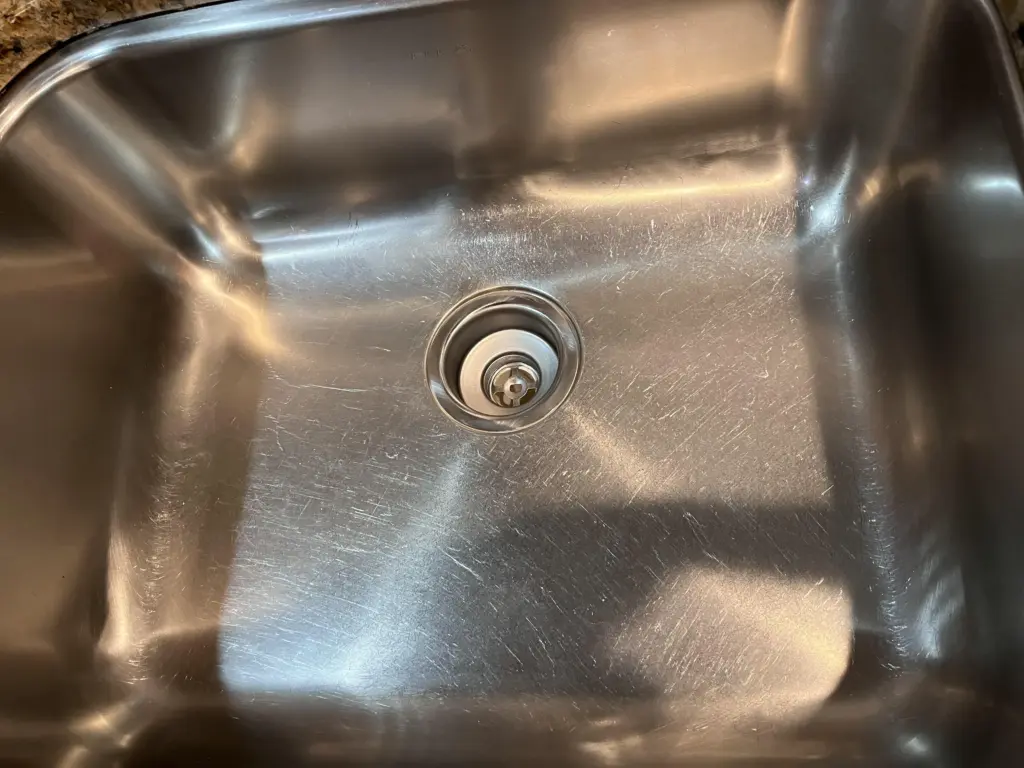
Stainless steel is not protected from scratching by a hard clear shell. On an uncoated sink, the visible surface is the stainless steel itself.
Contact with a hard or abrasive object can:
- Cut a new line into the finish
- Flatten the existing grain
- Displace a small amount of metal
- Transfer material from the object onto the sink
- Change how the surface reflects light
A Brushed Finish Is a Controlled Abrasion Pattern
A brushed or satin sink is created by mechanical finishing. Its grain is an intentional pattern of fine directional marks.
A new scratch becomes visible when it differs from that pattern in:
- Direction
- Depth
- Width
- Roughness
- Gloss
- Light reflection
That is why a mark can look strong under a spotlight but become difficult to see in diffuse daylight.
Grit Size Alone Does Not Define the Finish
Two finishes produced with a similar abrasive grade can still look different because of:
- Abrasive type
- Pressure
- Contact time
- Belt or brush condition
- Feed speed
- Wet or dry processing
- Number of finishing stages
- Direction of travel
For B2B orders, “brushed,” “satin” or a grit number is not a complete appearance specification. A physical finish sample is more reliable.
Eight Marks Commonly Called Scratches
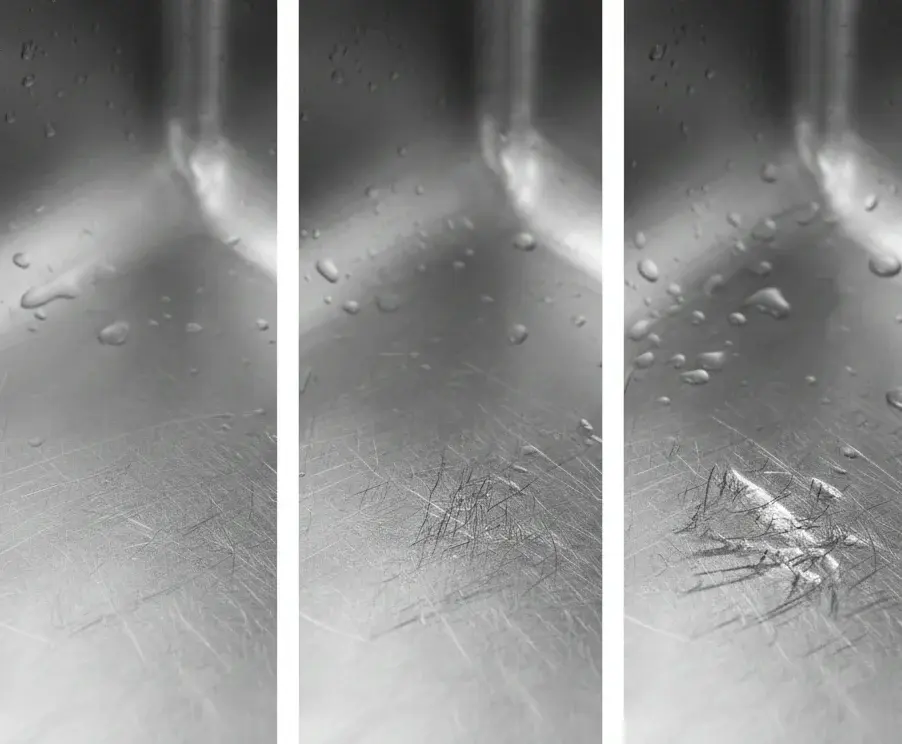
1. Fine Use Scratches
These are shallow marks created by ordinary contact with cookware, dishes and cutlery.
Typical signs:
- Appear after the sink enters use
- Concentrate in the bowl bottom and working areas
- Affect appearance more than function
- Are more obvious on a new, uniform finish
- May blend into a broader use pattern over time
Fine use scratches are normally expected wear.
2. Metal Transfer Marks
A pan, baking tray or utensil can leave grey material on the sink without deeply cutting it.
Typical signs:
- Grey or dark line
- May feel smoother than a gouge
- Can change after approved mild cleaning
- Often follows the path of cookware movement
Do not use aggressive abrasion as the first test. You may remove the transfer mark but create a real scratch around it.
3. Cross-Grain Scratches
A cross-grain scratch interrupts a directional brushed finish and therefore looks more severe.
Its cause depends on timing:
- Present under intact protective film: possible pre-film production issue
- Found after unpacking with damaged packaging: possible shipping or accessory contact
- Found after countertop work: possible installation tool damage
- Developed after use: likely cookware or cleaning contact
Direction alone does not prove responsibility.
4. Deep Gouges
A gouge is deeper than normal surface wear and may displace or deform metal.
Possible causes include:
- Sharp installation tools
- Heavy cookware dragged across the bowl
- Loose drains or clips in the carton
- Contact with an exposed screw or metal edge
- Poor factory handling
Deep gouges are difficult to blend without altering a wider area of the finish.
5. Swirl Marks
Circular or random swirls are commonly caused by cleaning across a directional grain.
They can result from:
- Circular scrubbing
- Abrasive powders
- Rough pads
- Polishing compounds
- Dirty cloths containing grit
Swirl marks are usually a maintenance issue, but similar marks found before use may require a production or handling review.
6. Finish Inconsistency
Some apparent “scratches” are actually inconsistent original finishing.
Examples include:
- Mixed grain direction
- Patchy gloss
- Coarse grinding beneath a fine finish
- Local over-polishing
- Visible weld blending
- Uneven corner transitions
- Different surface appearance on adjacent panels
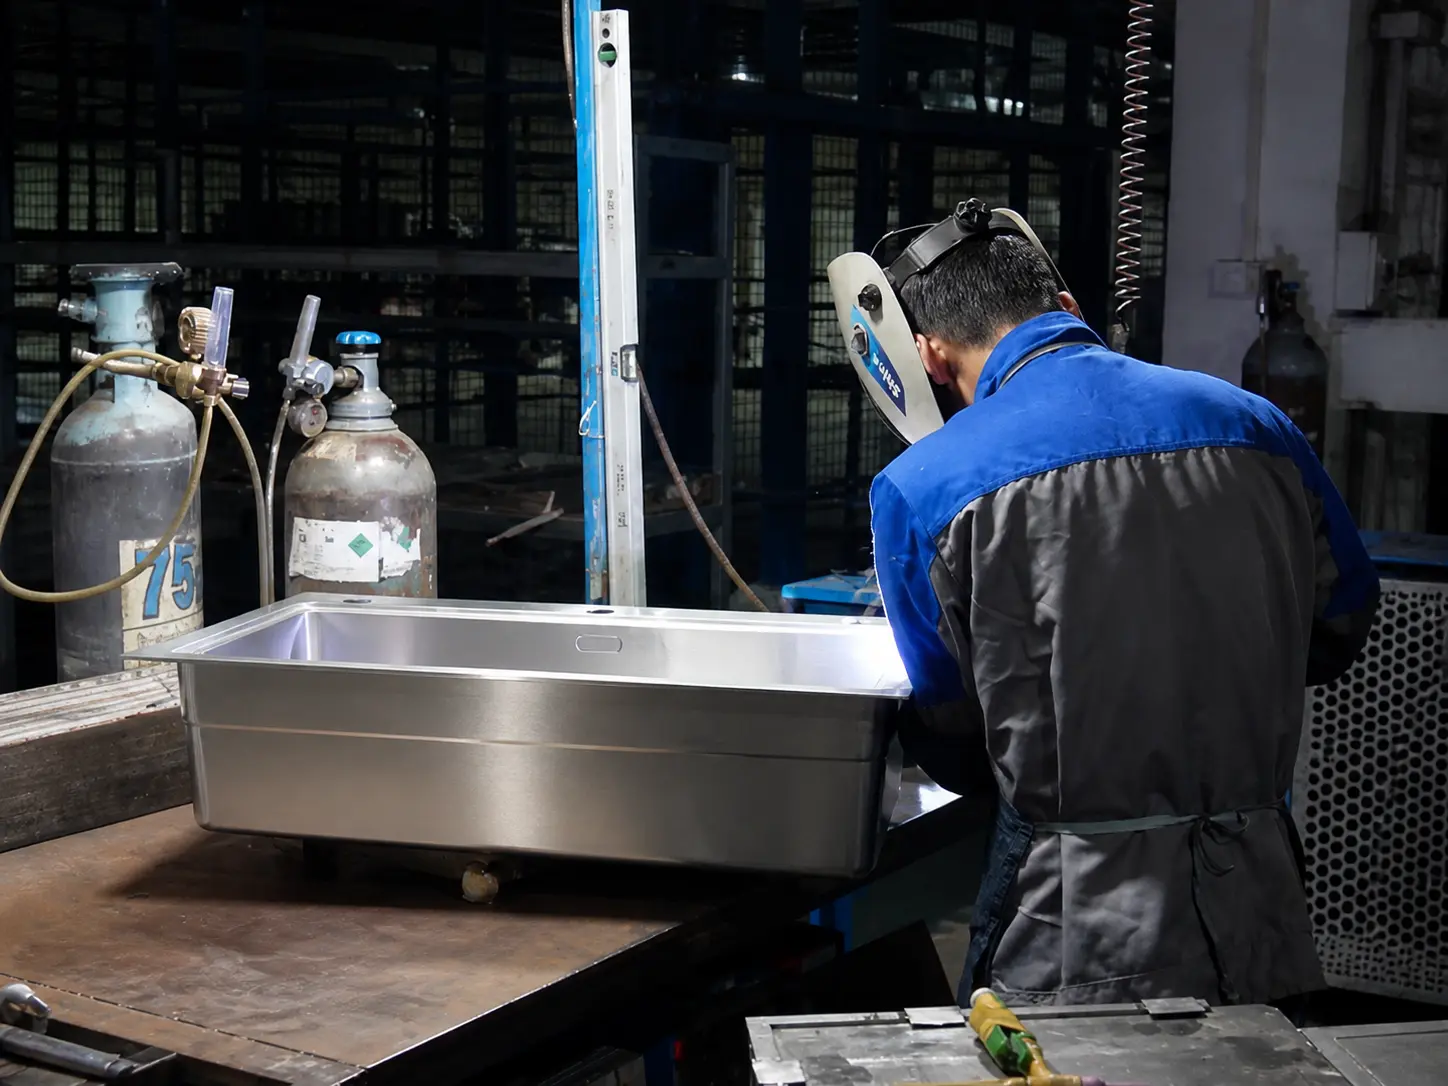
This is especially important on handmade sinks because cutting, welding, grinding and corner polishing involve several manual processes.
7. Packaging Abrasion
Packaging damage often creates repeated marks before the sink is used.
Common causes:
- Loose strainers, clips or screws
- Bottom grids rubbing against the bowl
- Cutting boards moving during shipment
- Damaged protective film
- Hard debris inside the bag or carton
- Sink-to-sink contact
- Inadequate internal fixing
A repeated mark in the same location across several units often indicates a repeatable packing or handling contact point.
8. Coating Damage or Pitting
These should not be classified as ordinary scratches.
For PVD, nano or other colored finishes, a line may involve loss or damage of the functional or decorative layer.
Pitting is localized corrosion that forms small cavities. It may be associated with prolonged exposure to chlorides, bleach, concentrated salt, harsh chemicals or contamination.
Do not use abrasive blending on a coated surface or possible pit.
Root Cause Clues from the Scratch Pattern
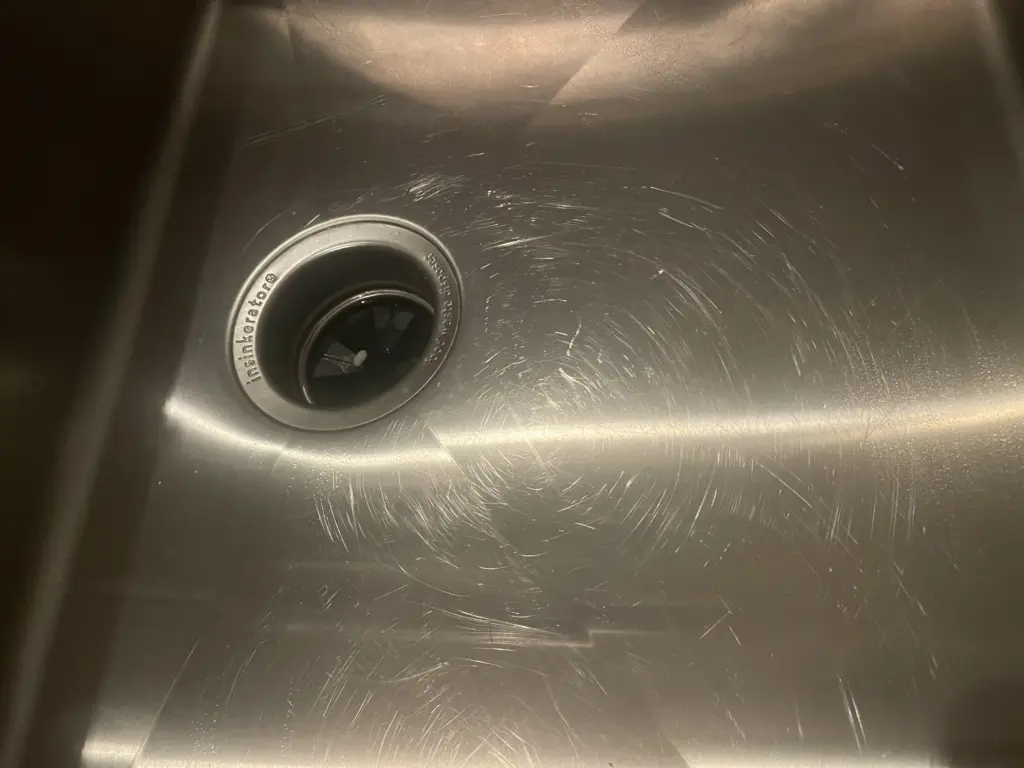
The location and repetition of a mark can reveal more than its appearance alone.
| Pattern or Location | Possible Root Cause to Investigate |
| Same scratch position across many sinks | Production fixture, stacking, packaging or accessory contact |
| Paired marks matching grid feet | Missing foot protection, trapped debris or grid movement |
| Long line from rim toward bowl | Installation tool, accessory movement or unpacking damage |
| Scratches only around drain | Strainer installation, drain processing, tools or cleaning residue |
| Marks concentrated at welded corners | Grinding and finish blending |
| Rim scratches beside clip locations | Installation or clip handling |
| Random circular swirls | Cleaning method |
| Parallel lines beneath loose accessories | Transport movement |
| Marks under undamaged protective film | Production or contamination before film application |
| Marks only after film removal | Film adhesive, trapped debris, removal tool or concealed earlier damage |
These are investigation clues—not automatic conclusions.
Normal Wear vs Quality, Handling or Packaging Problem
| Evaluation Point | More Consistent with Normal Wear | More Consistent with a Problem Requiring Review |
| Timing | Appeared after ordinary use | Present before use or immediately after unpacking |
| Depth | Fine and superficial | Deep groove, sharp edge or displaced metal |
| Direction | Similar to the grain or other use marks | Random coarse mark across the approved finish |
| Location | Normal cookware contact area | Protected area or repeated production contact point |
| Distribution | Random on one used sink | Same pattern across multiple units |
| Surface finish | Grain remains broadly consistent | Patchy grinding, mixed grain or local over-polishing |
| Packaging | No evidence of contact damage | Loose parts, damaged film or internal abrasion |
| Coated finish | Light removable scuff | Color loss, peeling or permanent layer damage |
| Function | Appearance only | Pitting, crack, leak, sharp edge or deformation |
A scratch claim should be evaluated against the agreed product specification and timing. “Visible” does not automatically mean “defective,” while “cosmetic” does not automatically mean “acceptable before delivery.”
Cosmetic Wear vs Functional Damage
Most fine scratches on uncoated stainless steel are cosmetic. The alloy’s basic corrosion resistance does not depend on a decorative plating layer.
Further technical review is appropriate when the mark includes:
- A deep groove that traps residue
- A sharp or raised edge
- Pitting
- A crack near a drain, weld or corner
- Significant metal deformation
- Coating loss
- Embedded iron contamination
- A repeatable batch pattern
Can a Scratch Cause Rust?
A clean scratch on suitable stainless steel does not automatically rust. The passive surface can reform when clean stainless steel is exposed to oxygen.
Rust-colored staining is more likely when:
- Ordinary steel particles are embedded in the surface
- Chloride-rich residue remains in the mark
- The area is repeatedly exposed to aggressive chemicals
- A cavity traps contamination
- The material or environment is unsuitable
The correct response is to identify contamination and corrosion—not assume that every brown line began as a scratch.
Does 304 Stainless Steel Scratch?
Yes.
Type 304 is widely used because of its overall corrosion resistance, formability and suitability for kitchen applications. It can still be scratched by cookware, knives, grit and abrasive cleaners.
Type 316 is also scratchable. Its increased corrosion resistance in certain environments does not create a scratch-proof surface.
Does 16 Gauge Scratch Less Than 18 Gauge?
Not necessarily.
Gauge affects:
- Thickness
- Weight
- Rigidity
- Resistance to deformation
- Product feel
Scratch visibility depends more directly on:
- Surface finish
- Grain direction
- Contact material
- Applied force
- Lighting
- Cleaning method
- Coating or texture
A 16-gauge and an 18-gauge sink with the same finish can show similar surface scratches.
How Finish Type Changes Scratch Behavior
| Finish | What Usually Becomes Visible | Repair Risk |
| Brushed | Cross-grain lines and deep marks | Incorrect blending can create a patch with different grain |
| Satin | Gloss changes and local abrasion | Spot-polishing may produce uneven reflectivity |
| Mirror or highly polished | Fine lines and swirl marks | Local restoration is difficult to match |
| Embossed or honeycomb | Marks on raised points and smooth areas | Texture cannot always be recreated locally |
| PVD or colored finish | Color loss, scuffing or coating breach | Abrasion may remove more coating |
| Nano or functional coating | Change in sheen, function or top layer | Generic stainless repair methods may damage the coating |
Before recommending a repair, identify the exact surface system—not only the steel grade.
Handmade vs Pressed Sinks: Different Finish Risk Points
Neither manufacturing route is automatically more scratch-resistant.
Handmade Sink Inspection Points
- Welded corners
- Radius transitions
- Ground seam areas
- Grain continuity between panels
- Local over-polishing
- Apron and rim surfaces
- Logo and drain areas
Pressed Sink Inspection Points
- Finish across stretched bowl walls
- Bowl-bottom appearance
- Rim marks from trimming and handling
- Drain-area finishing
- Stacking marks
- Consistency between molded units
Matrix shows both production routes on its stainless steel sink manufacturing page.
Can Stainless Steel Sink Scratches Be Removed?
Sometimes a scratch can be reduced or blended. Complete removal is not always realistic.
The decision depends on:
- Scratch depth
- Finish type
- Grain direction
- Coating
- Location
- Size of the affected area
- Required appearance standard
Repair Decision by Finish
| Surface | Reasonable First Step | What Not to Do |
| Uncoated brushed steel | Mild cleaning, drying and finish assessment | Do not scrub randomly across the grain |
| Uncoated satin steel | Mild cleaning and professional review if deep | Do not polish only one small visible patch |
| Mirror finish | Soft cleaning and specialist assessment | Do not use a general abrasive pad |
| Embossed or honeycomb | Clean gently and inspect raised areas | Do not flatten the texture through abrasion |
| PVD or colored finish | Stop abrasion and request finish-specific advice | Do not attempt to expose or blend the base steel |
| Unknown finish | Identify the finish first | Do not test an internet remedy on the visible bowl |
Why Spot Repair Often Looks Worse
Mechanical refinishing creates a new surface pattern. If abrasive type, pressure, direction or working area differs from the factory finish, the repaired area may have:
- Different gloss
- Different grain width
- A visible boundary
- A larger reflective patch
- Removed coating
For deep or highly visible damage, replacement may provide a more predictable result than local refinishing.
Do Bottom Grids Prevent Scratches?
A bottom grid reduces direct cookware contact and impact, but it cannot guarantee a scratch-free sink.
A grid may create marks when:
- Rubber or silicone feet are missing
- Sand or hard particles are trapped below it
- The grid is incorrectly sized
- The wire frame touches the bowl walls
- The grid slides during use
- Damaged feet expose metal
- Food and minerals are not cleaned from beneath it
For safer use:
- Use a grid designed for the exact bowl.
- Check all feet before use.
- Remove and clean the grid regularly.
- Rinse debris from the bowl.
- Replace missing or damaged feet.
- Lift the grid rather than dragging it.
Explore Matrix sink bottom grids for model-matched accessory programs.
How to Reduce Daily Scratches
- Rinse away grit before placing cookware in the sink
- Lift heavy pots instead of dragging them
- Use a fitted bottom grid when appropriate
- Keep grid feet clean and intact
- Use soft, clean cloths and non-metallic sponges
- Clean with the grain on directional finishes
- Do not cut food directly on the sink
- Do not store loose tools or screws in the bowl
- Remove concentrated salt and chemical residue promptly
- Dry the surface if water spots exaggerate scratch visibility
No care method can keep a working stainless steel sink visually untouched forever. The goal is controlled aging—not an impossible zero-contact surface.
How Factories Prevent Scratch Problems
Scratch prevention must continue through the entire production and packing flow.
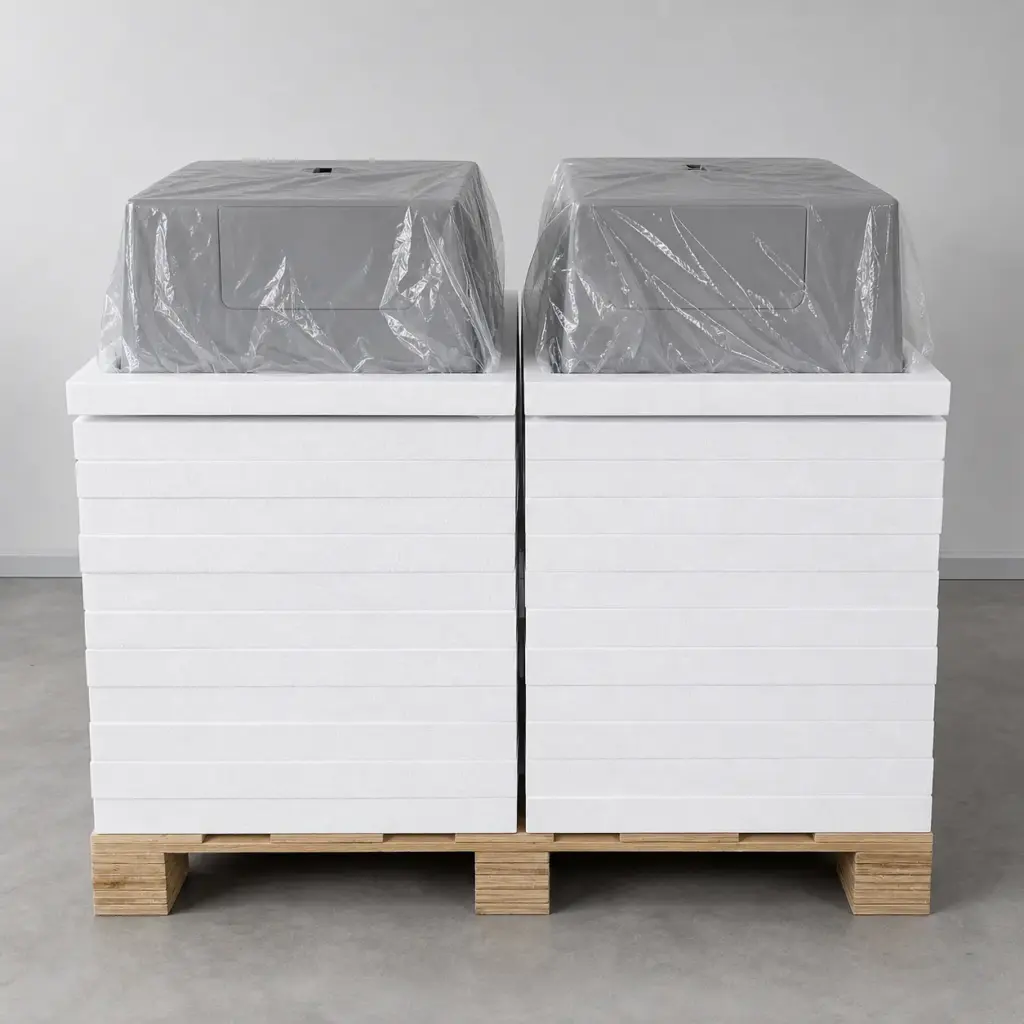
Surface Protection
- Protect sheet and sink surfaces between processes
- Keep visible faces away from hard worktables
- Remove metal debris and abrasive dust
- Prevent sink-to-sink contact
- Avoid carbon-steel contamination
Finishing Control
- Use a physical finish reference
- Control abrasive sequence and direction
- Monitor belt or brush condition
- Blend welded areas consistently
- Inspect corners, rims and drain transitions
- Prevent local over-polishing
Handling Control
- Use suitable gloves and clean supports
- Separate finished and unfinished products
- Protect apron panels and rims
- Keep tools out of finished bowls
- Avoid stacking without separators
Packaging Control
- Package accessories separately
- Immobilize grids, drains and cutting boards
- Protect the bowl, rim and corners
- Prevent movement inside the carton
- Check that film, bags and foam do not contain hard debris
B2B Appearance Approval: Make “No Scratches” Measurable
“No scratches” is not a reproducible inspection specification by itself.
A usable appearance agreement should define:
- Product model and finish revision
- Approved physical finish sample
- Visible surface zones
- Inspection lighting and whether it is measured
- Viewing distance and angle
- Inspection time per surface
- Clean and dry condition
- Whether protective film has been removed
- Scratch and finish-defect categories
- Acceptable and unacceptable reference photographs
- Sampling plan
- Record and claim requirements
There is no responsible universal viewing distance, light level or scratch size for every sink and sales channel. Buyer and supplier should agree on conditions that match the product’s positioning.
Define Appearance Zones
One possible structure is:
- Zone A: bowl, rim, faucet deck, apron and other normally visible faces
- Zone B: partly visible installation edges
- Zone C: underside and normally concealed surfaces
The actual zones must be defined for each product. A visible apron panel and a concealed underside should not automatically carry the same cosmetic requirement.
Define Defect Categories
For example:
- Fine superficial line
- Cross-grain scratch
- Deep gouge
- Dent or deformation
- Finish-direction mismatch
- Patchy gloss
- Coating loss
- Pitting or corrosion
- Packaging abrasion
Each category needs an approved example and disposition. Do not leave inspectors to interpret “premium surface” independently.
Use a Golden Finish Sample
An approved sample should show:
- Grain direction
- Grain fineness
- Gloss level
- Corner transition
- Weld-blending expectation
- Logo appearance
- Acceptable natural variation
Link the sample to the SKU, drawing, finish code and revision date. If the process or material changes, confirm whether the finish sample must be reapproved.
Factory Scratch Inspection Checklist
Inspect:
- Bowl bottom
- Bowl walls
- Rim and faucet deck
- Welded corners
- Apron or visible front panel
- Drain area
- Grain direction
- Gloss consistency
- Logo area
- Coated or colored areas
- Protective film or bag
- Bottom-grid and accessory separation
- Carton contact points
- Repeated patterns across inspected units
The sink should be clean and dry. Water, oil, polishing residue and adhesive can hide or imitate surface defects.
How to Investigate a Scratch Claim
A useful claim package should include:
- Purchase order and model number
- Batch or shipment reference
- Finish and approved sample reference
- Quantity received, inspected and affected
- When the mark was first seen
- Photographs before installation
- Full-sink and close-up photographs
- Lighting direction
- Protective film and packaging condition
- Accessory position in the carton
- Installation status
- Cleaning method already attempted
- Whether the same pattern appears on other units
Claim Decision Flow
- Was the mark present before installation?
- Was the sink clean and dry when inspected?
- Is it removable transfer, a scratch, a gouge, coating loss or pitting?
- Does it follow the approved grain?
- Is there packaging or installation evidence?
- Does the mark repeat across a batch?
- Does it exceed the approved appearance criteria?
- Has any repair attempt changed the evidence?
Repeated marks in the same location point toward a repeatable process or contact. Random marks appearing after installation require closer review of site handling, cleaning and use.
Preventing False Expectations Before Sale
Brands and distributors can reduce returns by explaining surface behavior before purchase.
A stainless steel care card should state:
- Stainless steel is durable but not scratch-proof
- Fine use marks may develop
- Brushed finishes should be cleaned with the grain
- Steel wool and harsh abrasive tools should not be used
- Bottom grids require cleaning and intact feet
- Water spots can increase the visibility of marks
- Colored finishes need separate care instructions
This is not an admission of poor quality. It is accurate expectation management.
Avoid unsupported claims such as:
- Scratch-proof
- Never rusts
- Maintenance-free
- Permanent original finish
- Any scratch can be repaired
Common Myths
304 Stainless Steel Does Not Scratch
False. Grade 304 can scratch. Its use in kitchen sinks does not create scratch immunity.
16 Gauge Is Scratch-Proof
False. Gauge affects thickness and rigidity, not the basic ability of a hard object to mark the surface.
Every Scratch Is a Manufacturing Defect
False. Fine marks commonly develop during normal use. Timing, depth, direction and the agreed finish standard determine classification.
A Bottom Grid Prevents Every Scratch
False. A grid reduces contact but may cause marks if debris is trapped or protective feet are missing.
Every Scratch Can Be Buffed Out
False. Repair can create a wider finish mismatch, especially on mirror, embossed, PVD and coated surfaces.
Rust-Colored Marks Prove the Steel Is Fake
False. Transferred iron particles can create rust-colored stains on stainless steel. Alloy verification and surface diagnosis are separate questions.
Final Decision
The mark is probably normal wear when:
- It appeared after ordinary use
- It is fine and superficial
- It occurs in working areas
- The finish remains generally consistent
- There is no pitting, coating loss or deformation
It may be a quality, handling, installation or packaging problem when:
- It was present before use
- It is a deep gouge or deformation
- Grain and gloss are inconsistent
- The same mark repeats across units
- Packaging or protective film is damaged
- Accessories were loose inside the bowl
- A colored coating has been removed
- Pitting, cracking or structural damage is present
The correct decision comes from evidence and an agreed appearance standard—not the word “scratch” alone.
Frequently Asked Questions
Are scratches normal on a new stainless steel sink?
Fine scratches can appear quickly after use. Marks found before use should be documented and compared with the approved finish to determine whether they came from manufacturing, packing, transport or installation.
Why does a new stainless steel sink show scratches so clearly?
A new sink has a uniform factory finish. The first new marks reflect light differently and create strong contrast. Fine scratches may become less visually dominant as the surface develops a broader use pattern.
Can stainless steel sink scratches be removed?
Some superficial marks on uncoated brushed steel can be reduced or blended. Deep scratches, mirror finishes, embossed textures and colored coatings are more difficult. Identify the finish before attempting repair.
Should steel wool be used on a stainless steel sink?
No. Carbon-steel wool can scratch the surface and leave iron particles that later create rust-colored staining.
Does 304 stainless steel resist scratches better?
Type 304 is not scratch-proof. Scratch visibility depends more directly on finish, contact, force and cleaning method than on grade alone.
Does a thicker sink scratch less?
Not necessarily. Thickness improves rigidity and resistance to deformation. It does not prevent surface contact from creating marks.
Is a grey line always a scratch?
No. It may be metal transferred from cookware. Use approved mild cleaning before diagnosing permanent damage.
Can a sink bottom grid scratch stainless steel?
Yes. Missing feet, trapped debris, incorrect size or sliding contact can create marks.
Can a scratch make stainless steel rust?
A clean scratch does not automatically rust. Rust-colored staining is more likely when iron contamination, chlorides or aggressive residue remain on or in the damaged area.
Are PVD or colored sink scratches repairable?
Ordinary abrasive blending is not recommended because it can remove more coating. Request finish-specific technical advice.
When should a scratch become a supplier claim?
Document it when it is present before use, exceeds the approved appearance criteria, repeats across a batch, results from packaging, removes a coating or includes pitting, cracking or deformation.
Request a Stainless Steel Finish Review from Matrix

Matrix supplies stainless steel kitchen sinks for brands, wholesalers and project buyers. We support finish selection, physical sample approval, manufacturing review, model-matched accessories, packaging and repeat-order control.
For a finish or scratch review, send:
- Sink model and finish
- Order or sample quantity
- Full-sink and close-up photographs
- Lighting and viewing conditions
- When the mark was first found
- Protective film and packaging condition
- Cleaning method already attempted
- Approved finish sample or reference, if available
Contact the Matrix team to request a finish sample, sink specification or OEM product review.