Yes, an undermount sink can loosen, sag or fall when its support system is missing, incorrectly installed, incompatible with the countertop or weakened over time.
The earliest signs are usually a growing gap, cracked sealant, uneven reveal, loose hardware, sink movement or plumbing under strain. Stop filling or heavily loading a loose sink and arrange professional inspection before resealing it.
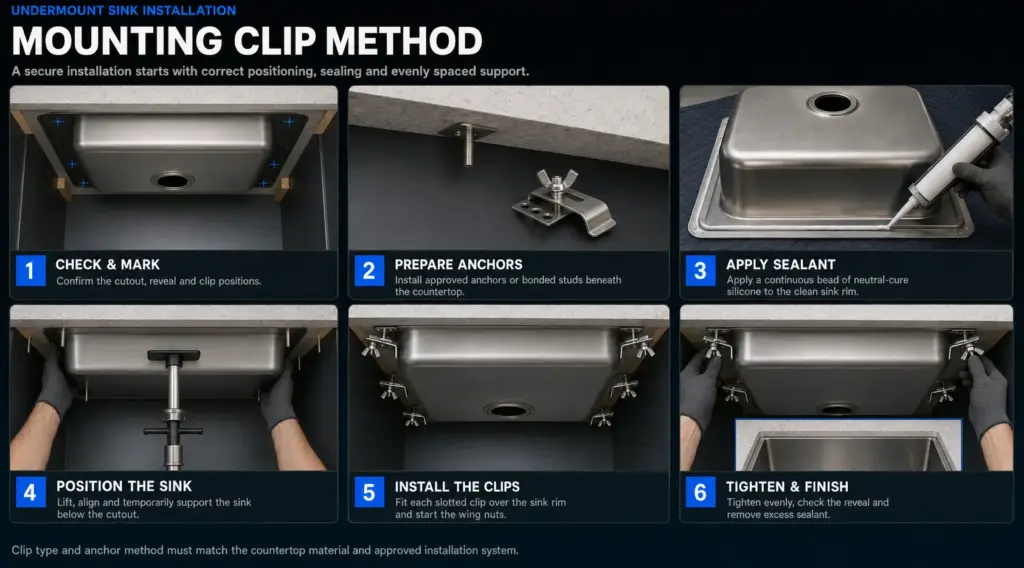
An undermount sink has no rim resting on top of the countertop. Its loaded weight must be transferred through clips, brackets, rails, a harness, a cabinet frame or another approved mounting system.
Adhesive and silicone may be part of that system, but they should not be assumed to carry every structural load unless the exact installation method explicitly requires and validates that use.
Immediate Answer: What Should You Do?
If the Sink Is Secure
- No visible gap
- Sealant remains continuous
- Support hardware is present
- Sink does not move
- No leak or unusual sound
Continue normal use and periodic visual checks.
If You See a Small Gap or Cracked Sealant
- Avoid filling the bowl.
- Remove heavy cookware.
- Do not add new caulk yet.
- Photograph the seam and support system.
- Arrange an installation inspection.
If the Sink Is Sagging or Moving
- Stop using the faucet and garbage disposal.
- Keep people away from the cabinet opening.
- Do not crawl beneath the bowl.
- Isolate electrical or water equipment only when safely accessible.
- Obtain urgent professional assistance.
Do not test a loose sink by standing in it, pressing down, filling it with water or adding dishes.
Undermount Sink Risk-Level Guide
| Level | Warning signs | Recommended response |
|---|---|---|
| Green | Even reveal, intact seal, visible support and no movement | Continue routine inspection |
| Amber | Hairline sealant crack, minor moisture or unknown support system | Reduce loading and arrange an inspection |
| Red | Growing gap, uneven bowl, loose clip, movement or new leak | Stop normal use and arrange prompt repair |
| Urgent | Active dropping, plumbing strain, disposal movement or electrical exposure | Keep clear, isolate systems if safe and call a professional immediately |
A sealant crack is not always proof that the sink is falling. However, it is evidence that the joint and hidden supports should be inspected rather than cosmetically covered.
What Actually Holds an Undermount Sink Up?
A professional undermount installation should have a traceable load path:
Loaded sink → sink rim or bowl support → clips, rails, brackets, harness or frame → countertop or cabinet structure → cabinet base and floor
Three different functions are involved:
- Sealant closes the wet joint between the sink and countertop.
- Adhesive bonds compatible surfaces or mounting components.
- Mechanical support transfers physical load into the countertop or cabinet structure.
These functions may overlap in a tested mounting system, but they should never be confused.
If the only visible “support” is the drain pipe or garbage disposal, stop using the sink. Plumbing must not carry the sink’s weight.
Sealant vs Adhesive vs Mechanical Support
| Component | Main function | Common failure risk |
| Silicone sealant | Seals the sink-to-countertop joint and may provide adhesion | Poor surface preparation, incorrect product, incomplete cure or long-term separation |
| Structural adhesive | Bonds compatible surfaces or approved mounting components | Incompatible substrate, contamination, incorrect mixing or cure failure |
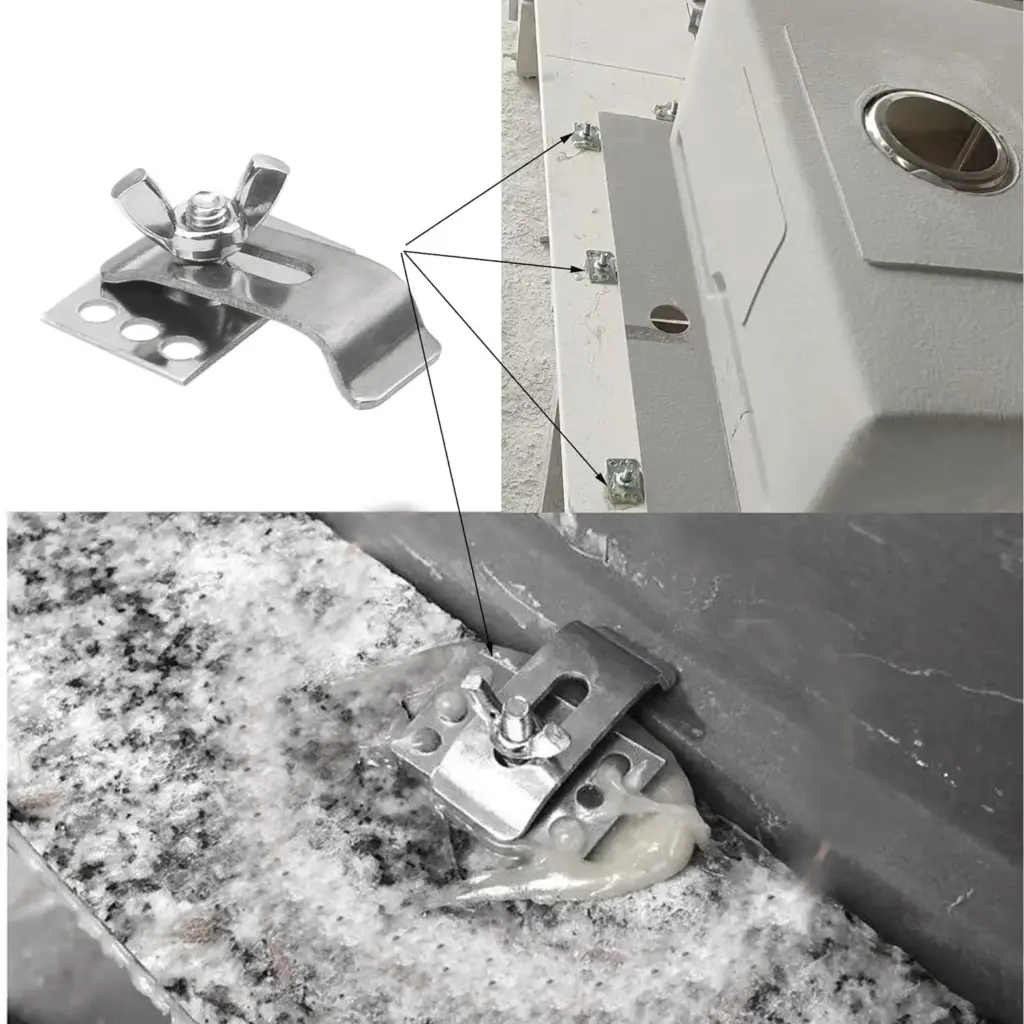
| Epoxy-mounted studs | Create anchor points for sink clips | Stud base detaches or the countertop surface fails |
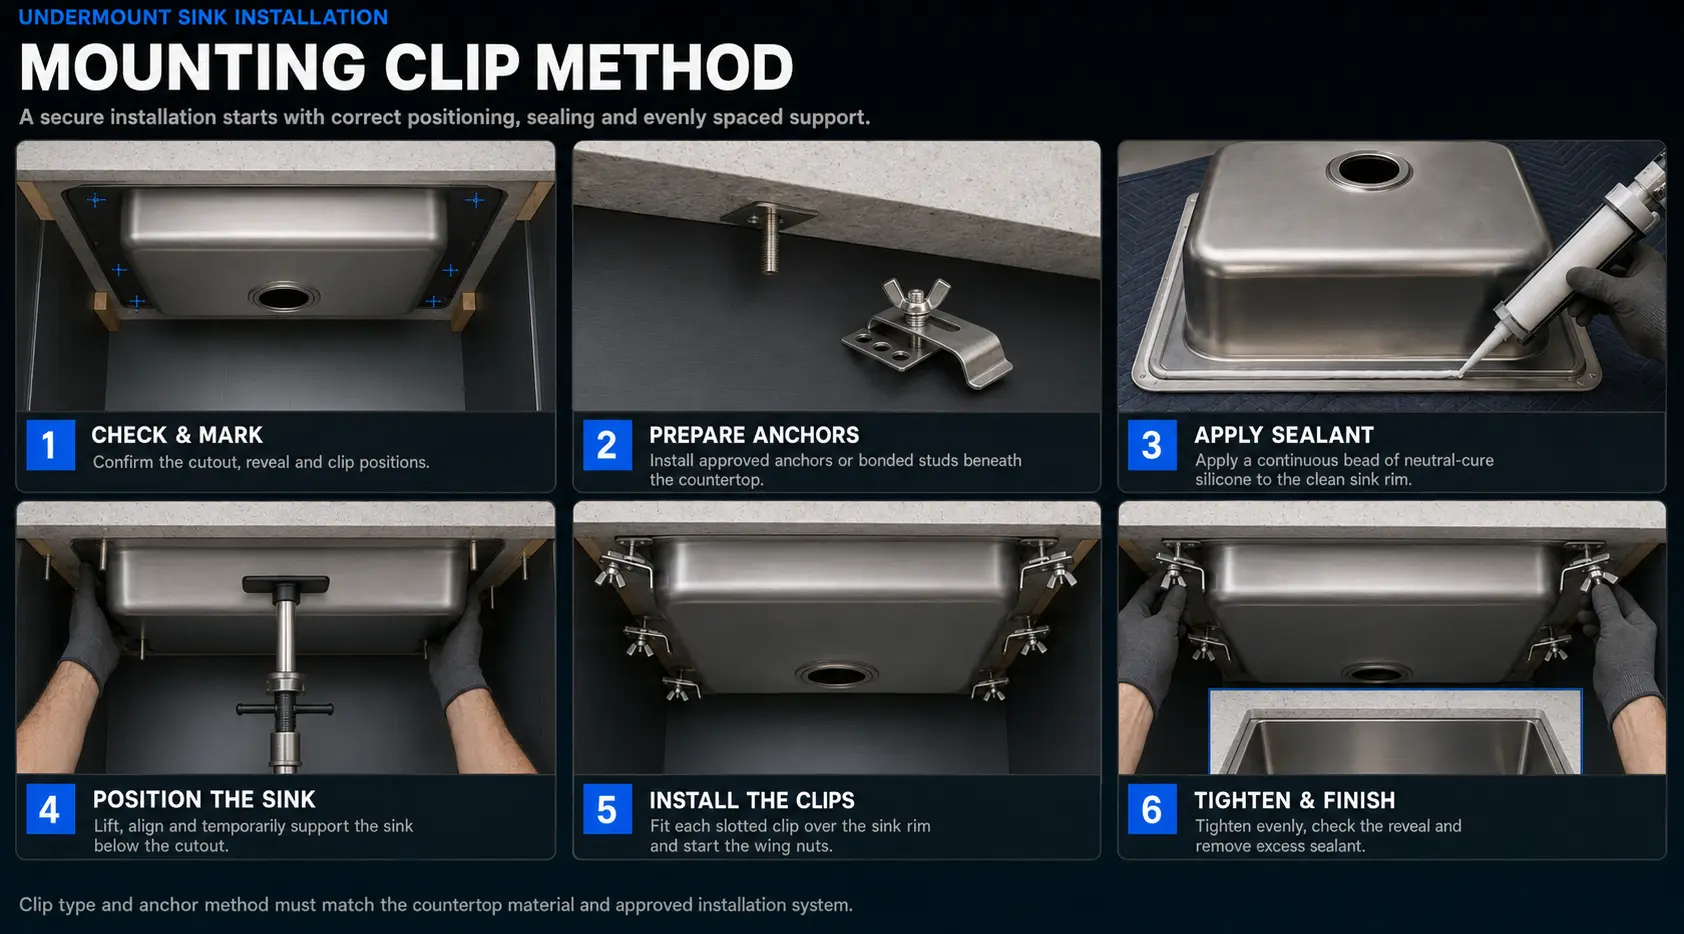
| Sink clips | Pull the sink rim toward the countertop | Missing, loose, overtightened or poorly anchored clips |
| Cabinet rails or brackets | Transfer weight to cabinet structure | Weak attachment, incorrect sizing or damaged cabinet panels |
| Harness or straps | Support the sink bowl from below | Incorrect attachment, poor tension or plumbing interference |
| Custom support frame | Distributes heavy or unusual loads | Inadequate design, weak cabinet or poor maintenance access |
A component should not be selected by name alone. Material compatibility, tested capacity, installation method and actual site conditions all matter.
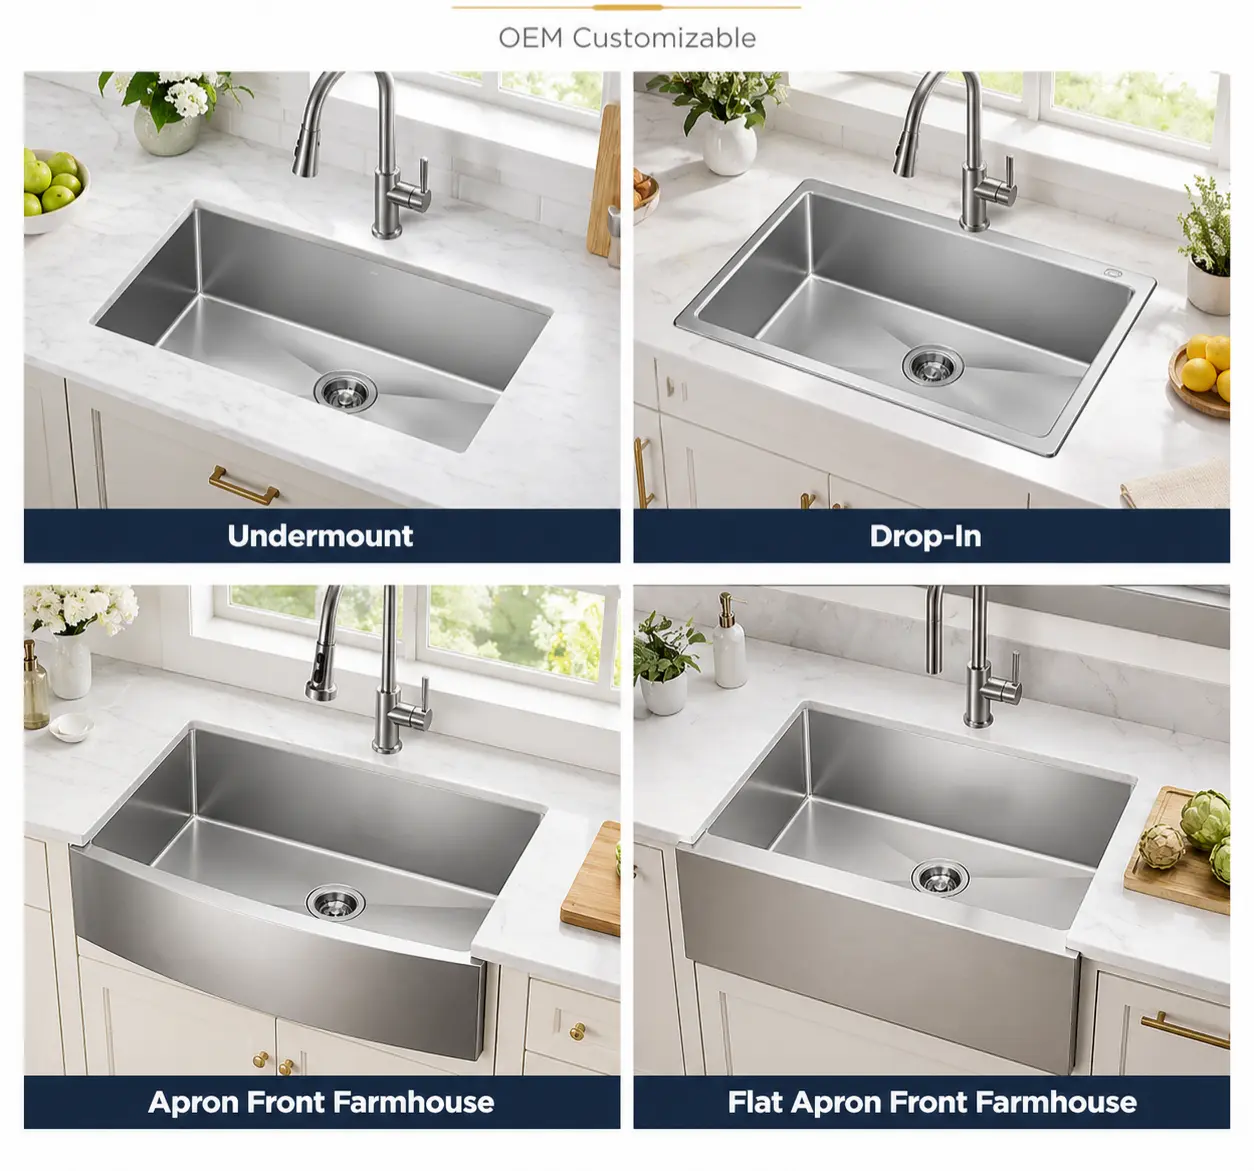
Matrix supplies undermount kitchen sinks for brands, wholesalers and project buyers, with installation requirements reviewed by sink type and application.
Is Silicone Enough to Hold an Undermount Sink?
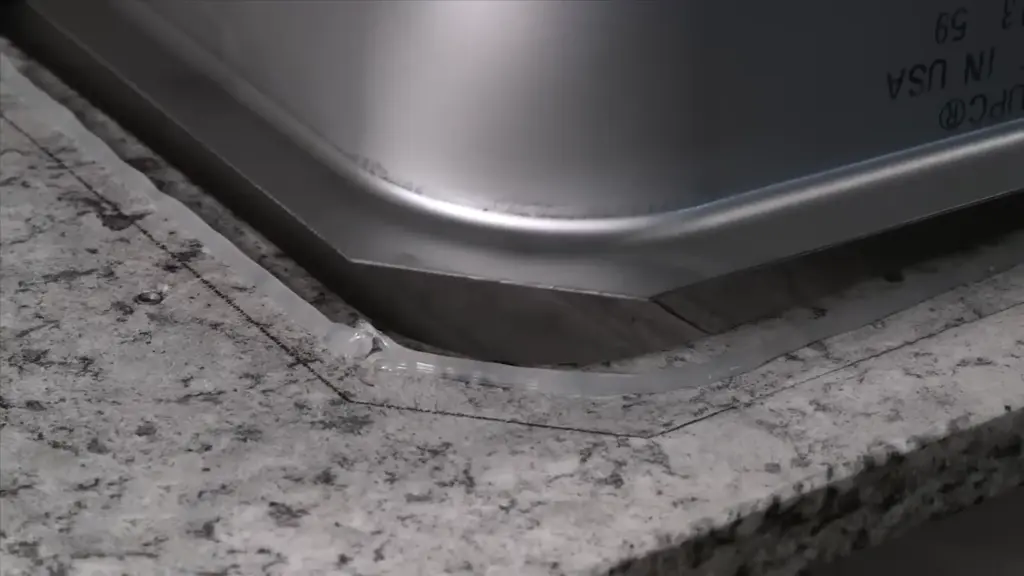
The accurate answer is: only when the exact approved installation system says it is.
Some silicone products provide meaningful adhesion. Others are primarily joint sealants. Their performance depends on:
- Product chemistry
- Sink-rim material and finish
- Countertop material
- Surface cleanliness
- Joint geometry
- Applied bead thickness
- Cure time and temperature
- Moisture and chemical exposure
- Sustained service load
Therefore, neither of the following statements is universally correct:
- “Silicone never supports a sink.”
- “Silicone alone can support any sink.”
The correct question is whether the complete mounting method is specified and approved for the exact sink, countertop and load condition.
Why Do Undermount Sinks Fall?
1. No Defined Structural Support
The sink may have been pressed into adhesive without clips, rails, brackets or another documented support plan.
An adhesive bead may hold an empty sink initially, but it has not necessarily been verified for a filled bowl, cookware, garbage disposal and long-term moisture exposure.
2. Supplied Hardware Was Not Installed
Clips sometimes remain in the carton or taped to the sink underside after installation.
A clean appearance above the countertop cannot confirm that the hidden mounting system was installed correctly.
3. Clip Anchors Detached
A clip may remain against the sink rim while its anchor or bonded stud separates from the countertop.
Possible causes include:
- Dust, oil or polish on the bonding surface
- Incorrect epoxy ratio or mixing
- Moisture during application
- Incompatible adhesive
- Insufficient cure time
- Excessive tightening force
- Countertop damage near the anchor
4. Clips Were Tightened Unevenly
One excessively tight clip can concentrate force and pull the sink out of alignment.
Overtightening may also:
- Distort a stainless steel rim
- Damage an anchor
- Chip brittle countertop material
- Squeeze out sealant unevenly
- Create an inconsistent reveal
Clips should be tightened gradually and evenly according to the installation instructions.
5. The Mounting Plan Ignored the Loaded Sink Weight
The installed system must support more than the empty sink.
It may carry:
- Water
- Cookware and dishes
- Bottom grids and accessories
- Garbage disposal
- Temporary food-preparation loads
- Vibration and impact
One liter of water weighs approximately one kilogram. A sink holding 20 liters of water therefore carries about 20 kilograms of water before the sink body, cookware and garbage disposal are counted.
This is a load illustration—not a recommended fill level or test method.
6. The Countertop and Anchor Were Incompatible
Granite, quartz, marble, quartzite, porcelain, sintered slabs, solid surface, wood and laminate do not use one universal anchoring method.
Potential problems include:
- Drilling too close to a stone cutout
- Using an anchor unsuitable for a thin slab
- Bonding over factory polish or dust
- Exposing a laminate core to moisture
- Using an adhesive incompatible with a coating
- Failing to reinforce a weak cutout area
The attachment method should be approved for the actual countertop material and thickness.
7. Cabinet Supports Were Attached to Weak Material
Rails and brackets are effective only when they transfer load into sound structural cabinet parts.
Thin trim, loose panels, damaged particleboard and water-softened cabinet material may not provide reliable attachment.
8. Temporary Supports Were Removed Too Early
Adhesives and sealants require specified cure conditions. “Dry to the touch” does not necessarily mean ready for service load.
Installing the disposal, filling the sink or removing temporary braces too early can disturb alignment and bonding.
9. The Joint Remained Wet
A leak or incomplete seal can allow water and residue into the joint. Moisture may weaken adhesion, cabinet material or mounting hardware while concealing damage behind the sink rim.
10. The Disposal Added Weight and Vibration
A garbage disposal is attached to the drain outlet. Its weight and operating vibration become part of the complete sink system.
If the sink moves or its seam opens when the disposal operates, stop using the disposal and inspect the mounting.
11. The Countertop or Cabinet Moved
Cabinets can settle, countertop seams can shift and cracks may develop near the sink cutout.
An initially aligned sink can later sag when its supporting structure changes.
12. A Previous Repair Added Caulk but Not Support
New caulk may hide a gap temporarily. It cannot restore a detached anchor, damaged cabinet or missing bracket.
A recurring seam crack usually indicates that the underlying movement was not corrected.
How a Small Separation Can Become a Fall
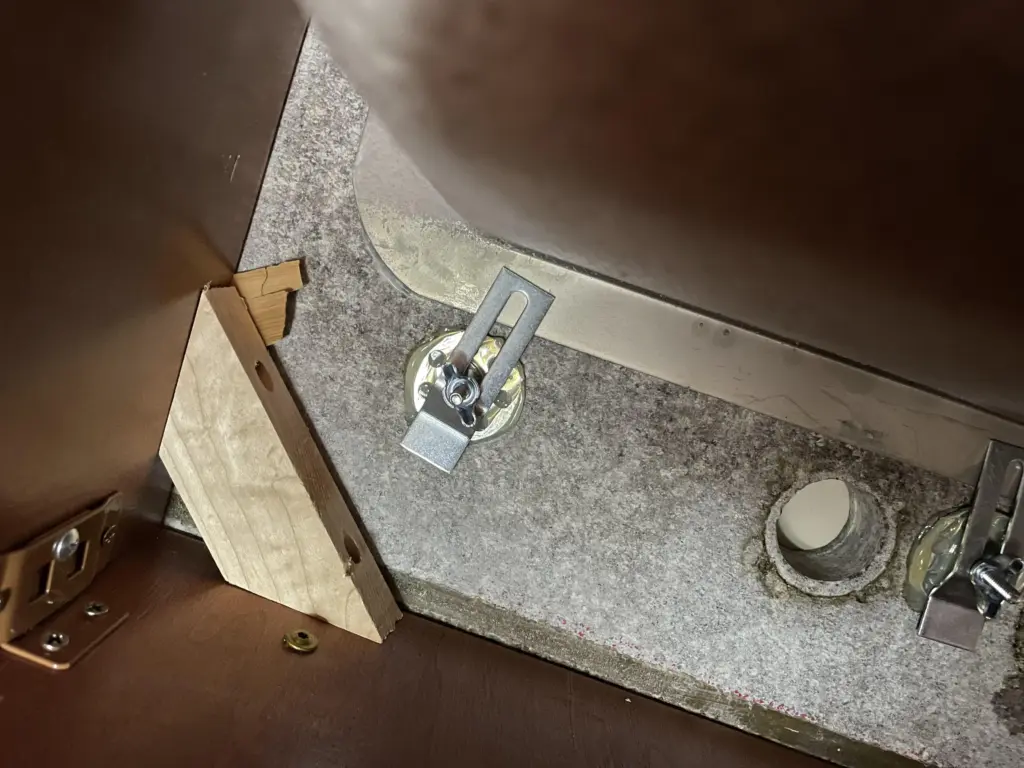
Failure does not always happen in one instant.
Stage 1: Seal Separation
A small crack or gap appears. Water and debris may enter the joint.
Stage 2: Load Redistribution
The remaining clips, adhesive areas or brackets begin carrying more load. The reveal may become uneven.
Stage 3: Plumbing Strain
The drain, disposal or waste pipe starts pulling at an angle. Leaks or movement may appear.
Stage 4: Partial or Complete Detachment
The remaining support releases, or its countertop or cabinet attachment fails.
Some failures can be sudden, especially after an impact or when a heavily loaded sink loses its final effective support point. Early inspection is safer than monitoring a growing gap indefinitely.
Four Loads an Undermount Installation Must Handle
Dead Load
Permanent weight from the sink, drain, garbage disposal and fixed accessories.
Live Load
Temporary weight from water, cookware, dishes and food preparation.
Dynamic Load
Impact, movement and garbage-disposal vibration.
Environmental Exposure
Moisture, temperature changes, cleaning chemicals and movement within the cabinet or countertop.
An installation that holds the empty sink during handover may still be inadequate under normal service conditions.
A Better Load Definition for B2B Projects
Instead of writing “the support must be strong,” define the service condition:
Design service load = sink self-weight + water at the agreed fill condition + attached disposal and fixed accessories + defined use load
The mounting-system supplier, countertop fabricator or qualified project professional should confirm the required capacity and safety margin.
Do not copy a generic load rating without checking:
- How the rating was tested
- Which countertop or cabinet was used
- Load direction
- Number and placement of supports
- Whether the test used static or dynamic loading
- Whether aging, moisture and vibration were considered
A large number printed without test conditions is not a useful engineering specification.
Which Undermount Sink Support Method Is Best?
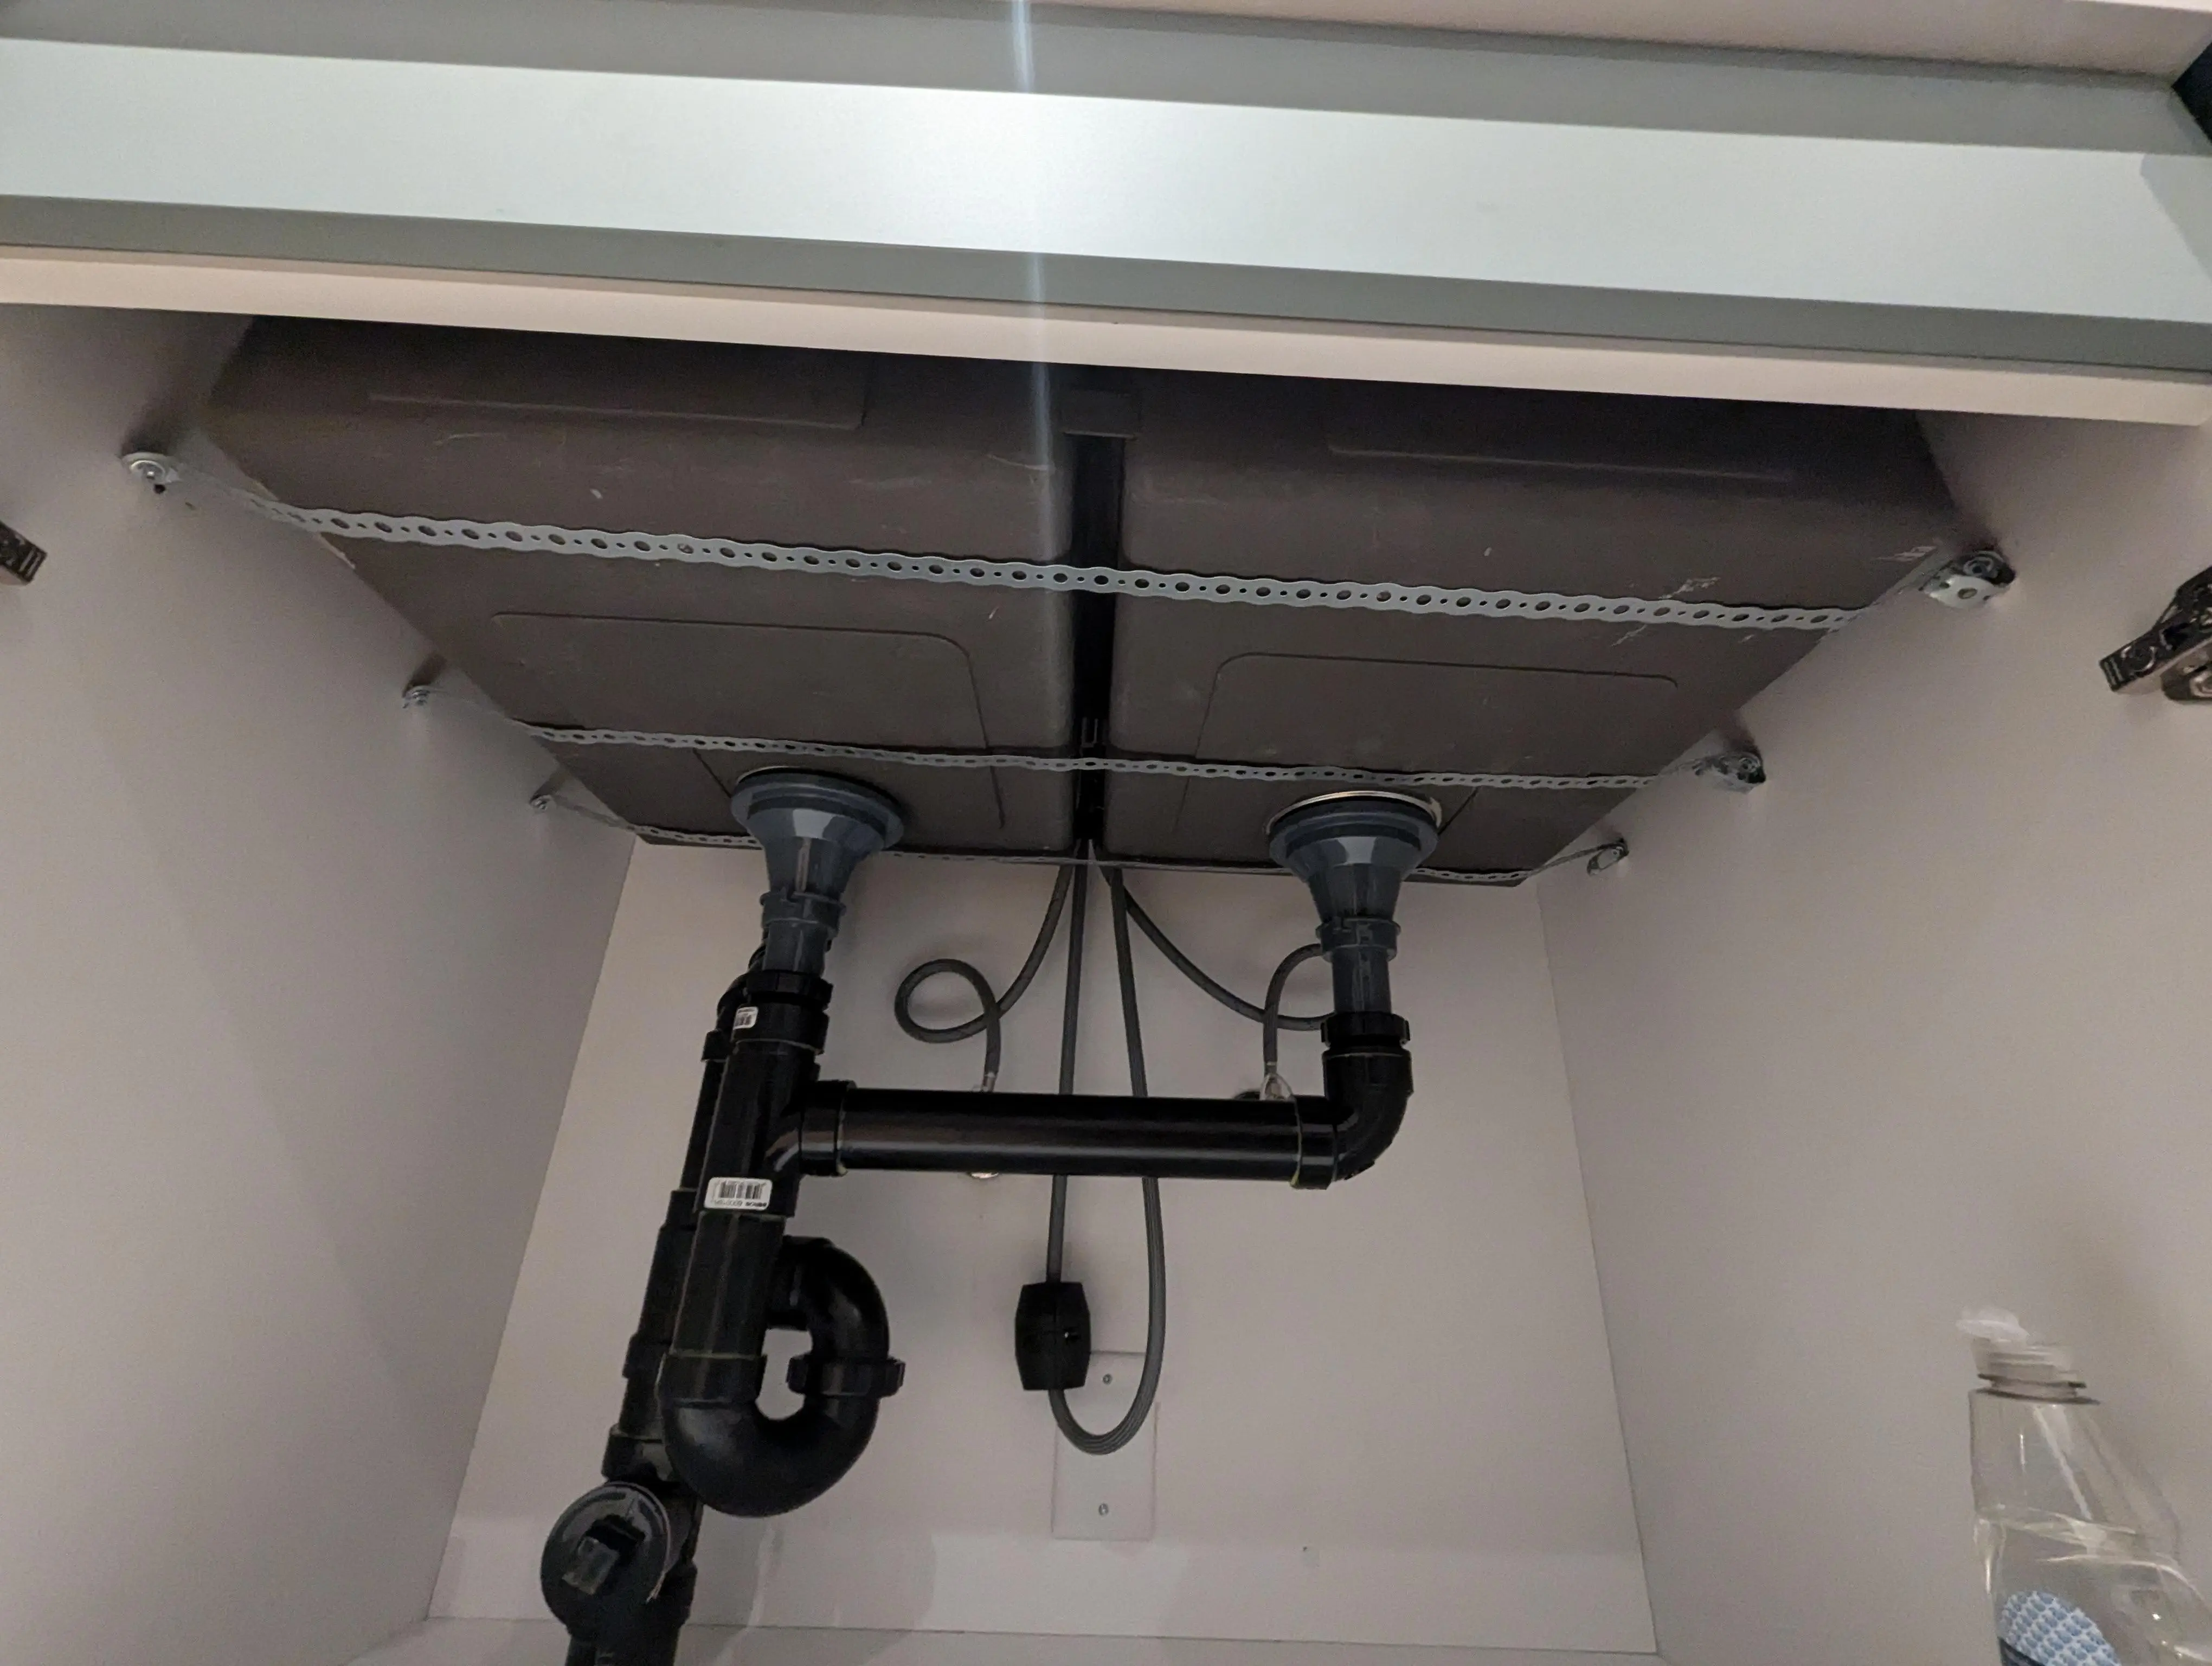
| Method | Typical advantage | Main limitation |
| Countertop-mounted clips | Compact and adjustable | Requires compatible anchors and sufficient countertop integrity |
| Adhesive-mounted studs with clips | Avoids some countertop drilling | Depends heavily on surface preparation and correct curing |
| Cabinet-mounted rails | Transfers load away from the countertop | Requires sound cabinet walls and sufficient clearance |
| Adjustable bottom brackets | Useful for alignment and retrofit projects | Must be sized and attached correctly |
| Harness or strap system | Can support irregular bowl shapes | Must avoid drains, disposals and hoses |
| Custom support frame | Distributes heavy or unusual loads | Requires design, cabinet space and installation planning |
There is no universal best method.
Heavy composite, fireclay, cast-iron, large workstation and apron-front sinks may need more distributed support than a compact stainless steel bowl.
Do Sink Material and Steel Gauge Affect Fall Risk?
Material affects sink weight and rigidity, but it does not replace mounting design.
Stainless Steel
Stainless steel is usually lighter than composite, fireclay or cast iron. Large, deep and thicker-gauge models can still create substantial service loads when filled and fitted with accessories.
Granite Composite
Granite composite sinks are heavier and more rigid. Support should be distributed to avoid concentrating force on the rim or cabinet.
Fireclay, Ceramic and Cast Iron
These sinks are heavy and may also be brittle. They frequently require dedicated structural support and careful handling.
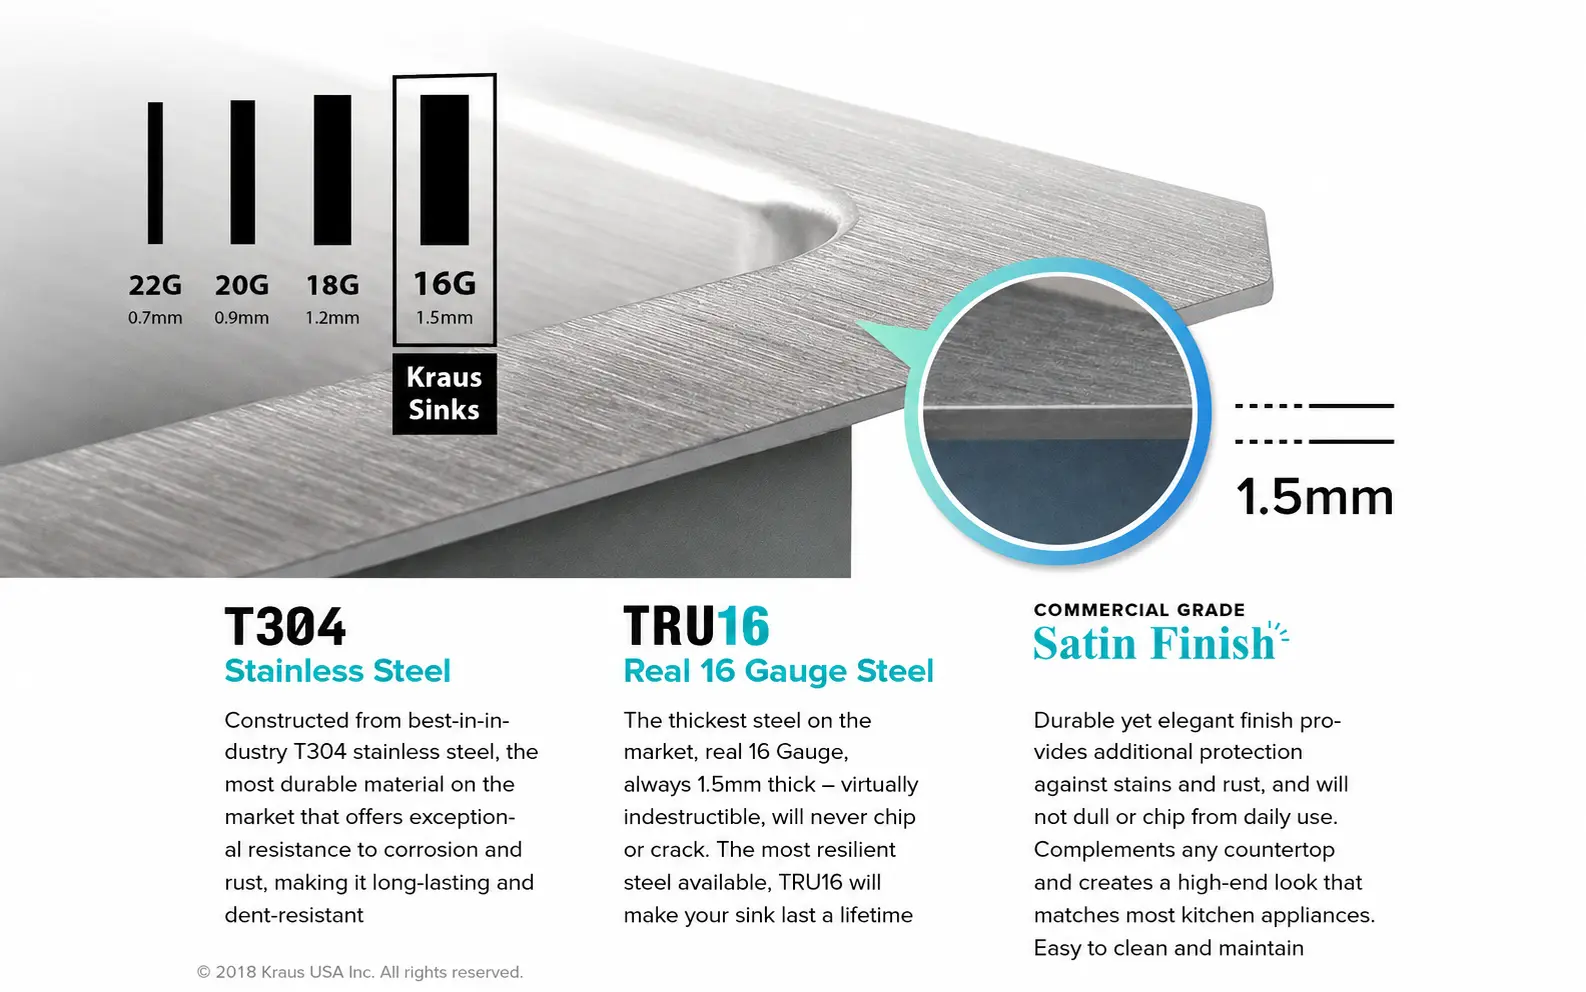
A 16-gauge stainless steel sink can fall when poorly mounted. An 18-gauge sink can remain secure when installed with a compatible support system.
Gauge is not a substitute for correct installation.
Does Positive, Zero or Negative Reveal Change Support?
Reveal describes the relationship between the countertop cutout and sink opening:
- Positive reveal: Part of the sink rim remains visible.
- Zero reveal: The countertop edge aligns with the bowl opening.
- Negative reveal: The countertop extends slightly over the bowl opening.
Reveal affects appearance, cleaning and cutout planning. It does not provide structural support.
A perfect-looking reveal can still hide missing clips underneath the countertop.
Warning Signs That Matter Most
Growing Rim Gap
A gap that increases over time suggests movement. Photograph it with a measurement reference so progression can be compared.
Cracked, Stretched or Missing Sealant
Sealant can age without structural failure, but a fresh crack may also indicate movement. Inspect the supports before recaulking.
Uneven Reveal
The visible distance between the countertop and bowl changes around the perimeter, or one side of the sink sits lower.
Loose or Detached Hardware
Clips hang away from the rim, bonded studs have separated or brackets no longer contact the sink.
Sink Movement
The bowl shifts during ordinary use or while the garbage disposal operates. Do not continue moving it to “test” the installation.
Water Inside the Cabinet
Moisture around the rim, supports or cabinet top may indicate seal separation or a plumbing leak.
Drain or Disposal Under Strain
The drain connection tilts, piping pulls upward or the disposal appears to be carrying part of the bowl.
Countertop Cracks
Cracks radiating from the cutout or broken anchor areas require countertop assessment as well as sink repair.
What to Do When an Undermount Sink Is Separating
- Stop loading the bowl. Do not fill it or stack dishes inside.
- Stop the garbage disposal. Do not operate equipment attached to a moving sink.
- Keep clear below. Do not place your head or body beneath an unstable bowl.
- Remove loose objects only when safe. Do not press on the sink.
- Isolate power or water only when safely accessible. Avoid wet electrical areas.
- Document the condition. Photograph the gap, reveal, clips, brackets, countertop and cabinet.
- Contact the appropriate professional. A countertop fabricator, sink installer, cabinet contractor and plumber may each be involved.
Never use a full bowl of water as a load test.
Who Should Inspect or Repair the Sink?
| Problem | Primary professional |
| Stone crack, cutout or anchor damage | Countertop fabricator |
| Missing or failed mounting system | Experienced sink or countertop installer |
| Weak cabinet frame or mounting rails | Cabinet contractor |
| Garbage disposal, drain or pipe stress | Licensed plumber |
| Wet electrical disposal connection | Qualified electrician and plumber |
| Unclear multi-system failure | General contractor coordinating the trades |
The repair may require more than one trade. Reattaching the sink without correcting strained plumbing or damaged countertop material can leave another failure point.
Can You Prop Up a Loose Sink Temporarily?
Qualified installers may use temporary supports during a controlled repair. Improvised household props can slip, damage plumbing or concentrate force on the sink bottom.
Do not use:
- Stacked boxes
- Loose pieces of lumber
- A car jack
- Objects balanced on cabinet shelves
- The drain pipe as support
Temporary stabilization is not a substitute for a documented mounting system.
What a Professional Installation Should Include
1. Compatibility Review
Confirm the sink, countertop, cabinet, cutout, reveal, disposal and support method before countertop fabrication.
2. Dry Fitting
Verify rim contact, alignment, cabinet clearance, faucet space and the plumbing route.
3. Surface Preparation
Remove dust, oil, moisture, polish, old sealant and incompatible residue according to the adhesive manufacturer’s instructions.
4. Defined Structural Support
Install the specified clips, studs, rails, brackets, harness or frame.
5. Continuous Wet-Joint Seal
Apply the specified compatible sealant around the rim without treating it as a substitute for missing support.
6. Controlled Alignment
Maintain the approved reveal and consistent rim contact.
7. Even Fastening
Tighten hardware gradually and avoid concentrating force in one area.
8. Full Cure
Keep temporary installation supports in place until the specified cure conditions have been achieved.
9. Stress-Free Plumbing
Connect the drain and garbage disposal without using either component to pull the sink into position.
10. Handover Inspection
Record the reveal, seal, mounting hardware, cabinet attachment and leak-test result.
Matrix provides further planning guidance in its kitchen sink installation guides.
Why Recaulking Alone Is Not a Structural Repair
When an undermount sink has moved, proper repair may require:
- Safely supporting the bowl
- Removing the garbage disposal and plumbing where necessary
- Lowering the sink to expose the complete rim
- Removing failed sealant and adhesive
- Cleaning and drying the bonding surfaces
- Inspecting the countertop and cabinet
- Replacing failed anchors or adding an approved support system
- Resealing and realigning the sink
- Maintaining support during curing
- Reconnecting plumbing without stress
- Inspecting for movement and leaks
Applying caulk only to the visible front edge may improve its appearance while leaving the failed support unchanged.
When the Countertop Also Needs Repair
Ask a countertop fabricator to assess:
- Cracks around the cutout
- Chipped mounting points
- Delamination
- A cutout that leaves insufficient rim contact
- Water-damaged laminate or wood core
- Significant flex
- Previous holes or repairs near the sink
Do not install a stronger anchor into damaged material without confirming that the countertop can carry it.
B2B Buyers: “Clips Included” Is Not a Specification
A professional product file should define:
- Sink model and drawing revision
- Material and empty weight
- Bowl capacity or agreed water condition
- Compatible countertop materials
- Minimum cabinet requirements
- Cutout and reveal
- Intended support system
- Hardware part numbers
- Anchor method
- Adhesive and sealant category
- Surface-preparation method
- Cure requirements
- Garbage-disposal and accessory assumptions
- Inspection and handover records
One generic bag of clips should not be assigned automatically to every sink size and countertop.
B2B Installation Approval Checklist
| Area | Approval question |
| Service load | Have the sink, water, disposal, accessories and use load been considered? |
| Sink rim | Does the geometry provide consistent support contact? |
| Countertop | Is the material suitable for the selected anchor or adhesive? |
| Cabinet | Are structural attachment points sound and accessible? |
| Cutout | Does it match the approved reveal and required rim contact? |
| Hardware | Are the correct clips, rails, brackets or harness supplied? |
| Adhesive | Are compatibility, shelf life, mixing and cure conditions defined? |
| Sealant | Is a continuous, water-resistant seam specified? |
| Fastening | Are tightening sequence and overtorque risks addressed? |
| Disposal | Are additional weight, vibration and clearance considered? |
| Plumbing | Can connections be made without pulling the sink? |
| Handover | Are support photographs, leak checks and installer records retained? |
Copyable Undermount Sink Installation Specification
Product Identification
Install the exact sink model and drawing revision approved for the project. Confirm overall dimensions, rim width, empty weight, bowl layout and drain position before countertop fabrication.
Design Service Condition
Review sink self-weight, water at the agreed fill condition, attached disposal, fixed accessories and the defined use load. The mounting-system supplier, fabricator or qualified project professional shall confirm the required capacity and safety margin.
Countertop Compatibility
Use a mounting and anchoring system approved for the actual countertop material, thickness, cutout and edge condition. Do not substitute drilling methods, anchors or adhesives without documented approval.
Cabinet Compatibility
Where cabinet-mounted rails, brackets or frames are used, attach them to sound structural cabinet parts. Do not transfer design load to loose trim, shelves or water-damaged panels.
Structural Support
Provide the specified clips, studs, brackets, rails, harness or frame. Do not rely on an unspecified bead of sealant as the only assumed support.
Surface Preparation
Prepare the sink rim and countertop underside according to the adhesive and sealant instructions. Remove dust, oil, moisture, polish, old adhesive and other contamination.
Joint Sealing
Apply a continuous compatible sealant to prevent water and debris from entering the sink-to-countertop joint.
Alignment and Fastening
Position the sink to the approved reveal. Tighten supports gradually and evenly without damaging the countertop, anchors or sink rim.
Cure Protection
Maintain appropriate temporary installation support and prevent service loading until the specified cure requirements are achieved.
Plumbing and Garbage Disposal
Connect the drain, disposal and waste piping without applying vertical or lateral force to the sink. Confirm electrical and plumbing clearances.
Final Inspection
Inspect the complete perimeter for seal continuity, reveal consistency, support engagement, unwanted movement and leaks. Retain installation photographs and product traceability records.
This specification must be adapted to the exact sink, countertop, cabinet, hardware, adhesive system and local project requirements.
Undermount Sink Failure Investigation Checklist
Collect the following information:
- Sink model, material and dimensions
- Countertop material and thickness
- Cabinet type and condition
- Installation date
- Photographs above and below the sink
- Gap location and progression
- Support-system layout
- Clip, anchor, adhesive and sealant details
- Garbage-disposal model and installation date
- Countertop cracks or water damage
- Previous repairs
- Loading or impact event before the problem appeared
Classify the evidence into:
- Sink-body issue
- Hardware or adhesive issue
- Countertop issue
- Cabinet-support issue
- Installation issue
- Plumbing or garbage-disposal stress
This classification helps prevent a visible symptom from being mistaken for the root cause.
Undermount Sink Claims to Avoid
Avoid unsupported claims such as:
- “Silicone alone can hold any sink.”
- “This undermount sink can never fall.”
- “More clips always mean greater safety.”
- “16-gauge stainless steel prevents mounting failure.”
- “A stone countertop automatically makes an undermount sink secure.”
- “The garbage disposal helps support the bowl.”
- “A clean seal proves the hidden support is correct.”
- “Recaulking fixes every loose sink.”
- “One support kit fits every countertop.”
Accurate installation limits are safer and more credible than absolute claims.
Frequently Asked Questions
Can an undermount sink actually fall?
Yes. It can sag or detach when the clips, adhesive, brackets, countertop or cabinet support are inadequate, incompatible or damaged.
What is the first sign that an undermount sink is failing?
A growing rim gap, cracked sealant or changing reveal is often an early sign. New movement, leaks or loose hardware require prompt inspection.
Is silicone enough to hold an undermount sink?
Only if the exact approved mounting system specifies that application for the sink, countertop and service load. Do not assume every silicone product is a structural adhesive.
What normally supports an undermount sink?
Support may come from clips, epoxy-mounted studs, cabinet rails, adjustable brackets, a harness or a structural frame.
Can a garbage disposal cause an undermount sink to fall?
Its weight and vibration add load. A correctly designed system accounts for them, but disposal movement may expose an inadequate or deteriorating mount.
Does thicker stainless steel prevent mounting failure?
No. Gauge influences sink rigidity and weight, not the security of its mounting hardware.
Why is the sink sealant cracking?
The sealant may be aging, losing adhesion or moving because the sink support has shifted. Inspect the support before recaulking.
Can I keep using a sink with a small gap?
Avoid filling or heavily loading it until the mounting system has been inspected. Water can enter the joint, and the separation may grow.
Can I add more glue from inside the cabinet?
Applying new adhesive over old sealant or contaminated surfaces is not a complete repair. It may hide failed hardware without restoring the correct load path.
Can a detached sink be remounted?
Often yes, provided the sink, countertop and cabinet remain sound. The old joint must be prepared correctly, and a compatible support system must be installed.
Are granite composite sinks at greater risk?
They are heavier than most stainless steel sinks and may require more distributed support. Risk depends on the complete installation—not the sink material alone.
Should the drain pipe support the sink?
No. Drain and garbage-disposal connections must not carry the sink’s structural load.
Can I install an undermount sink myself?
The work involves countertop compatibility, structural support, adhesives, plumbing and sometimes electrical connections. Professional installation is strongly recommended.
How often should the mounting system be checked?
Inspect it whenever a gap, leak, movement, cabinet moisture or unusual sound appears, and after disposal, plumbing or countertop work.
Final Answer
An undermount sink can fall when its load path is incomplete or deteriorates.
The most important warning signs are:
- A growing gap
- Cracked or stretched sealant
- Uneven reveal
- Loose or detached clips
- Sink movement
- New leaks
- Garbage-disposal or plumbing strain
- Countertop cracks
A secure undermount installation manages three different jobs:
- Sealing: Keeps water and debris out of the joint.
- Bonding: Joins compatible materials or mounting components where specified.
- Structural support: Transfers the complete service load safely into the countertop or cabinet.
If separation has started, stop loading the sink and arrange a professional assessment. Recaulking without correcting the support is not a structural repair.
For B2B sink programs, define the service load, substrate, mounting system, hardware, adhesive, sealant, cure conditions, plumbing assumptions and inspection records before production and project handover.
Develop Undermount Sink Programs with Matrix
Matrix supports undermount kitchen sink programs for brands, importers, wholesalers and project buyers. We can help review:
- Stainless steel and granite composite sink options
- Sink size, weight, depth and rim geometry
- Countertop cutout and reveal
- Clip, rail and support planning
- Drain, disposal and accessory compatibility
- Installation guides and care information
- Hardware packaging and installation checklists
- OEM and project documentation
To review a program, prepare the sink model, material, dimensions, countertop, cabinet, drain, disposal, support concept, packaging requirements and target market.
Contact the Matrix team to discuss an undermount sink sample, installation guide or OEM/private-label program.