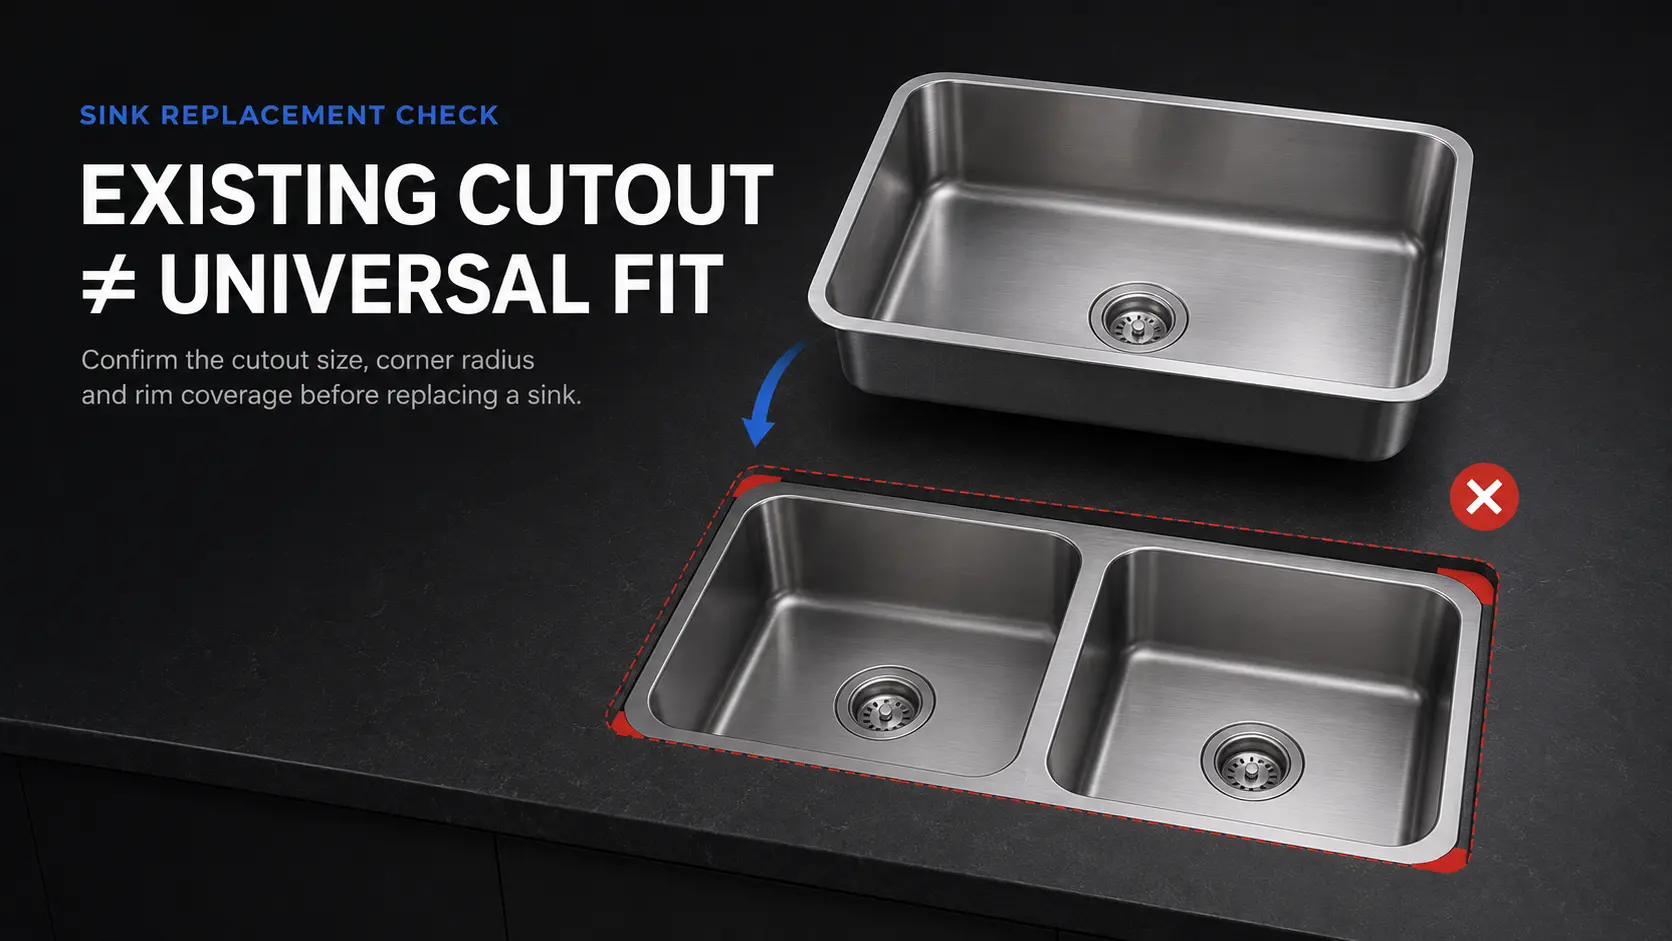
A replacement sink must fit the existing countertop opening—not just match the old sink’s advertised size. Measure the cutout length, width and corner radius; identify the installation type and reveal; then confirm rim coverage, cabinet clearance, bowl depth, drain position and plumbing space.
The Short Version: Can the New Sink Fit?
A replacement is only a credible fit when all five conditions below are confirmed:
| Fit Condition | What Must Be Confirmed |
|---|---|
| Opening | The new sink works with the actual cutout length, width, shape and corner radius |
| Interface | A top-mount rim covers the opening, or an undermount bowl produces an acceptable reveal with enough flange for support |
| Cabinet | The bowl, rim, clips and installation tools fit inside the real cabinet—not just the nominal cabinet size |
| Plumbing | Bowl depth, drain location, disposal and wall drain can connect without creating a drainage conflict |
| Documentation | The physical opening has been compared with the exact model drawing, DXF or full-size template |
If one of these conditions is still unknown, the sink is not yet approved—it is only a possible candidate.
Quick Answer: What Should You Measure?
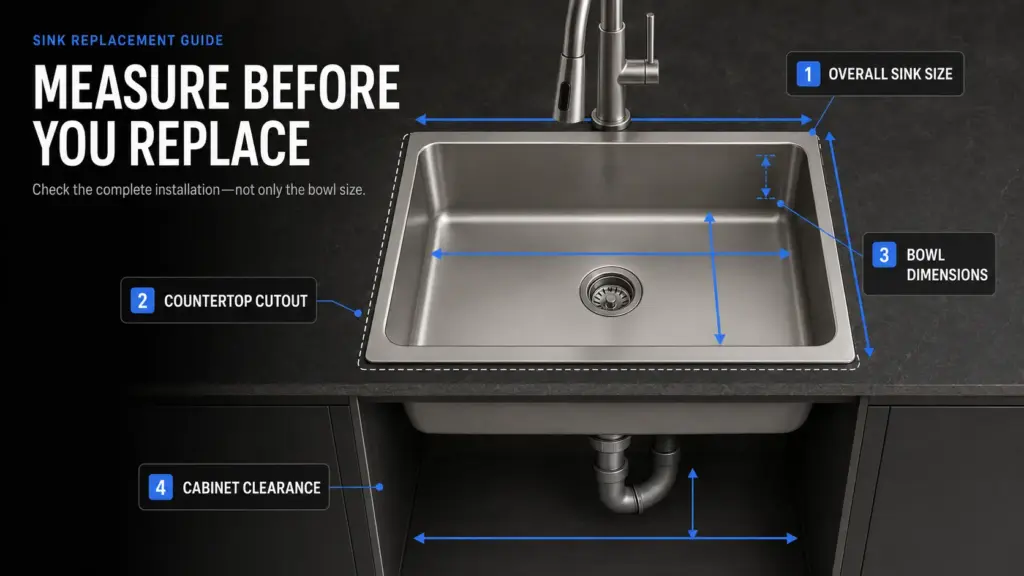
Before ordering a replacement kitchen sink, record these details:
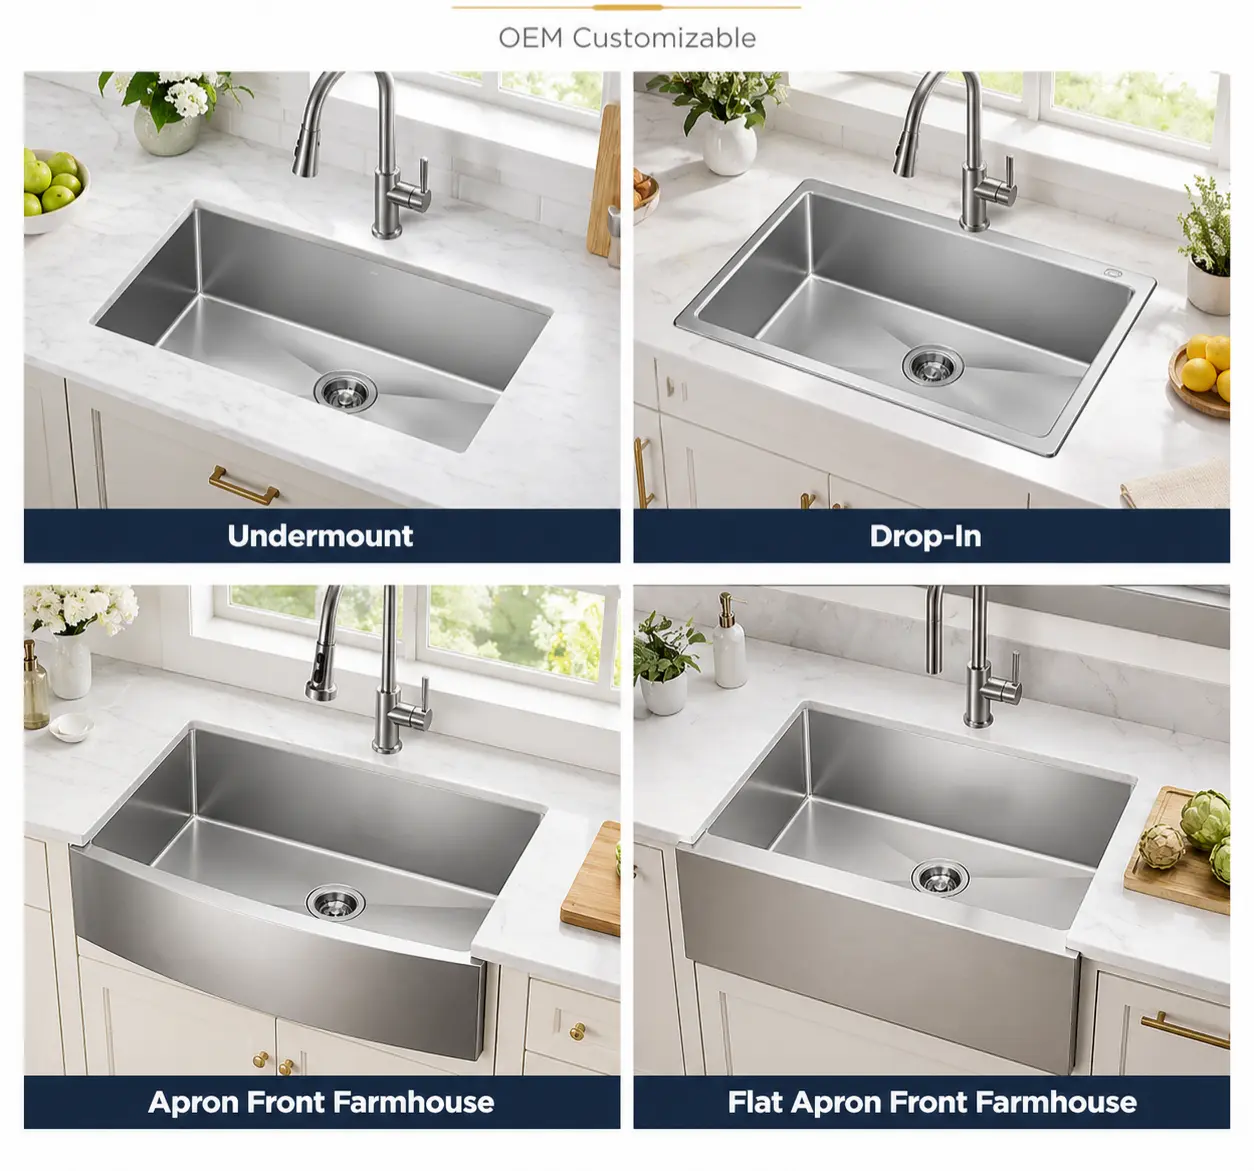
- Installation type: top mount, undermount, flush mount or farmhouse
- Countertop cutout length and width
- Cutout corner radius and overall shape
- Existing sink overall dimensions
- Bowl opening and bowl dimensions
- Rim or flange width
- Undermount reveal style
- Cabinet inside width and front-to-back clearance
- Bowl depth and available plumbing height
- Drain position, faucet holes and accessory clearances
The cutout is the starting point, but it is not the only dimension that determines fit.
Professional rule: Measure the fixed parts first. In most replacement projects, the countertop opening, cabinet and wall drain are fixed. The replacement sink must work around them.
The Most Common Mistake: Buying by Nominal Sink Size
“33-inch sink” is a product category, not a fit guarantee.
Two sinks with the same nominal size may have different:
- Overall dimensions
- Bowl openings
- Rim widths
- Corner radii
- Drain positions
- Bowl depths
- Cutout requirements
This matters even more when the existing countertop is stone, quartz, granite or another material that is difficult or expensive to modify.
The correct question is not “Is the new sink also 33 inches?” It is “Does the new sink fit this exact opening, cabinet and plumbing layout?”
Understand the Dimensions Before Measuring
| Dimension | What It Means | Why It Matters |
| Nominal size | The general size used to market the sink | Useful for initial searching, but not for final fit approval |
| Overall size | The maximum outside length and width of the sink | Determines countertop coverage and cabinet fit |
| Bowl opening | The usable opening at the top of the bowl | Important for matching an undermount cutout |
| Bowl size | The internal length, width and depth | Determines usable capacity and plumbing clearance |
| Cutout size | The countertop opening required for installation | The critical starting point for replacement selection |
| Rim or flange | The flat perimeter around the sink | Covers a top-mount opening or provides the mounting surface for an undermount sink |
| Corner radius | The curve at each corner of the bowl or cutout | A mismatch can create uneven reveal or exposed gaps |
| Reveal | The relationship between the countertop edge and an undermount sink | Affects appearance, cleaning and replacement compatibility |
| Cabinet size | The usable space inside the sink base cabinet | Limits sink width, mounting access and plumbing space |
Use the Right Evidence in the Right Order
Not all measurements are equally reliable. Use this order of evidence:
- The exact replacement sink plus its current model-specific template or CAD file
- A verified tracing or digital survey of the existing countertop opening
- A dimensioned product drawing showing the bowl, flange, drain and installation details
- Careful field measurements supported by scaled photographs
- Nominal size, marketplace description or product photograph
The first two can support final fit approval. The last item should only be used to identify possible models.
A template from a similar-looking sink is not interchangeable. Even products with the same outside dimensions can use different bowls, corners and cutout lines.
Tools You Will Need
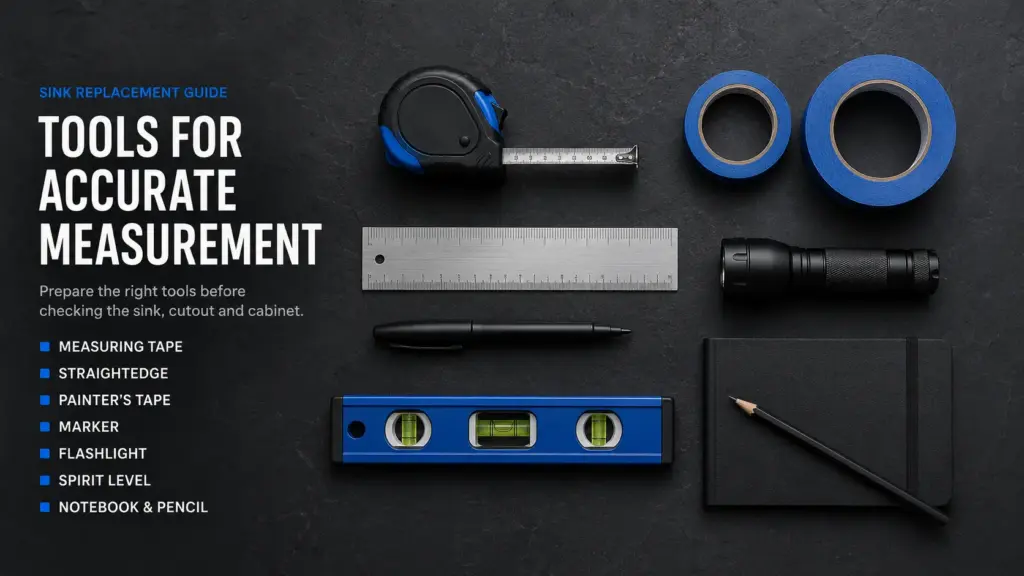
- Tape measure with clear inch and millimeter markings
- Rigid ruler or straightedge
- Carpenter’s square
- Paper, cardboard or thin template material
- Pencil or removable marker
- Phone or camera
- Flashlight for the cabinet interior
- Corner-radius gauge, if available
Record dimensions in both inches and millimeters when possible. For professional or repeat orders, millimeters reduce rounding errors.
Do not round a measured opening to the nearest standard sink size. Record what is physically present, including any difference between the front, center and rear.
Step 1: Identify the Existing Installation Type
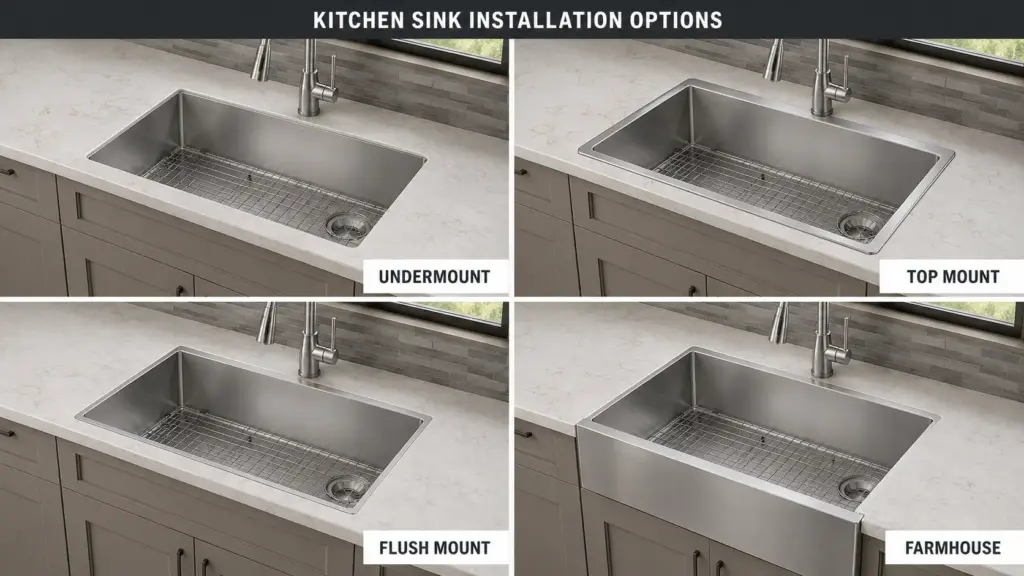
Top-Mount or Drop-In Sink
A top-mount sink is lowered into the countertop from above. Its visible rim rests on top of the counter and covers the cutout edge.
For a replacement top-mount kitchen sink, confirm:
- The new sink body fits through the existing opening
- The new rim fully covers the opening on all four sides
- Faucet holes and deck areas do not conflict with the backsplash
- Mounting clips can be reached inside the cabinet
Top-mount sinks usually provide more replacement flexibility because the visible rim can cover a small difference in the opening. However, rim coverage still needs to be checked against the actual drawing.
Undermount Sink
An undermount sink is fixed below the countertop. The countertop opening remains visible, so the cutout shape becomes part of the finished appearance.
For a replacement undermount kitchen sink, confirm:
- The new bowl shape follows the existing opening
- The corner radii are compatible
- The intended reveal can be achieved consistently
- The flange extends beyond the cutout for sealing and support
- Clips, brackets or another approved support system can be installed
An undermount replacement is less forgiving than a top-mount replacement. A sink can fit below the opening and still look wrong from above.
Flush-Mount or Integrated Installation
Flush installations require close control of both the sink rim and countertop recess. Do not select a replacement from overall dimensions alone. The original section details or a new fabricator-approved drawing may be required.
Farmhouse or Apron-Front Sink
A farmhouse replacement must match more than the countertop opening. Measure the cabinet cutout, apron height and width, support platform, door clearance and front projection. Small differences can require cabinet modification.
Step 2: Measure the Countertop Cutout
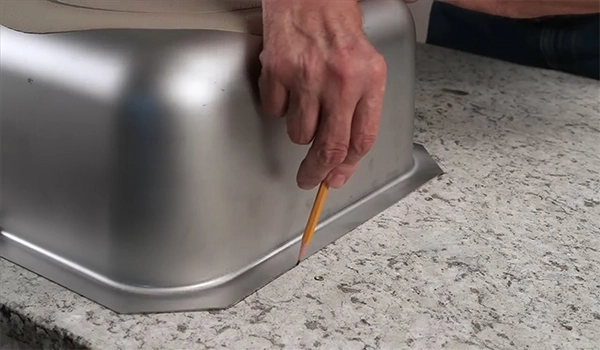
Measure the opening—not only the old sink.
Measure the Length and Width
Measure the cutout in several places:
- Front width
- Center width
- Rear width
- Left-side depth
- Center depth
- Right-side depth
Do not assume that the opening is perfectly square or symmetrical. Record the smallest and largest measurements if they differ.
Check Whether the Opening Is Square
Measure diagonally from corner to corner in both directions, using the same reference points on each rounded corner.
Different diagonal measurements indicate that the cutout may not be perfectly square.
This may be hidden by a top-mount rim, but it can create an uneven reveal with an undermount sink.
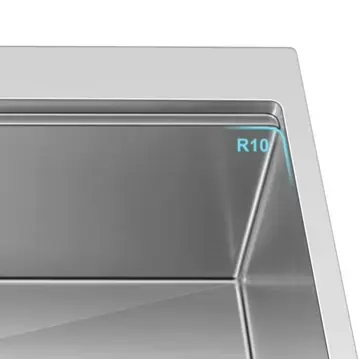
Measure the Corner Radius

Corner radius is often overlooked.
A replacement bowl with sharper corners than the existing cutout may leave excessive countertop overhang in the corners. A replacement with larger rounded corners may expose part of the sink flange or create an inconsistent reveal.
For the most reliable record:
- Place paper or thin cardboard over or under the opening where safe and accessible.
- Trace the opening accurately.
- Mark the front, back, left and right sides.
- Add a ruler to photographs for scale.
- Compare the tracing with the replacement sink’s full-size template or CAD drawing.
Do not estimate the radius from a product photograph.
Record the Countertop Edge Profile
For an undermount replacement, also photograph and record:
- Polished or unfinished cut edge
- Bevel, eased edge or other edge profile
- Chips, cracks or previous repairs
- Seam locations near the opening
- Uneven overhang around the existing sink
These details may not change the nominal dimensions, but they can affect whether the opening can be modified or whether a different reveal will look acceptable.
Step 3: Measure the Existing Sink
Measure the existing sink’s:
- Maximum outside length
- Maximum outside width
- Bowl opening
- Internal bowl length and width
- Bowl depth
- Rim or flange width
- Drain center position
- Faucet-deck depth, if present
Access from inside the cabinet may be required to measure the outer flange of an undermount sink.
For a top-mount sink, the countertop opening is partly hidden by the rim. A reliable final cutout measurement may require removal of the old sink or access to the cut edge from below.
Do not calculate the cutout by subtracting an assumed rim width.
Step 4: Check Rim Coverage or Flange Support
For a Top-Mount Replacement
The replacement rim must cover the entire existing opening while leaving enough solid countertop for support and sealing.
Check each side independently. An opening may be off-center, oversized or uneven even when the overall measurements appear suitable.
Do not approve a sink simply because its overall dimensions are larger than the opening. The bowl body, clip rail, faucet deck and corner geometry must also fit.
For an Undermount Replacement
The replacement flange must extend beyond the existing opening enough to provide the sealing and mounting area required by the sink, countertop and support system.
There is no universal safe flange overlap for every sink and countertop. Use the sink drawing and have the support method approved by the countertop fabricator or installer.
A Useful Top-Mount Screening Formula
For a rectangular, centered sink and cutout, the theoretical rim coverage on each side can be estimated as:
Side coverage = (new sink overall size − existing cutout size) ÷ 2
Calculate length and width separately.
Example
- Existing cutout: 31.50 × 20.50 inches
- New top-mount sink overall size: 33.00 × 22.00 inches
Theoretical coverage:
- Left and right: (33.00 − 31.50) ÷ 2 = 0.75 inch per side
- Front and back: (22.00 − 20.50) ÷ 2 = 0.75 inch per side
This result does not approve the sink. It only shows the maximum theoretical coverage if the opening is centered, square and compatible with the new bowl body.
The actual rim profile, corner geometry, clip rail and installation requirements still control the decision.
If the cutout is uneven, use the smallest real coverage—not the average.
Step 5: Identify the Existing Undermount Reveal
The reveal describes how the countertop edge relates to the sink below it.
| Reveal Type | What You See | Replacement Implication |
| Positive reveal | A narrow strip of sink rim is visible | Offers some visual tolerance, but the exposed rim must be even |
| Zero or flush reveal | Countertop edge aligns with the sink wall | Requires the closest match between cutout and bowl geometry |
| Negative reveal | Countertop slightly overhangs the sink | Can hide a small difference, but excessive overhang traps debris and reduces access |
Do not assume that a negative reveal will hide every mismatch. Uneven overhang, incompatible corner radii or insufficient flange support can still make the replacement unacceptable.
A Useful Undermount Reveal Screening Formula
For simple rectangular shapes with the same centerline and compatible corners:
Approximate reveal per side = (countertop opening − replacement bowl opening) ÷ 2
- A positive result suggests a positive reveal: part of the sink rim may be visible.
- A result near zero suggests a flush reveal.
- A negative result suggests the countertop may overhang the bowl.
Example
- Existing countertop opening: 30.25 inches
- Replacement bowl opening at the relevant top plane: 30.00 inches
Approximate reveal:
(30.25 − 30.00) ÷ 2 = 0.125 inch per side
That suggests a 1/8-inch positive reveal along the straight sides.
It says nothing about corner compatibility or flange support. Because bowl walls can taper and manufacturers may define bowl dimensions differently, confirm the result by overlaying the exact cutout template or CAD profile.
Step 6: Measure the Sink Cabinet—Not Just the Door Opening
Open the cabinet and measure the usable interior space.
Check:
- Inside width between cabinet walls
- Front-to-back clearance
- Face-frame intrusion
- Drawer or door hardware
- Cabinet rails and structural supports
- Space for sink clips or brackets
- Faucet and accessory shanks
- Water supply lines
- Drain pipes and garbage disposal
The cabinet door opening may be narrower than the interior, while rails or frames may reduce installation access.
A sink may physically fit inside the cabinet but leave no room to tighten clips or connect plumbing.
“Minimum cabinet size” is also not the same as sink width. It is a cabinet recommendation based on the complete sink and mounting arrangement. Verify the actual drawing.
Step 7: Confirm Bowl Depth and Plumbing Clearance
A deeper replacement bowl does not automatically create a better kitchen.
Before increasing sink depth, measure the vertical distance from the countertop to:
- Wall drain connection
- P-trap
- Garbage disposal
- Pull-down faucet hose weight
- Water filter or tank
- Cabinet shelf or pull-out storage
A deeper bowl lowers the drain outlet. Adding a garbage disposal lowers the plumbing connection further.
If the wall drain is too high, the new arrangement may drain poorly or require plumbing changes.
Also confirm that the bowl does not conflict with cabinet braces or adjacent appliances.
Step 8: Record the Drain Position
Measure the drain center from two fixed reference edges, not by eye.
Record:
- Distance from the left or right side
- Distance from the front or back
- Drain hole diameter
- Strainer or disposal connection
- Available space below the drain
A center drain and rear-offset drain can fit the same countertop opening but create very different plumbing and storage layouts.
Step 9: Check Faucet and Accessory Clearances
For sinks with faucet holes or a faucet deck, record:
- Number of holes
- Hole diameters
- Center-to-center spacing
- Distance from each hole to the backsplash
- Countertop thickness
- Clearance for mounting nuts below
Also include holes for:
- Soap dispenser
- Filtered-water faucet
- Air switch
- Cup washer
- Side spray
For an undermount replacement without a faucet deck, confirm that the new bowl and flange will not interfere with existing countertop holes.
Five-Minute Replacement Sink Decision Flow
Use this sequence before shortlisting a model:
- Identify the installation type. Top mount and undermount follow different fit rules.
- Capture the existing opening. Measure multiple points and trace the corners.
- Obtain the exact replacement template. Do not rely only on overall dimensions.
- Overlay the opening and template. Check straight sides, corners, rim or flange and drain location.
- Check the cabinet and plumbing. Include installation access, not just empty space.
- Choose the intended reveal or rim coverage. Confirm it on all four sides.
- Request installer or fabricator approval. Do this before ordering or modifying the countertop.
Fit Status
| Status | Meaning | Action |
| Green | Template, corners, support, cabinet and plumbing are confirmed | Proceed to final installation review |
| Yellow | Overall size looks possible, but radius, flange, reveal or clearance is unverified | Do not order; obtain drawings or field measurements |
| Red | Rim cannot cover the opening, flange support is insufficient, cabinet conflicts, or the countertop is unsafe to modify | Select another model or assess a custom or project solution |
Top-Mount vs Undermount Replacement
| Checkpoint | Top Mount | Undermount |
| Existing cutout | Sink body must pass through it | Opening remains visible and must match the bowl |
| Rim or flange | Rim must cover the opening | Flange must provide sealing and mounting area |
| Corner-radius mismatch | May be hidden if the rim covers it | Often visible as an uneven reveal |
| Small dimensional difference | Sometimes manageable | Usually requires closer review |
| Countertop edge finish | Hidden by the sink rim | Remains visible |
| Final approval | Cutout plus rim coverage | Cutout, bowl geometry, reveal and support together |
When Must the Old Sink Be Removed?
Preliminary measurements can often be taken while the old sink is installed. Final confirmation may require removal when:
- A top-mount rim hides the countertop cut edge
- An undermount flange cannot be measured from below
- The countertop opening is uneven
- The corner radius is uncertain
- There is no reliable original cutout template
- The replacement is close to the available limit
- Cabinet supports hide part of the sink
Removing a sink can damage plumbing, sealant or countertop edges. Use a qualified installer where appropriate.
What Cannot Be Confirmed Reliably Before Removal?
Depending on the installation, the following may remain hidden:
- True top-mount cutout line beneath the rim
- Full undermount flange width
- Old adhesive, clips and support locations
- Damage concealed by the rim
- Exact countertop thickness at the opening
- Interference between the bowl body and cabinet frame
Mark these items as “not verified” instead of guessing.
A professional measurement sheet should distinguish measured, documented and assumed values.
Common Replacement-Sink Measuring Mistakes
1. Assuming the Label Size Is the Actual Size
Nominal dimensions are useful for search filters, not installation approval.
2. Measuring Only the Bowl Interior
The bowl interior does not show rim coverage, flange support or cabinet fit.
3. Measuring the Old Sink but Not the Countertop Opening
The countertop is normally the fixed constraint in a replacement project.
4. Ignoring Corner Radius
The length and width may match while the corners remain incompatible.
5. Forgetting the Reveal
For an undermount sink, the same cutout can produce a positive, flush or negative reveal depending on the replacement bowl.
6. Checking Cabinet Width but Not Installation Access
Mounting clips, brackets, faucet nuts and plumbing still need working space.
7. Increasing Bowl Depth Without Checking the Drain Height
The sink may fit the cabinet but create a plumbing conflict.
8. Ordering from a Photograph
Perspective and image cropping cannot confirm dimensions, radius or flange width.
9. Using a Template from a Similar Model
A similar-looking sink can use different cutout dimensions, bowl walls or corner radii.
10. Treating an Estimate as Final Approval
A screening formula can eliminate unsuitable models, but it cannot confirm installation by itself.
Replacement Sink Measurement Sheet
Send the following information when requesting a fit review:
| Item | Measurement or Detail |
| Installation type | Top mount / undermount / flush / farmhouse |
| Countertop material | Quartz / granite / solid surface / laminate / other |
| Cutout length | |
| Cutout width | |
| Smallest and largest measurements | |
| Diagonal 1 / diagonal 2 | |
| Corner radius or traced template | |
| Countertop edge profile | |
| Existing reveal | Positive / zero / negative |
| Existing sink overall size | |
| Bowl opening and bowl size | |
| Rim or flange width | |
| Cabinet inside width and depth | |
| Bowl depth | |
| Drain diameter and position | |
| Garbage disposal | Yes / no |
| Faucet and accessory holes | |
| Photos | Top, underside, cabinet and plumbing |
| Required quantity | |
| Target market or project | |
| Drawing or measurement revision |
Add a revision number and date to every measurement sheet.
If the sink is removed later and more accurate information becomes available, replace the preliminary version rather than editing it without a record.
For a single home replacement, confirm the final choice with the installer and countertop fabricator before purchasing.
For a wholesale, private-label or project program, retain the approved drawing and model record for repeat orders.
For B2B and Multi-Unit Replacement Projects
One measured kitchen does not always represent an entire building or replacement market.
Countertop openings can vary because of:
- Manual fabrication
- Different installers
- Previous repairs
- Countertop damage
- Product model changes
- Different reveal preferences
- Inconsistent original templates
For apartments, hospitality projects, countertop programs and distributor replacement SKUs:
- Survey several representative units.
- Record the smallest and largest openings.
- Separate units with different corner radii or installation details.
- Select a pilot unit before approving the full quantity.
- Test the sink, support, faucet, drain and disposal together.
- Approve a golden template and dimensioned drawing.
- Lock the model number, drawing revision, finish and accessory list for repeat orders.
Do not promise universal replacement compatibility from one nominal size.
Define the exact opening range and exclusions that the approved model can support.
Recommended B2B Fit Package
A professional replacement program should include:
- Model-specific PDF and DXF cutout files
- Overall, bowl, flange and drain dimensions
- Intended reveal or rim-coverage reference
- Minimum cabinet and installation-access notes
- Support and sealing requirements
- Faucet and accessory-hole plan
- Plumbing-clearance drawing
- Approved physical sample or pilot installation record
- Drawing revision and change history
When a Custom Replacement Sink May Make Sense
A standard replacement may not work when:
- The existing opening has an uncommon size
- The corner radii do not match current models
- The countertop cannot be modified
- A project contains many identical existing cutouts
- Drain or cabinet constraints require a special layout
- A distributor needs a repeatable replacement SKU
Matrix supports custom kitchen sink programs for brands, importers, distributors and project buyers.
A feasibility review should include:
- Cutout template
- Target reveal
- Cabinet size
- Sink material
- Bowl depth
- Drain position
- Surface finish
- Order quantity
- Repeat-order requirements
Customization is not automatically the best answer. If an existing model fits the opening and application, it is usually simpler and faster than developing a new specification.
For a custom project, the countertop opening should not be treated as the only design input. The new sink still needs adequate flange width, producible corner geometry, drainage, rim flatness, packaging protection and repeatable inspection dimensions.
Final Replacement Checklist
Do not order until you can answer yes to all applicable questions:
- Does the new sink safely work with the existing cutout?
- Are all four corners compatible?
- Does a top-mount rim fully cover the opening?
- Does an undermount flange provide adequate mounting and sealing area?
- Is the intended reveal consistent?
- Does the sink fit inside the actual cabinet?
- Is there room for clips, brackets and installation tools?
- Does the bowl depth work with the drain and disposal?
- Are faucet and accessory holes clear?
- Has the actual model drawing been reviewed?
- Has the countertop fabricator or installer approved the fit?
Frequently Asked Questions
Can a 33-inch sink replace any other 33-inch sink?
No. Two 33-inch sinks can have different actual dimensions, cutout requirements, rim widths, bowl shapes and corner radii.
Compare the existing countertop opening with the replacement model’s drawing or cutout template.
Can an undermount sink be replaced without replacing the countertop?
Sometimes.
The replacement sink must work with the existing opening, corner radius, reveal, flange support, cabinet and plumbing. Fixed stone cutouts leave less room for dimensional differences.
Can a smaller sink fit an existing larger cutout?
Usually not without special review.
A top-mount sink may work only if its rim fully covers and safely supports around the opening. For an undermount sink, a smaller bowl may create excessive or uneven reveal and insufficient flange support.
Can a larger sink fit the same cutout?
Possibly, but the bowl, flange, cabinet and plumbing must fit.
Enlarging a countertop opening should only be considered after the countertop material and structure have been assessed by a fabricator.
Do I need to remove the old sink before measuring?
Not always for preliminary measurements.
Final confirmation may require removal when the existing rim hides the cutout, the flange cannot be accessed or the dimensions are close to the replacement limit.
Is the cutout template more important than the advertised dimensions?
Yes.
Advertised dimensions describe the product at a high level. The model-specific template or CAD profile shows the opening geometry used for installation, including corners and reveal references.
Compare the current template with both the physical sink and the existing countertop opening.
What if the opening measurements differ from front to back?
Record the smallest and largest values and check the diagonals.
Do not average the opening and assume it is rectangular. An uneven opening may be hidden by a top-mount rim but can create an inconsistent undermount reveal.
Can a top-mount sink replace an undermount sink?
Sometimes.
The top-mount bowl must fit through the existing opening, its rim must fully cover the cutout, the cabinet must allow installation of the clips, and the countertop must be suitable.
The complete model drawing and installation method still require approval.
What measurements should a B2B buyer send to a sink supplier?
Send:
- Installation type
- Countertop cutout dimensions
- Corner radius
- Reveal
- Sink and bowl dimensions
- Cabinet size
- Bowl depth
- Drain position
- Faucet holes
- Scaled photographs
- Required quantity
- Target market
A traced template or CAD file is preferable for repeat projects.
Need Help Reviewing a Replacement Sink Specification?

Matrix supplies kitchen sinks for brands, wholesalers, countertop programs and project buyers.
We can review an existing cutout against available models or assess whether a custom specification is practical.
Send Matrix:
- A dimensioned cutout drawing or traced template
- Top and underside photographs
- Cabinet and plumbing dimensions
- Installation and reveal preference
- Material, finish and accessory requirements
- Required quantity and target market
Contact the Matrix team to discuss a replacement sink, OEM program or project requirement.