Many kitchen faucets use a mounting hole of approximately 1-3/8 inches, or 35 mm. But 35 mm is not a universal faucet-hole standard—and matching the diameter alone does not guarantee a successful installation.
A kitchen faucet can pass through the hole and still be incompatible because:
- The mounting surface is too thick.
- The fixing washer cannot support the faucet.
- The faucet base does not cover the opening.
- The handle hits the backsplash.
- The fixing nut contacts the sink bowl.
- The spout does not reach the correct part of the bowl.
- The pull-down hose cannot move freely below the sink.
- The sink deck flexes under a tall faucet.
The correct way to match a kitchen sink and faucet is to treat them as one installation system.
Quick Answer: What Size Is a Kitchen Faucet Hole?
A 1-3/8-inch or 35 mm opening is common for modern single-hole kitchen faucets. However, actual faucets may specify a different minimum and maximum mounting-hole diameter.
Always check the technical drawing or installation instructions for the exact faucet model before drilling or ordering a sink with pre-punched holes.
A correct faucet installation requires more than one measurement.
| Compatibility Point | What Must Match |
|---|---|
| Hole diameter | Faucet shank, hoses and connectors must pass through |
| Upper coverage | Faucet base or deck plate must fully cover the opening |
| Lower support | Washer and fixing nut must grip the underside securely |
| Hole count | The sink must provide the required number of openings |
| Hole spacing | Multi-hole faucets must match the center-to-center pattern |
| Mounting thickness | The threaded shank must be long enough |
| Above-deck clearance | Faucet and handle must clear the wall or backsplash |
| Below-deck clearance | Nut, hoses, weight and accessories need working space |
| Spout geometry | Water should land in a practical area of the sink |
If one of these points fails, the faucet may be difficult to install, unstable or unsuitable for the sink.
The Most Important Rule: The Faucet Drawing Overrides the “Standard”
The word “standard” is often used too loosely.
A sink supplier may describe a hole as standard because it is approximately 35 mm. A faucet supplier may describe a faucet as standard because it fits many common openings. Neither description confirms that the two products are compatible.
The approved faucet drawing should state:
- Minimum mounting-hole diameter
- Maximum mounting-hole diameter
- Faucet-base diameter
- Mounting-washer dimensions
- Required hole spacing
- Maximum mounting-surface thickness
- Minimum rear clearance
- Spout reach
- Handle movement
- Under-deck installation space
For replacement projects, use the drawing for the faucet being purchased.
For wholesale or OEM programs, approve the actual sink, faucet and accessories together before production.
How Many Faucet Holes Does a Kitchen Sink Need?
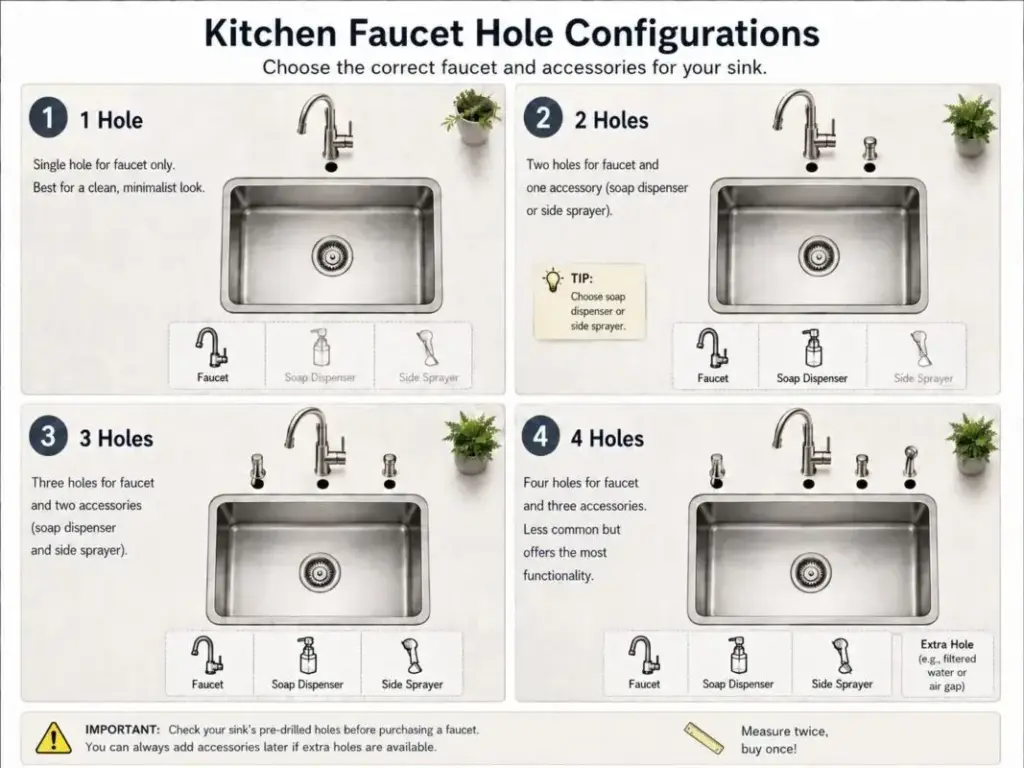
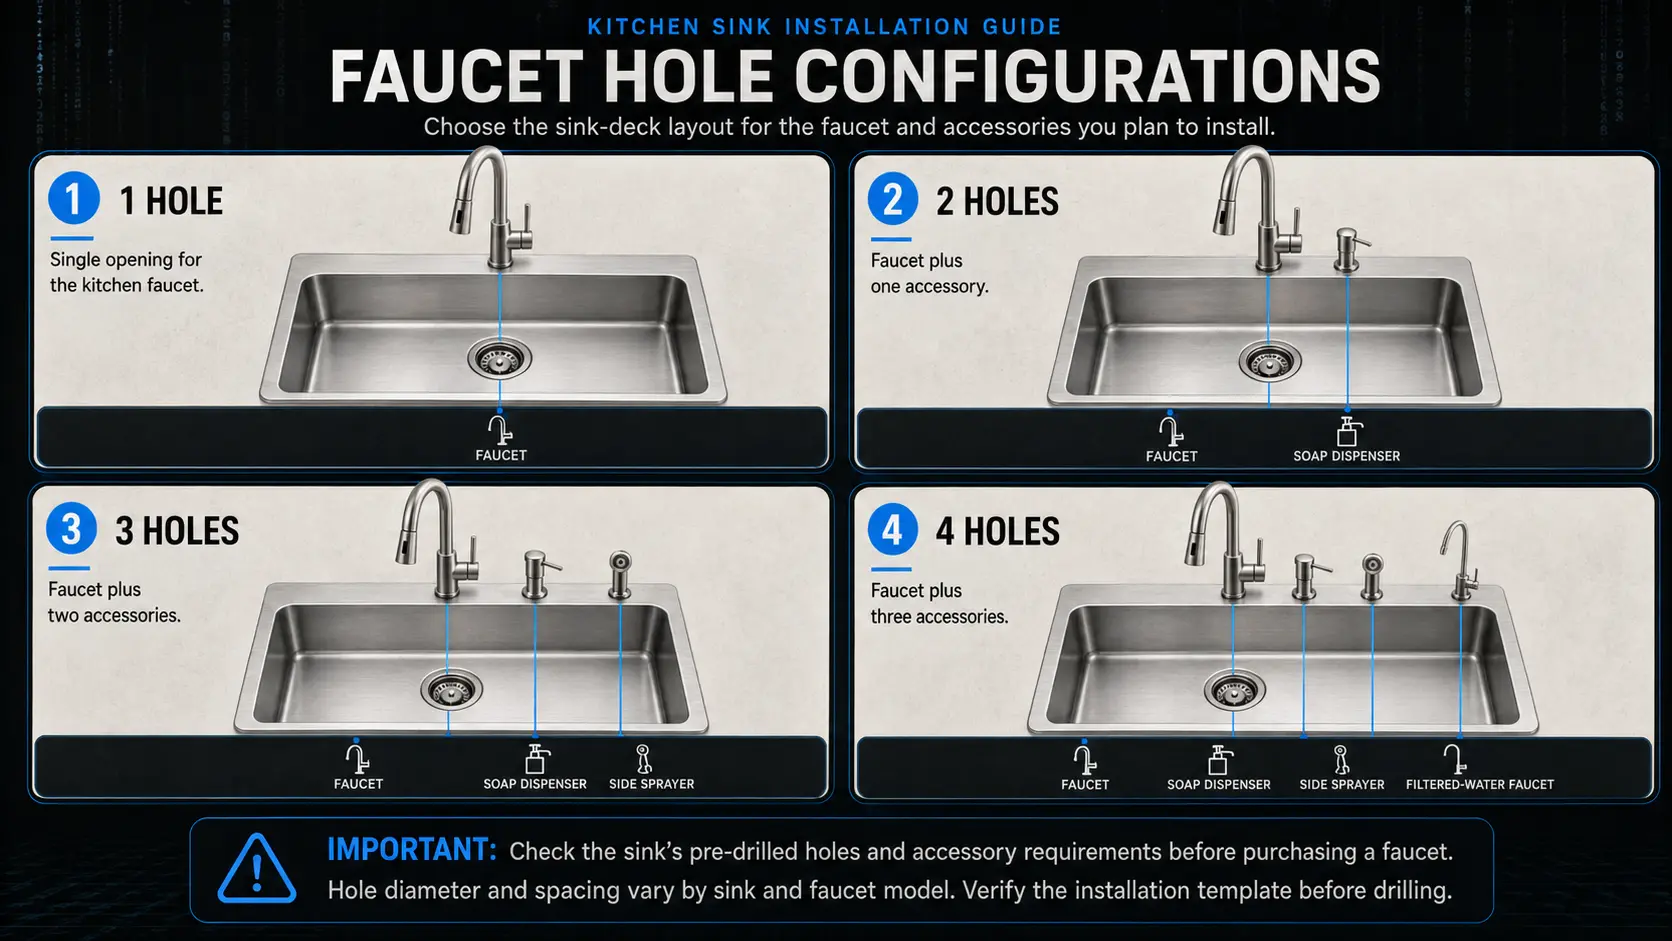
Kitchen sinks and countertops commonly use zero-, one-, two-, three- or four-hole layouts.
The correct number depends on the faucet design and the additional functions required around the sink.
Zero-Hole Sink
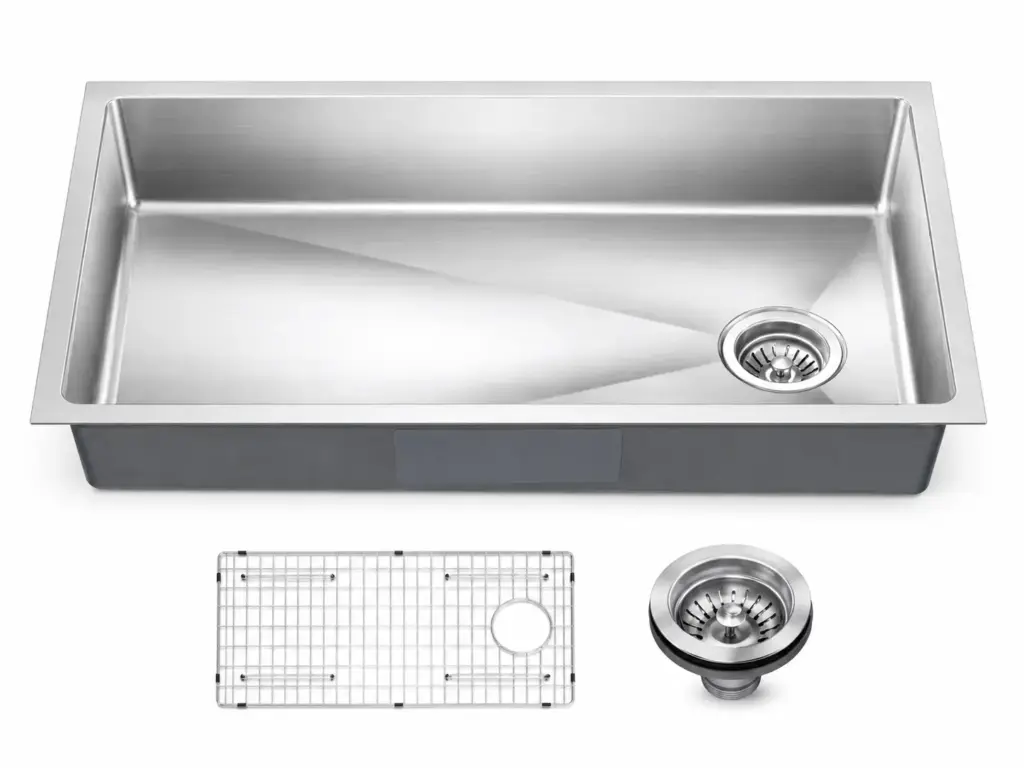
A zero-hole sink has no faucet opening in the sink itself.
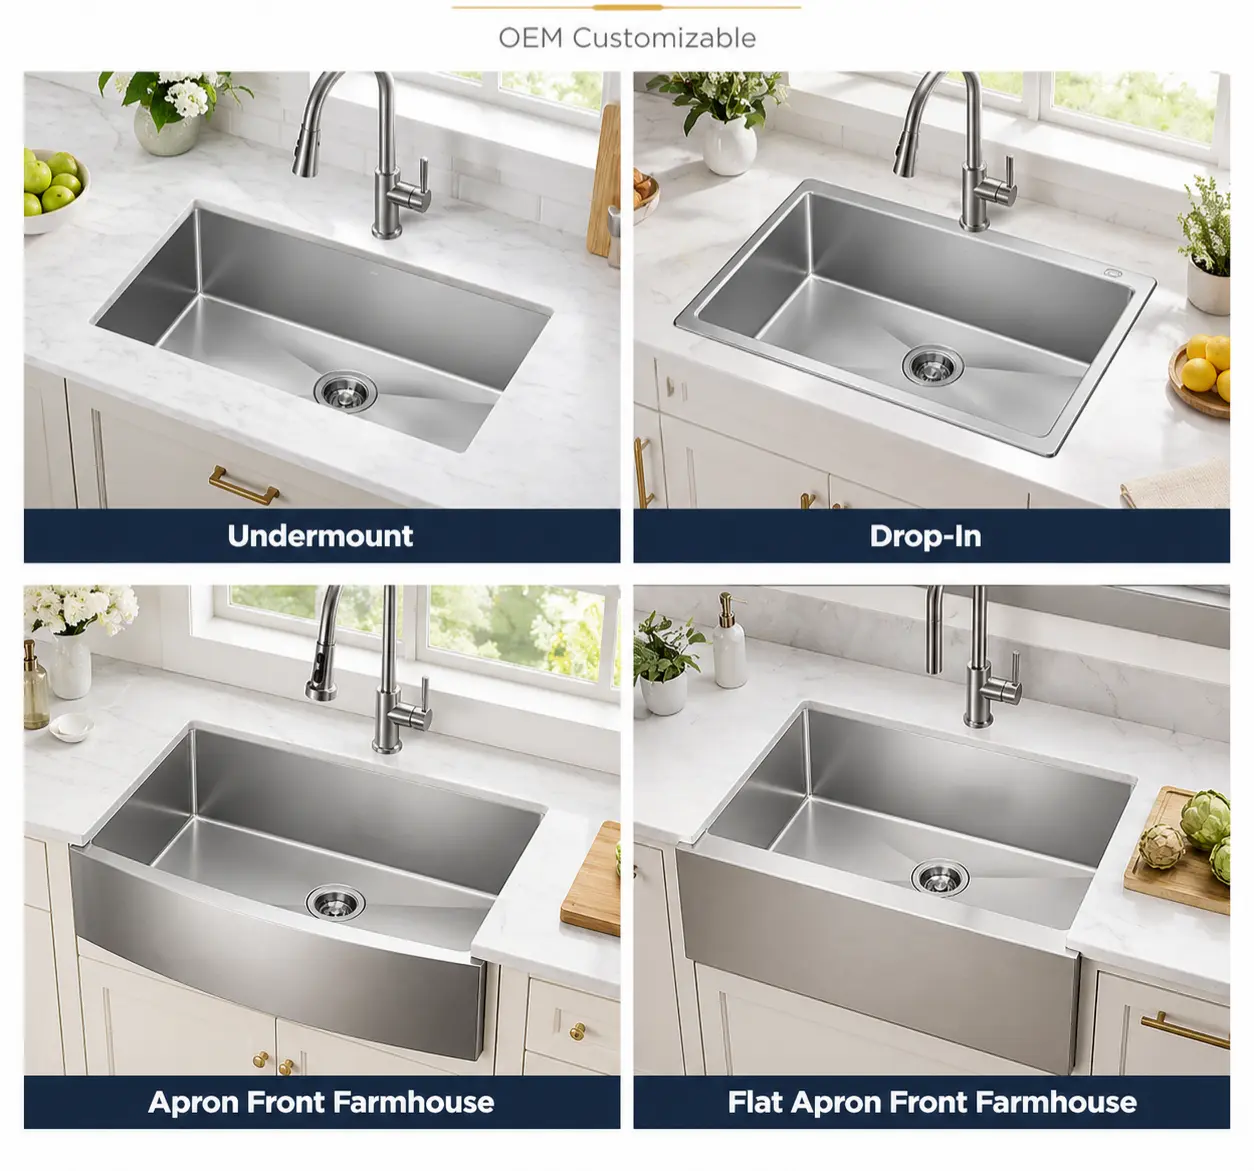
This is common with undermount sinks because the faucet is normally installed through the countertop behind the bowl. Some farmhouse sinks, custom sinks and wall-mounted faucet installations also use a zero-hole design.
A zero-hole sink is not necessarily less complete. It can be more flexible because the countertop fabricator can position the faucet after confirming:
- Sink cutout
- Faucet model
- Countertop thickness
- Backsplash position
- Cabinet structure
- Accessory layout
The faucet should be selected before the countertop is drilled. Leaving the decision until installation can result in incorrect reach, limited handle movement or interference below the countertop.
One-Hole Sink
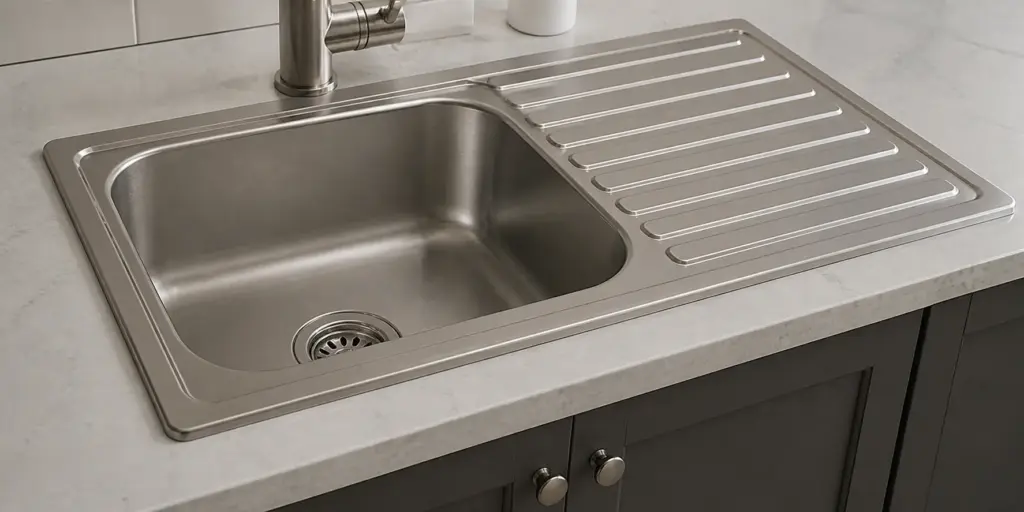
A one-hole sink is commonly used with a single-body faucet.
Typical applications include:
- Pull-down kitchen faucets
- Pull-out kitchen faucets
- Single-handle faucets
- Touchless faucets
- High-arc gooseneck faucets
- Compact bar and prep faucets
The spout and water control are integrated into one main faucet body.
A one-hole layout creates a clean appearance, but it does not provide a separate opening for a soap dispenser, filtered-water faucet, side sprayer or disposal air switch.
Two-Hole Sink
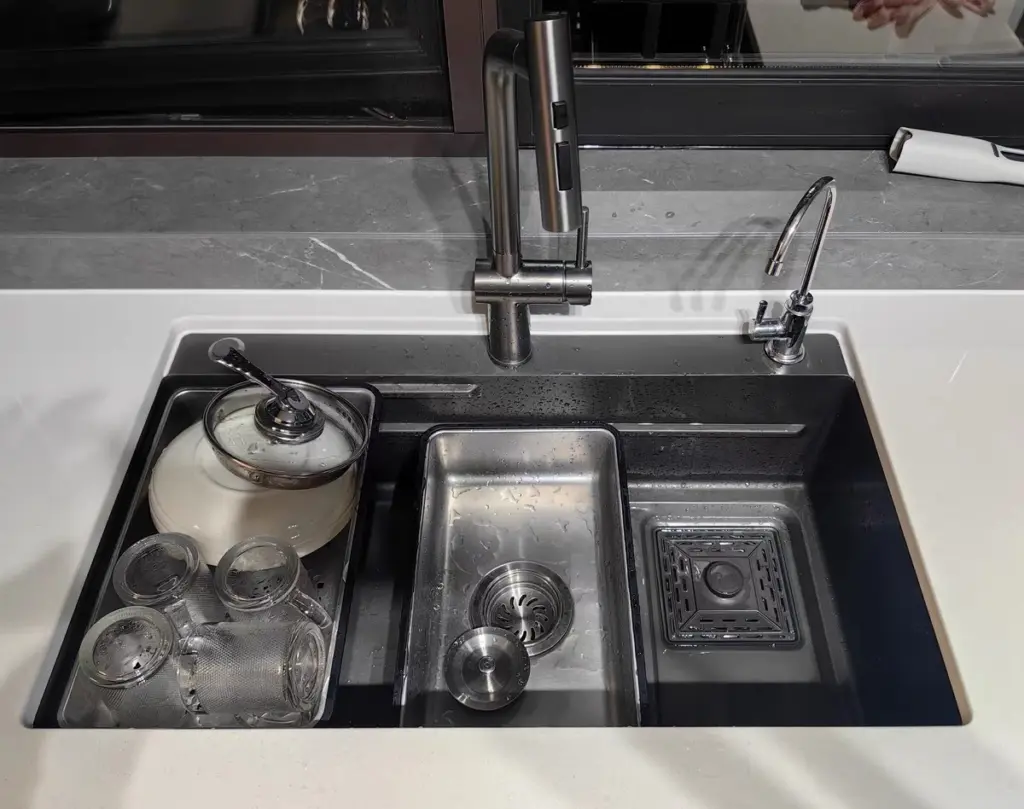
A two-hole layout often includes:
- One hole for the main kitchen faucet
- One hole for an accessory
The second opening may be used for:
- Soap dispenser
- Filtered-water faucet
- Side sprayer
- Garbage disposal air switch
- Dishwasher air gap where required
- Separate faucet control
The two openings do not necessarily require the same diameter.
For example, the main faucet may fit a common 35 mm opening while the filtered-water faucet requires a smaller hole. Each component must be checked separately.
Three-Hole Sink
A three-hole sink may be designed for:
- A spout with separate hot and cold handles
- A fixed-base faucet using three mounting positions
- A faucet with separate controls
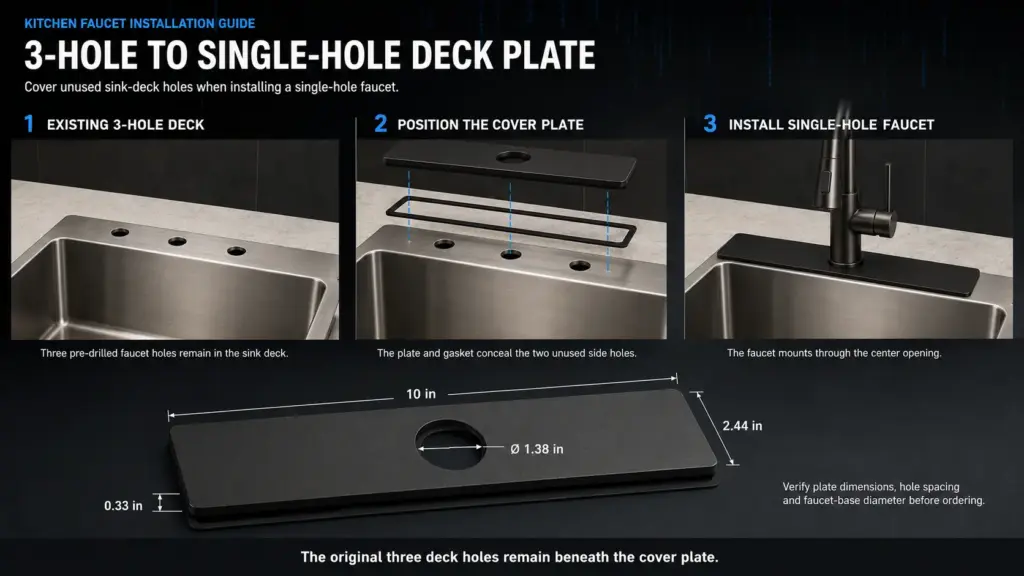
- A single-hole faucet with a deck plate covering the other holes
Three holes do not describe the complete pattern. The center-to-center spacing must also match.
A three-hole faucet designed for one spread may not fit another three-hole sink.
Four-Hole Sink
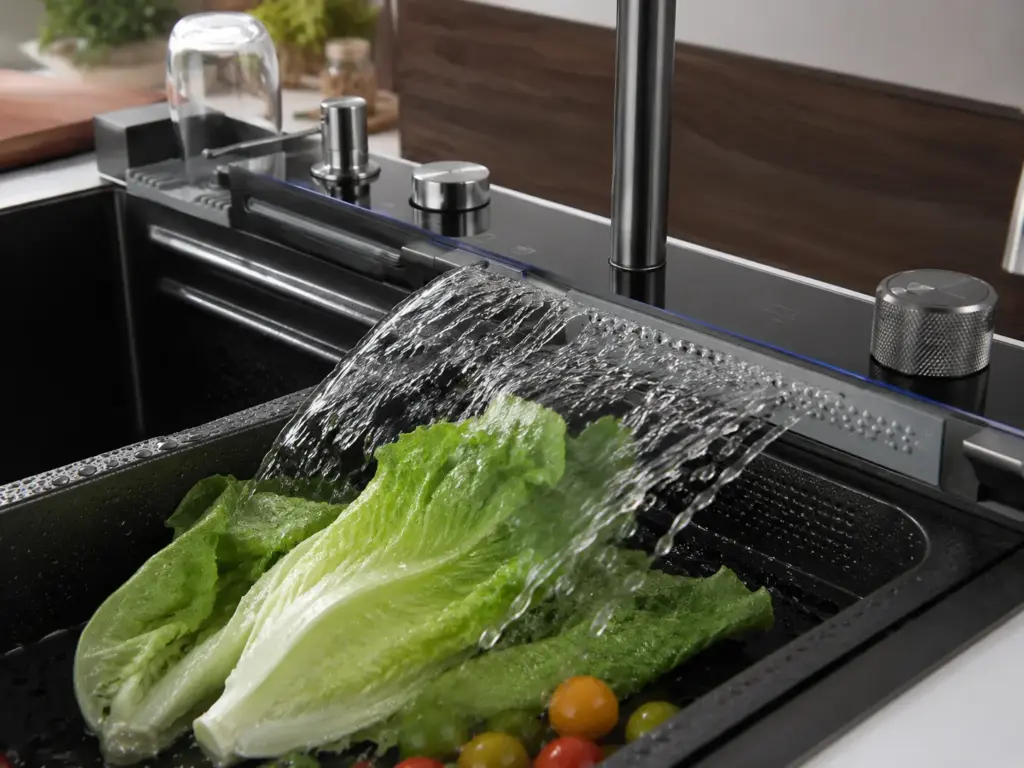
A traditional four-hole layout commonly includes:
- Three positions for the faucet, spout and handles
- One additional position for a side sprayer or soap dispenser
A four-hole sink may also be adapted to a modern single-hole faucet, but the remaining holes must be covered or used for compatible accessories.
More holes do not automatically provide greater flexibility. Every additional opening creates:
- Another sealing point
- Another possible installation mismatch
- Another SKU variation
- Another visual element on the sink deck
For a coordinated sink-and-faucet set, fewer correctly planned holes are usually better than several unassigned holes.
Which Faucet-Hole Layout Should You Choose?
| Planned Configuration | Hole Layout to Consider | Important Check |
| Single-body faucet only | One hole | Diameter, deck thickness and base coverage |
| Faucet plus soap dispenser | Two holes | Separate diameter and bottle clearance |
| Faucet plus filtered-water tap | Two holes | Filter tubing and under-counter space |
| Faucet plus air switch | Two holes | Button diameter and control-unit clearance |
| Faucet plus two accessories | Three holes | Spacing and visual balance |
| Separate spout and two handles | Three holes | Exact center-to-center pattern |
| Traditional faucet plus side sprayer | Four holes | Faucet spacing and sprayer connection |
| Undermount sink with countertop faucet | Zero sink holes | Countertop drilling and flange clearance |
| Wall-mounted faucet | Zero deck holes | Spout projection and wall plumbing position |
This table is a planning guide, not a substitute for the component drawings.
What Do 4-Inch and 8-Inch Faucet Spacing Mean?
Faucet spacing is measured from the center of one mounting hole to the center of another.
For a symmetrical three-hole pattern:
- A 4-inch spread generally means the centers of the two outside holes are 4 inches apart.
- An 8-inch spread generally means the centers of the two outside holes are 8 inches apart.
If the layout is symmetrical, the middle opening is positioned halfway between the two outer openings.
However, hole count and nominal spread still do not confirm compatibility. The faucet may use:
- A fixed base
- Separate handles and spout
- Model-specific mounting studs
- A non-symmetrical control layout
- A separate remote valve
Measure the actual openings and compare them with the faucet drawing.
How to Measure Center-to-Center Spacing
For holes of the same diameter, measure from:
- Left edge of the first hole to the left edge of the second hole; or
- Right edge of the first hole to the right edge of the second hole
This gives the center-to-center distance without estimating the center visually.
For a three-hole layout, record all three measurements:
- Left hole to center hole
- Center hole to right hole
- Left outer hole to right outer hole
Do not assume the two sides are equal, especially on an existing sink.
Why Hole Diameter Is Only Half the Measurement
A secure faucet mounting hole must satisfy three different conditions.
1. The Components Must Pass Through
The opening must be large enough for all components that pass through it, such as:
- Threaded mounting shank
- Hot and cold supply hoses
- Pull-down hose
- Quick-connect fitting
- Sensor cable
- Control line
The shank may fit while a connector attached to the hose does not.
Measure the largest component that must pass through the opening—not only the faucet thread.
2. The Faucet Base Must Cover the Opening
The faucet base and gasket must sit on a continuous, flat mounting surface.
If the hole is too large:
- The base may not cover it completely.
- The gasket may not seal correctly.
- Water may enter the cabinet.
- The faucet may sit unevenly.
A decorative deck plate may hide the opening, but appearance alone does not confirm structural support.
3. The Lower Washer Must Support the Faucet
Below the sink or countertop, the mounting washer and fixing nut must grip enough material around the opening.
If the lower washer partially enters the hole or rests against a curved edge, the faucet may move even when the nut is tight.
A correct installation therefore requires support above and below the mounting surface.
Main Faucet Holes and Accessory Holes Are Not Automatically the Same
Do not apply the main faucet-hole dimension to every accessory.
| Component | What Must Be Verified |
| Main kitchen faucet | Shank, hose bundle, base, washer and nut |
| Soap dispenser | Mounting shank, refill bottle and bottle clearance |
| Filtered-water faucet | Shank, tubing connection and filter location |
| Side sprayer | Hose fitting, support body and faucet diverter |
| Dishwasher air gap | Selected product and local plumbing requirements |
| Disposal air switch | Button body, tubing and control-module space |
| Remote faucet control | Valve body, hose or cable length |
| Digital faucet control | Mounting body, wiring and electronic module |
A component may fit through the opening but still be impossible to tighten because its washer, bottle or connector contacts the sink bowl.
Can a Single-Hole Faucet Fit a Three-Hole Sink?
Often, yes.
A single-hole faucet can sometimes be installed in a three-hole sink using:
- A compatible deck plate; or
- Separate hole covers or accessories
Using a Deck Plate
A deck plate, also called an escutcheon, covers the unused openings around a single-hole faucet.
Before using one, confirm:
- It is approved for the selected faucet.
- It covers the complete three-hole pattern.
- Its gasket seals the unused openings.
- The sink deck is flat enough.
- The plate does not contact a raised rim.
- The central mounting hardware still receives proper support.
- The plate does not reduce the allowed mounting thickness beyond the installation limit.
A deck plate covers holes. It does not correct incompatible spacing, an oversized structural opening or a weak mounting surface.
Using Hole Covers
Unused holes can also be sealed with correctly sized covers.
Alternatively, they may be used for:
- Soap dispenser
- Filtered-water tap
- Disposal air switch
- Side sprayer
- Air gap where required
All unused holes should be mechanically secured and sealed against water.
Can a Three-Hole Faucet Fit a One-Hole Sink?
Not without adding more openings.
A faucet with a separate spout and two handles requires the correct number, diameter and spacing of holes. It cannot normally be converted into a single-hole faucet.
Before adding holes, check:
- Sink or countertop material
- Required hole diameter
- Exact spacing
- Distance from the bowl
- Distance from the sink rim
- Available flat area
- Fixing-nut clearance
- Risk of surface damage
- Product warranty
- Left- and right-hand orientation
Selecting a compatible single-hole faucet is often more practical than modifying an installed sink or countertop.
Maximum Deck Thickness: The Frequently Missed Specification
Maximum deck thickness is the greatest material thickness that the faucet mounting hardware can clamp securely.
Depending on the installation, the mounting system may involve:
- Stainless steel sink deck
- Stone countertop
- Reinforcement plate
- Faucet gasket
- Deck plate
- Under-deck washer or bracket
A faucet that fits a thin stainless steel sink may not fit a thick stone countertop.
The installation can fail when:
- Too little thread remains for the fixing nut.
- The mounting bracket cannot engage fully.
- The supply connections cannot be assembled.
- A deck plate uses part of the available shank length.
- An unplanned reinforcement plate increases the total thickness.
Check the maximum thickness for the exact faucet configuration. Some faucets have different limits with and without a deck plate.
Do not use a generic shank extension unless it is approved for the selected faucet.
Sink-Deck Mounting vs Countertop Mounting
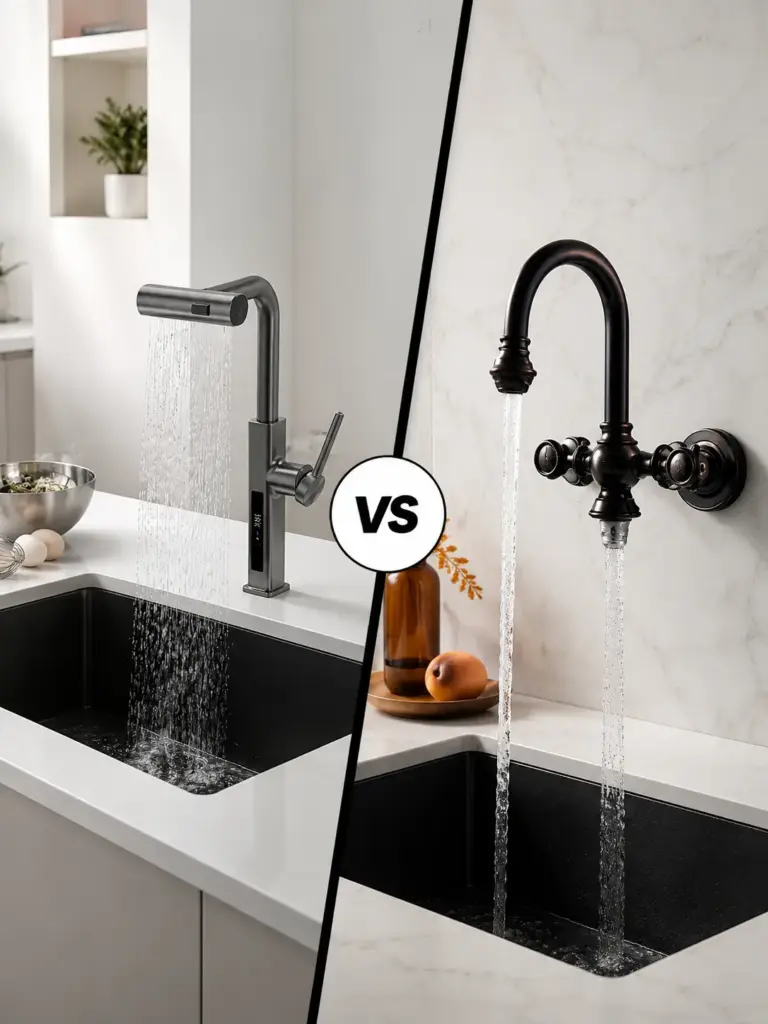
Faucet Mounted Through the Sink Deck
This is common with top-mount and drop-in kitchen sinks.
It can be useful for:
- Replacement sink programs
- Laminate countertop installations
- Retail sink-and-faucet sets
- Rental housing projects
- Preconfigured product packages
The sink deck must provide:
- Sufficient width
- A flat mounting surface
- Correct hole position
- Fixing-nut access
- Adequate stiffness
- Clearance from the bowl and rim
Faucet Mounted Through the Countertop
This is common with undermount sinks and some farmhouse sinks.
It provides more freedom to position the faucet but requires coordination between:
- Sink drawing
- Countertop cutout
- Faucet specification
- Sink flange
- Mounting clips
- Support rails
- Backsplash
- Cabinet structure
The faucet hole should not be drilled before the sink and faucet dimensions are approved.
Why Tall Faucets Move on Some Stainless Steel Sinks
A tall pull-down, gooseneck or semi-professional faucet creates leverage on the mounting surface.
When the user:
- Rotates the spout
- Operates the handle
- Pulls out the spray head
- Returns the spray hose
the force is transferred to the sink deck.
A faucet can be correctly tightened and still move if the deck is too flexible.
Possible causes include:
- Thin unsupported sink deck
- Oversized mounting hole
- Small lower washer
- Insufficient flat area
- Hole too close to a formed edge
- Deck distortion
- Missing or unsuitable reinforcement
- Heavy faucet body with a tall center of gravity
Depending on the sink and faucet design, stability may be improved through:
- A wider mounting washer
- A suitable reinforcement plate
- A formed or reinforced faucet deck
- Better hole positioning
- Greater flat bearing area
- Faucet hardware designed for thin metal decks
For B2B sink-and-faucet programs, test the real faucet on a production-equivalent sink sample. A drawing cannot fully predict deck movement.
Faucet-Hole Position and Water Landing Point
The faucet hole determines where the faucet stands. That position affects where the water lands inside the sink.
A faucet can be mechanically compatible but function poorly because the spout is too short or too long for the bowl.
If the Faucet Is Too Far Back
The stream may:
- Strike the rear bowl wall
- Increase splash around the rear deck
- Leave limited room for washing large cookware
- Make the sink feel smaller
If the Faucet Is Too Far Forward
The stream may:
- Land close to the front wall
- Splash toward the user
- Reduce usable space at the front of the bowl
- Miss the preferred washing zone
The Water Does Not Have to Hit the Drain
Positioning the stream directly over the drain is not a universal requirement.
A better target is a practical open area where:
- Water does not strike a steep wall.
- Large cookware can be rinsed comfortably.
- Splash remains inside the bowl.
- The stream is not blocked by a bottom grid or accessory.
- Both bowls can be reached if the sink is double-bowl.
Review the faucet and sink in side view—not only from above. Spout reach, outlet height and outlet angle all affect the landing point.
Handle and Backsplash Clearance
A faucet may fit the mounting hole but fail during operation because the handle hits the backsplash.
Check the faucet in every position:
- Water off
- Full hot
- Full cold
- Maximum flow
- Spout turned left
- Spout turned right
Rear clearance can be limited by:
- Backsplash
- Window sill
- Wall
- Raised sink rim
- Accessory base
- Countertop upstand
Where rear space is limited, consider a faucet with side or forward handle movement.
Under-Sink Clearance
Always inspect the mounting area from below.
Allow space for:
- Mounting nut
- Mounting bracket
- Hot and cold supply hoses
- Pull-down hose
- Hose counterweight
- Quick-connect fitting
- Sensor control box
- Soap dispenser bottle
- Filter tubing
- Air-switch tubing
- Sink clips
- Support rails
- Drainpipe and garbage disposal
Pull-Down Hose Clearance
The hose counterweight must move freely.
If it contacts the cabinet wall, drainpipe, supply valve or stored items:
- The spray head may not retract.
- The hose may feel heavy.
- The faucet may appear defective.
- The hose may wear prematurely.
The pull-down hose should be tested through its full extension and return path after installation.
How to Measure Existing Kitchen Sink Faucet Holes
Do not select a replacement faucet from appearance alone.
Step 1: Identify Where the Faucet Is Mounted
Determine whether the faucet passes through:
- Sink deck
- Countertop
- Separate mounting plate
- Wall
This affects deck thickness and drilling options.
Step 2: Count the Physical Openings
Count the actual holes—not the visible faucet components.
A deck plate may hide two unused openings. Inspect the underside if necessary.
Step 3: Record the Function of Every Hole
For example:
- H1: Main faucet
- H2: Soap dispenser
- H3: Filtered-water faucet
- H4: Air switch
This prevents an accessory opening from being mistaken for part of the faucet pattern.
Step 4: Measure the Hole Diameters
Measure each finished opening separately.
Do not assume all holes have the same diameter.
Step 5: Measure Center-to-Center Spacing
Record the spacing between every related opening, especially for multi-hole faucets.
Step 6: Measure the Flat Mounting Area
Check the flat area around and below each hole.
The faucet base and lower washer should not rest on:
- Raised rim
- Curved deck
- Drainboard groove
- Folded edge
- Weld
- Bowl radius
Step 7: Measure the Mounting Thickness
Record the thickness of the material clamped by the faucet.
Step 8: Check Above- and Below-Deck Clearance
Inspect:
- Backsplash clearance
- Handle movement
- Fixing-nut access
- Hose route
- Counterweight path
- Accessory clearance
Step 9: Compare Everything with the Faucet Drawing
Do not order until the physical measurements fall within the faucet’s permitted installation range.
Replacement Faucet Measurement Sheet
Use this checklist before buying a replacement faucet.
| Item | Measurement |
| Mounting surface | Sink / countertop / wall |
| Number of physical holes | ______ |
| Main faucet-hole diameter | ______ |
| Accessory-hole diameter | ______ |
| Left-to-center spacing | ______ |
| Center-to-right spacing | ______ |
| Outer-hole spread | ______ |
| Mounting-surface thickness | ______ |
| Flat area around main hole | ______ |
| Faucet center to backsplash | ______ |
| Faucet center to rear bowl wall | ______ |
| Space below mounting hole | ______ |
| Existing deck-plate dimensions | ______ |
| Required accessories | ______ |
Take photographs from above and below. They can help the faucet or sink supplier identify possible interference.
Faucet Compatibility Matrix
| Existing Layout | Compatible Direction | Conditions |
| No sink holes | Countertop- or wall-mounted faucet | Countertop can be drilled in the correct position |
| One hole | Single-hole faucet | Diameter, thickness and clearance match |
| One hole | Three-hole faucet | Not without adding correctly spaced holes |
| Two holes | Faucet plus accessory | Both component specifications match |
| Three holes | Three-hole faucet | Exact spacing and mounting requirements match |
| Three holes | Single-hole faucet | Compatible deck plate or sealed hole covers required |
| Four holes | Traditional faucet plus accessory | Faucet pattern and accessory opening match |
| Four holes | Single-hole faucet plus accessories | Unused openings must be assigned or sealed |
| Oversized hole | Any faucet | Base and lower hardware must still provide full support |
| Thick countertop | Deck-mounted faucet | Shank length and mounting hardware must accommodate it |
“Compatible” in this table means potentially compatible. The individual product drawings remain the final reference.
Can You Add Another Faucet Hole?
The answer depends on the sink or countertop material.
Stainless Steel
Some stainless steel sink decks can be drilled or punched using suitable professional equipment.
The process must control:
- Position
- Deck deformation
- Surface scratching
- Burrs
- Sharp edges
- Heat discoloration
- Finish damage
- Metal particles
The area should be supported during the operation, and the finished edge should be clean and deburred.
For a new production order, punching or preparing the opening before final surface finishing is generally more controlled than modifying a finished sink.
PVD or Colored Stainless Steel
Adding a hole after finishing may:
- Scratch the decorative surface
- Chip or disturb the coating around the opening
- Expose unfinished metal at the edge
- Create visible color variation
Faucet and accessory holes should preferably be finalized before the decorative finish is applied.
Granite, Quartz and Porcelain Countertops
These surfaces require material-specific drilling equipment and professional fabrication.
The hole position should be reviewed against:
- Sink cutout
- Countertop edge
- Sink flange
- Backsplash
- Faucet base
- Cabinet structure
A hole too close to the sink cutout or countertop edge can weaken the material.
Granite Composite, Fireclay and Ceramic Sinks
Do not drill these sinks using stainless steel methods.
Some products include designated knockouts or approved drilling areas. Other products should not be drilled after manufacture.
Follow the instructions for the exact sink model. Incorrect drilling can chip or crack the sink.
Common Faucet-Hole Problems and Their Causes
| Problem | Possible Cause |
| Faucet will not pass through | Hole too small or connector bundle too large |
| Faucet base does not cover hole | Opening too large or incorrect base size |
| Faucet moves after tightening | Flexible deck, oversized hole or poor washer support |
| Water leaks around faucet base | Damaged gasket, uneven deck or incomplete coverage |
| Fixing nut cannot be installed | Bowl, rim or cabinet structure blocks access |
| Handle hits backsplash | Hole positioned too far back |
| Water hits rear wall | Faucet position or spout reach is incorrect |
| Water splashes toward user | Stream lands too close to front of bowl |
| Pull-down head does not retract | Hose or counterweight is obstructed |
| Soap bottle cannot be installed | Accessory hole too close to bowl or cabinet rail |
| Deck plate rocks | Sink deck is curved, raised or distorted |
| Faucet leans | Mounting surface is uneven or insufficiently supported |
This troubleshooting table also helps B2B buyers distinguish faucet defects from installation-interface problems.
Faucet-Hole Requirements by Sink Type
Top-Mount and Drop-In Sinks
These sinks often provide a rear deck for faucet mounting.
Important specifications include:
- Deck width
- Deck flatness
- Hole layout
- Rim profile
- Metal stiffness
- Bowl clearance
- Countertop cutout
- Fixing-clip position
Explore Matrix top-mount and drop-in kitchen sinks.
Undermount Sinks
Most undermount faucets are mounted through the countertop.
The fabricator should receive:
- Sink cutout template
- Sink overall dimensions
- Flange width
- Faucet drawing
- Accessory layout
- Mounting-clip position
The faucet hole must not interfere with the undermount flange or support system.
Farmhouse Sinks
Farmhouse installations may have limited countertop space behind the bowl.
Check:
- Countertop strip width
- Apron position
- Cabinet depth
- Backsplash clearance
- Faucet-base diameter
- Fixing-nut access
Workstation Sinks
The faucet should not interfere with sliding accessories such as:
- Cutting boards
- Colanders
- Roll-up racks
- Draining trays
Also verify that the spout can reach the intended washing area without blocking accessory movement.
Bar and Prep Sinks
Compact sinks require careful faucet proportions.
An oversized kitchen faucet can:
- Direct water too close to the front edge
- Create excessive splash
- Overload a narrow sink deck
- Look visually unbalanced
- Occupy too much under-cabinet space
A compact bar or prep faucet may provide better reach and installation clearance.
RV and Compact Kitchen Sinks
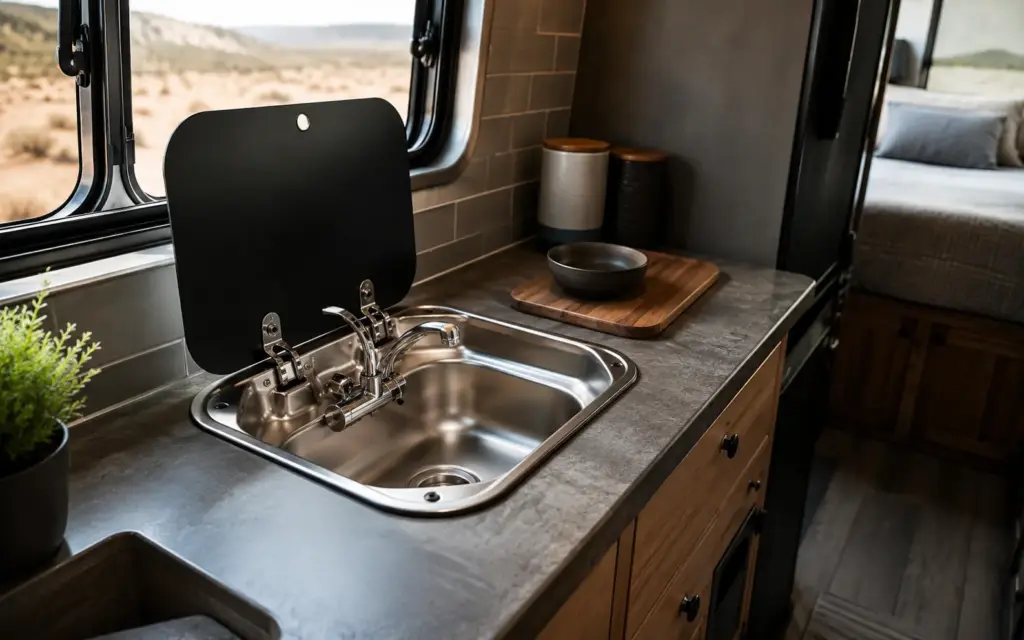
In an RV or compact cabinet, the limiting factor may not be the hole diameter. It may be:
- Cabinet depth
- Fold-down cover
- Wall clearance
- Water tank plumbing
- Drain position
- Hose movement
- Limited access below the sink
A compact sink-and-faucet system should be reviewed as a complete assembly.
B2B Engineering: Treat the Hole Layout as an Interface Drawing
For a private-label, wholesale or project program, “one standard faucet hole” is not an adequate production specification.
The faucet-hole layout should be defined on a controlled drawing.
Establish Drawing Datums
Hole positions should be measured from fixed reference edges, or datums.
For example:
- Datum A: rear outer edge of the sink
- Datum B: left outer edge of the sink
Each hole can then be defined using an X and Y position from those datums.
This is more reliable than instructions such as:
- “Put the hole behind the bowl.”
- “Center the hole on the sink.”
- “Add another hole on the right.”
Verbal descriptions become ambiguous when a sink is rotated, mirrored or produced in left- and right-hand versions.
Create a Faucet-Hole Schedule
| Hole ID | Function | Diameter | X Position | Y Position | Approved Component |
| H1 | Main faucet | Drawing value | Drawing value | Drawing value | Faucet model |
| H2 | Soap dispenser | Drawing value | Drawing value | Drawing value | Dispenser model |
| H3 | Filtered-water faucet | Drawing value | Drawing value | Drawing value | Filter faucet model |
| H4 | Air switch | Drawing value | Drawing value | Drawing value | Switch model |
The production drawing should also show:
- Diameter tolerance
- Positional tolerance
- Hole spacing
- Orientation
- Flat mounting area
- Distance from formed edges
- Finish requirements around the opening
Tolerance should be based on the actual faucet and manufacturing process—not copied from an unrelated sink model.
B2B Product Strategy: Which Hole Variant Should You Offer?
The best hole configuration depends on the sales channel.
Replacement and Retail Programs
Buyers may need compatibility with existing countertops and familiar faucet layouts.
Possible strategies include:
- One-hole model
- Multi-hole model
- One-hole faucet with optional deck plate
- Clearly labeled hole variants
The target market’s actual faucet assortment should be studied before fixing the pattern.
New Construction and Project Programs
A no-hole undermount sink can provide more countertop-layout flexibility, but the project team needs coordinated drawings.
For top-mount project sinks, a fixed and pre-approved hole layout can reduce site drilling.
Boxed Sink-and-Faucet Sets
A boxed set should use a fixed, validated combination.
Confirm:
- Faucet fits the opening.
- Base covers the hole.
- Hardware can be tightened.
- Deck remains stable.
- Spout reaches the correct area.
- Handle clears the backsplash.
- Accessories fit below the deck.
- Installation instructions show the same layout.
Private-Label Product Collections
Avoid using one item number for different hole patterns.
Better SKU control may include:
- Model-0H: No hole
- Model-1H: One hole
- Model-2H: Faucet plus accessory
- Model-3H: Defined three-hole pattern
- Model-L: Accessory on left
- Model-R: Accessory on right
The naming system can vary, but the carton, drawing, order sheet and inspection record should identify the same configuration.
Faucet-Hole Quality Inspection Checklist
Dimensional Inspection
Confirm:
- Hole count
- Diameter
- Diameter tolerance
- Center-to-center spacing
- Position from drawing datums
- Left- or right-hand orientation
- Distance from bowl and rim
- Mounting-zone flatness
Workmanship Inspection
Check for:
- Sharp burrs
- Rough edges
- Deck deformation
- Cracks
- Surface scratches
- Heat marks
- Coating damage
- Contamination around the opening
Functional Assembly Check
Use the approved production components to confirm:
- Faucet and hoses pass through.
- Faucet base sits flat.
- Gasket covers the opening.
- Lower washer has full support.
- Nut can be tightened.
- Faucet remains stable.
- Handle moves freely.
- Spout reaches the intended area.
- Pull-down hose extends and retracts.
- Counterweight does not collide with plumbing.
- Accessory bottles and fittings fit below the sink.
A go/no-go gauge can confirm diameter quickly, but it cannot verify the complete installation.
Packaging and SKU Control
Check that:
- Hole configuration matches the carton label.
- Left- and right-hand versions are not mixed.
- The faucet deck is protected from impact.
- Accessories match the specified layout.
- Installation instructions show the supplied product.
- Replacement orders use the same approved drawing revision.
A correctly produced sink can still generate complaints if the wrong hole variant is packed.
How Matrix Supports Sink-and-Faucet Compatibility
Matrix supplies kitchen sinks, faucets and matched accessories for importers, distributors, private-label brands and project buyers.
Depending on the program, Matrix can review:
- Sink installation type
- Faucet-hole count
- Hole diameter and position
- Sink-deck structure
- Faucet model
- Spout reach
- Accessory layout
- Left- or right-hand orientation
- Sink-and-faucet sample assembly
- Packaging and SKU identification
Explore:
- Matrix kitchen and bathroom product programs
- Pull-down kitchen faucets
- Custom kitchen sink programs
- Kitchen sink and faucet installation guides
For an OEM, wholesale or project program, send the sink drawing, faucet specification, accessory list, target market and required hole layout to contact Matrix.
Final Faucet-Hole Decision Checklist
Before buying, drilling or producing a kitchen sink, answer these questions:
- How many physical holes are required?
- What is the function of each hole?
- What diameter does each component require?
- What is the permitted hole-diameter range?
- What is the center-to-center spacing?
- Does the faucet base fully cover the opening?
- Does the lower washer have enough support?
- Is the mounting surface within the faucet’s thickness limit?
- Is there enough flat deck area?
- Can the fixing nut be reached and tightened?
- Does the handle clear the backsplash?
- Does the spout reach the correct part of the bowl?
- Can the pull-down hose and weight move freely?
- Do accessories fit below the sink?
- Has the actual sink-and-faucet combination been test-assembled?
If any answer is unknown, the installation has not been fully confirmed.
Frequently Asked Questions
What is the standard hole size for a kitchen faucet?
A 1-3/8-inch or 35 mm opening is common, but it is not universal. The exact minimum and maximum diameter in the faucet installation drawing should be followed.
Are all kitchen faucet holes 35 mm?
No. Main faucets, soap dispensers, filter faucets, side sprayers, air switches and remote controls may require different openings.
How many holes does a kitchen faucet need?
A single-body faucet normally requires one main mounting hole. Separate-handle faucets and additional accessories may require two, three or four holes.
How do I know whether I have a one-hole or three-hole sink?
Inspect the sink or countertop from below. A deck plate can hide two unused holes, making a three-hole sink appear to have only one opening.
Can a single-hole faucet fit a three-hole sink?
Often, yes. Use a compatible deck plate or seal the unused holes with suitable covers or accessories.
Can a three-hole faucet fit a single-hole sink?
Not without drilling additional holes with the correct diameter and spacing.
What is the difference between 4-inch and 8-inch faucet spacing?
The measurement refers to the center-to-center distance between the outer mounting holes. Faucets designed for different spreads may not be interchangeable.
Do undermount kitchen sinks have faucet holes?
Many undermount sinks do not. The faucet is usually installed through the countertop behind the sink.
Why is my kitchen faucet loose?
Possible causes include an oversized hole, flexible sink deck, insufficient washer support, uneven mounting surface or improperly tightened hardware.
Does a deck plate make every faucet fit a three-hole sink?
No. It can cover unused holes, but the plate must match the faucet, cover the pattern, seal correctly and sit on a flat surface. It does not repair a structurally oversized hole.
Where should the kitchen faucet hole be positioned?
It should provide correct spout reach, water landing point, handle clearance, mounting support and under-sink access. The sink and faucet should be evaluated together.
Should the faucet stream hit the drain?
Not necessarily. The stream should land in a practical open area without striking a steep bowl wall or splashing toward the user.
Can I drill another hole in a stainless steel sink?
Some stainless steel decks can be professionally drilled or punched. The work must avoid deformation, sharp burrs, scratches and finish damage.
Should a sink-and-faucet set be assembled before mass production?
Yes. A physical assembly check can reveal deck movement, poor base coverage, inaccessible fixing hardware, incorrect spout reach and under-sink interference that separate inspections may miss.