A new stainless steel sink rim may appear raised, bowed or twisted because of manufacturing stress, welding distortion, trimming, shipping damage or installation interference.
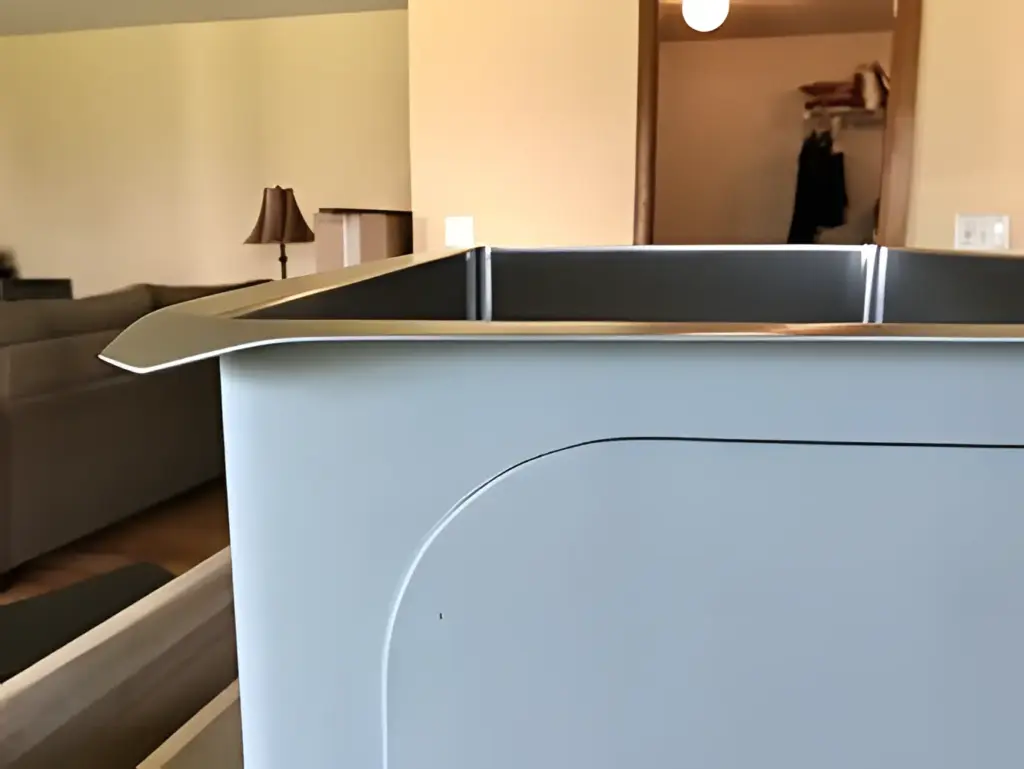
However, a visible gap does not automatically mean the sink is defective.
The gap may be caused by:
- A distorted sink rim or flange
- An uneven countertop
- A cutout that is too small
- Incorrect corner radii in the cutout
- Debris or cured sealant under the rim
- Incorrect mounting clips
- Uneven clip tightening
- Excessive clip force
- An unlevel farmhouse support frame
The fastest way to find the cause is to perform three separate tests:
- Free-state sink flatness test
- Dry-fit countertop test
- Installed seating test
These tests separate manufacturing and transport problems from installation problems.
Quick Diagnosis: Sink Defect or Installation Problem?
| Test Result | More Likely Cause |
|---|---|
| Uninstalled sink has permanent diagonal twist | Manufacturing or transport distortion |
| Uninstalled sink flange exceeds the agreed flatness tolerance | Product nonconformity |
| Sink is within tolerance but does not dry-fit | Countertop or cutout interference |
| Sink dry-fits correctly but develops gaps after clips are tightened | Clip sequence, clip position or overtightening |
| Gap appears over old silicone or debris | Mounting-surface preparation |
| Only one cutout corner prevents seating | Incorrect cutout radius |
| Rim is raised near a damaged carton corner | Transport impact |
| Handmade sink lifts near a welded area | Welding or grinding distortion |
| Pressed sink has a long, smooth bow | Forming, trimming or springback |
| Small waves appear beside individual clips | Excessive local clip force |
Should a New Stainless Steel Sink Rim Be Perfectly Flat?
A sink rim should be sufficiently flat to:
- Seat evenly on its intended mounting surface
- Form a continuous seal
- Install with the specified clips or support system
- Avoid excessive stress on the countertop
- Maintain a consistent visible reveal
This does not necessarily mean every unrestrained stainless steel rim will show zero measurable deviation.
Thin sheet metal can retain a small amount of elastic bow. Some mounting systems can draw down a controlled deviation using normal installation force.
But the following are not acceptable installation strategies:
- Forcing a severely twisted sink flat
- Using excessive clip pressure
- Filling a large structural gap with silicone
- Bending the rim by hand
- Transferring sink distortion into the countertop
There is no universal flatness tolerance for every sink. The permitted deviation should be defined according to:
- Sink design
- Installation type
- Rim structure
- Material thickness
- Clip system
- Approved product drawing
- Installation fixture
Flat Is Not the Same as Level
A spirit level does not measure rim flatness.
It shows whether a surface is horizontal relative to gravity.
A surface can be:
- Flat but not level
- Level but locally uneven
- Level along one direction but twisted diagonally
To check sink-rim flatness, use:
- A verified reference plane
- A suitable straightedge
- A feeler gauge
- A controlled inspection fixture
Use a level only when checking installation orientation or drainage—not as the only flatness tool.
Identify the Correct Mating Surface
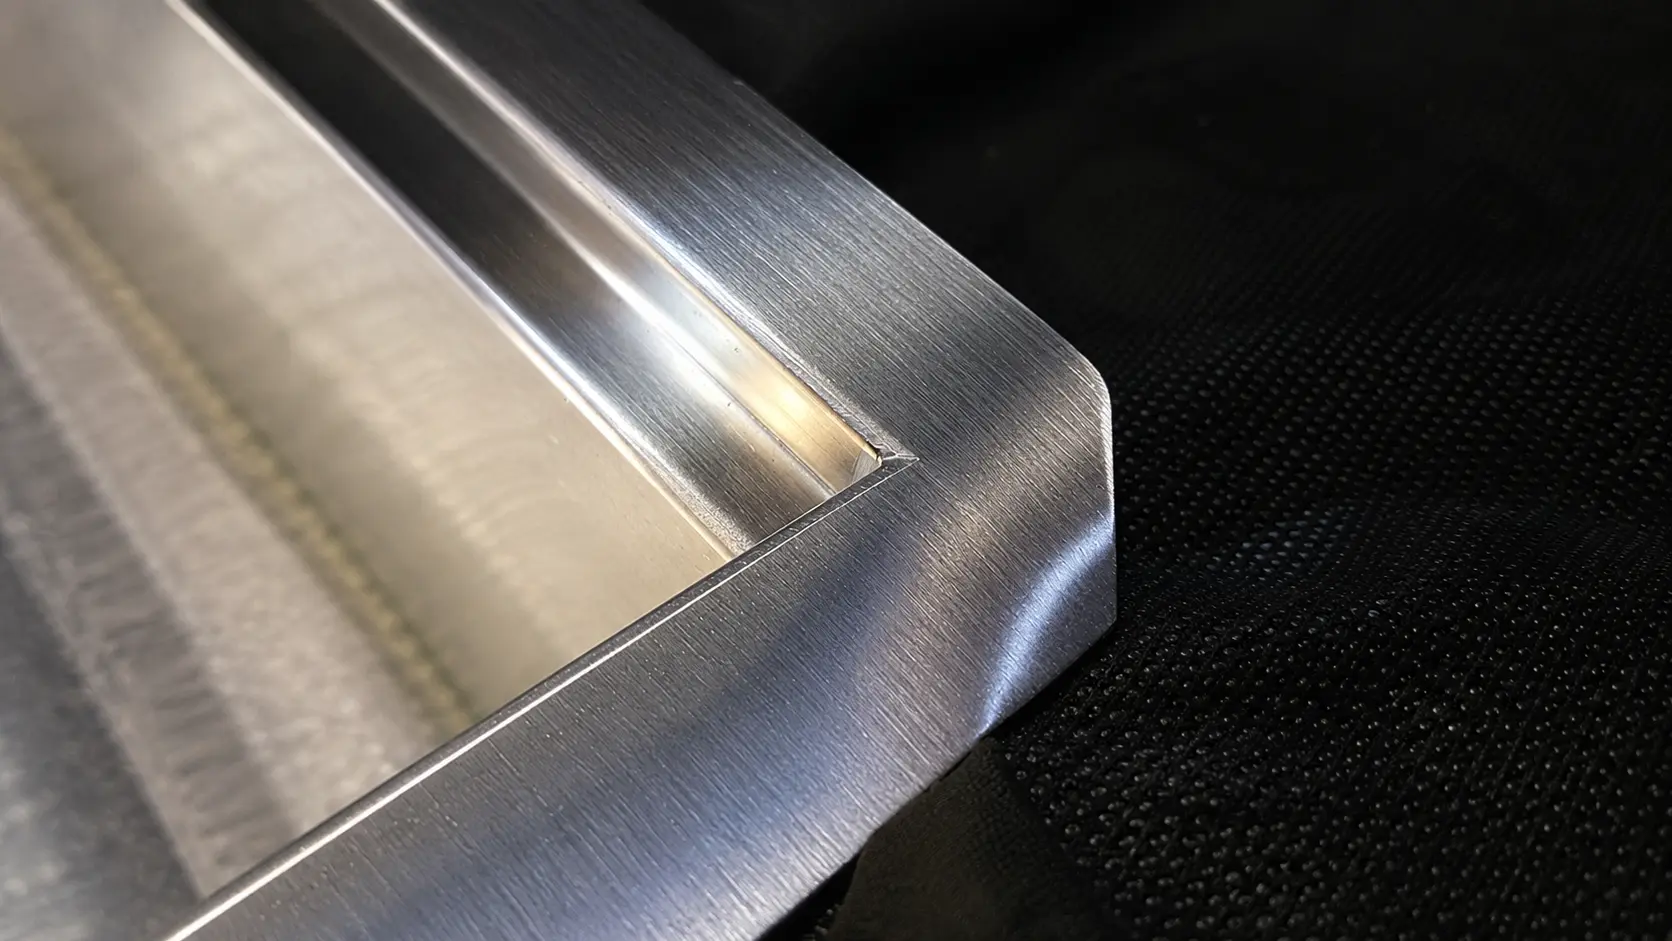
The mating surface is the part of the sink that contacts the countertop.
Different installation types use different mating faces.
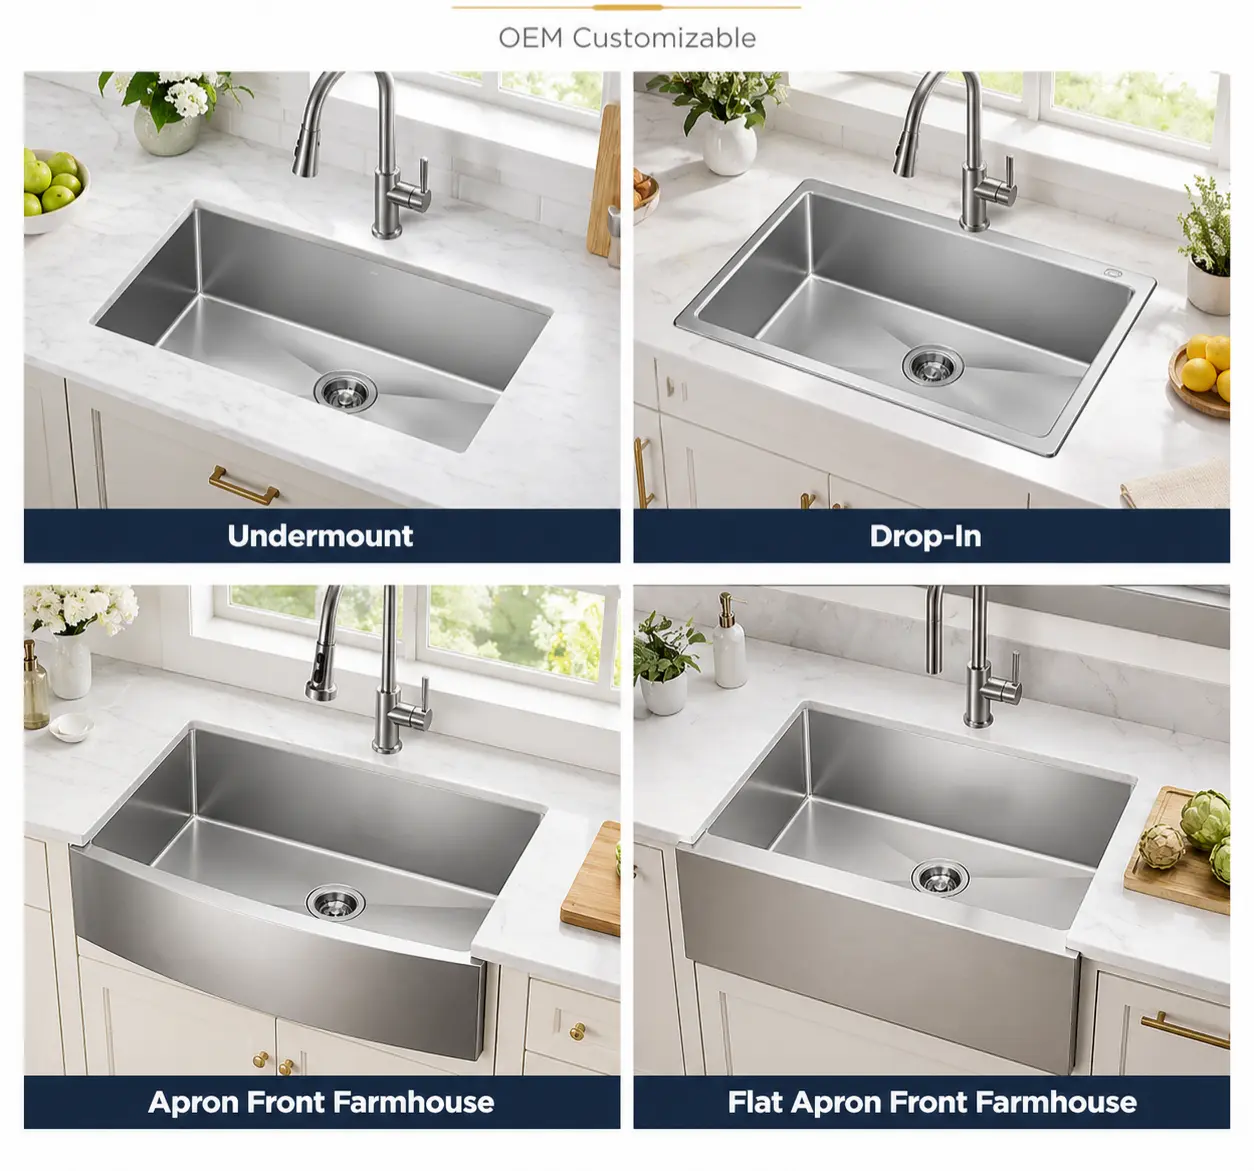
Top-Mount Sink
The underside of the visible rim contacts the top of the countertop.
This underside surface is the critical sealing and seating plane.
Undermount Sink
The upper face of the sink flange contacts the underside of the countertop.
Placing an undermount sink bowl-up on an ordinary table may test the wrong side of the flange.
Farmhouse Sink
The sink may use:
- Cabinet support below
- Countertop contact at the rear or sides
- A mounting flange
- A combination of these structures
The support base and countertop contact must be checked separately.
Why This Matters
A sink can appear flat when resting on a non-functional surface but still have an uneven actual mating face.
For accurate inspection, the fixture must contact the same surface that will contact the countertop.
Bow, Twist and Waviness Are Different Problems
Bow
A long rim edge curves gradually upward or downward.
Example:
- Both ends of the rear rim touch
- The middle remains raised
Twist
Opposite corners move in different directions.
The sink rocks diagonally when supported on its mating face.
Twist is generally more difficult to correct through normal mounting than a small elastic bow.
Local Waviness
Small high and low areas appear along the rim.
Possible causes include:
- Edge forming
- Welding
- Grinding
- Clip pressure
- Hole punching near the rim
Corner Lift
One corner remains permanently raised.
Possible causes include:
- Transport impact
- Welding shrinkage
- Trimming stress
- Asymmetrical forming
- Incorrect handling
Rolled-Edge or Burr Interference
The main rim plane may be acceptable while a local burr, folded edge or clip rail prevents contact.
The obstruction should not be confused with complete sink twist.
The Three-Test Diagnosis
Test 1: Free-State Sink Flatness
This test evaluates the sink before installation force is applied.
Prepare the Sink
Remove:
- Carton supports
- Protective blocks
- Accessories
- Tape
- Loose mounting clips
- Drain fittings that interfere with the fixture
The bowl, sound pads or undercoating must not contact the reference surface before the rim does.
Use a Suitable Reference Fixture
Do not assume a floor, countertop or workbench is flat.
The fixture should:
- Support the actual mating face
- Avoid the bowl and undercoating
- Remain rigid under the sink’s weight
- Have a known flatness condition
- Protect the finished surface
Check for Rocking
Apply light pressure at each corner.
If one corner causes the opposite corner to lift, record the diagonal movement.
Do not apply enough force to deform the sink.
Check the Rim Edges
Use a suitable straightedge along:
- Front rim
- Rear rim
- Left rim
- Right rim
- Both diagonals
Measure the Largest Gap
Use a feeler gauge to record:
- Gap size
- Gap location
- Sink orientation
- Whether the gap is a bow, twist or local wave
Measure in the free state without clamps or external force.
Compare with the Specification
The result is not pass or fail until it is compared with the product’s agreed flatness requirement.
Test 2: Dry-Fit the Sink Without Sealant
If the sink passes the free-state check, position it in the countertop without sealant.
This test identifies installation interference.
Check:
- Does the bowl clear the cutout?
- Do all cutout corners match?
- Does the clip channel clear the opening?
- Is the sink centered?
- Is old sealant present?
- Are there stone chips or laminate swelling?
- Does the flange hit anchors or support rails?
- Does the countertop have a high point?
If the sink is flat on the inspection fixture but not during dry fitting, the countertop or cutout is the more likely cause.
Test 3: Installed Seating Test
Install the sink using:
- Approved clips
- Correct clip quantity
- Correct clip spacing
- Approved support method
- Specified sealant
- Recommended tightening sequence
Check whether the rim or flange seats continuously using normal installation force.
If gaps appear only after clips are tightened, inspect:
- Clip sequence
- Clip position
- Unequal tightening
- Overtightening
- Sink movement inside the cutout
- Countertop deformation
Manufacturing Causes: Pressed Sinks
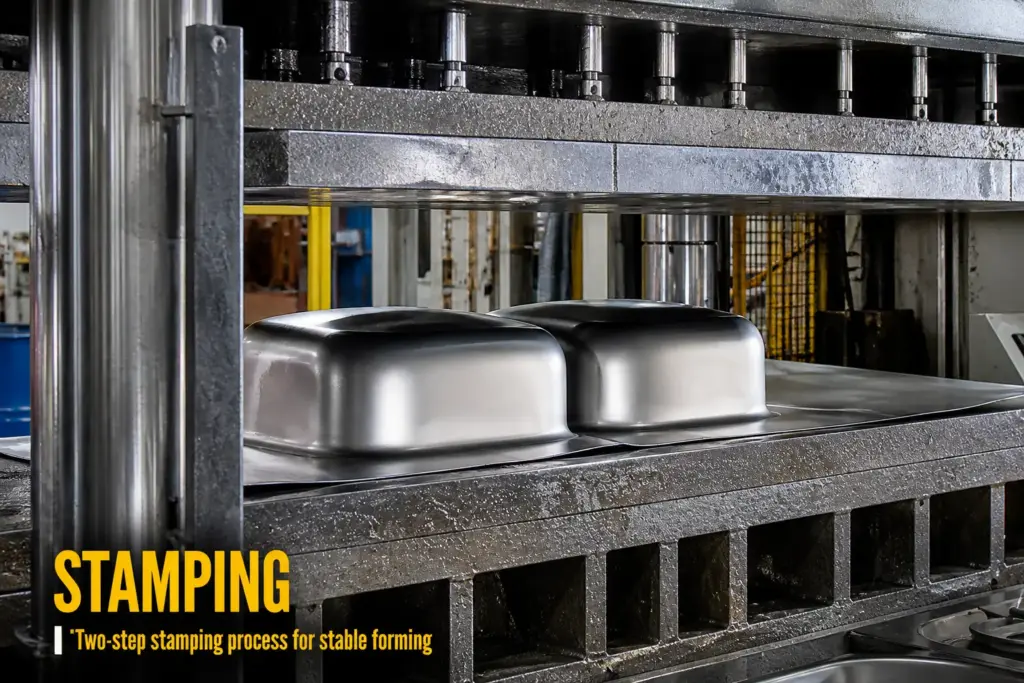
A pressed sink begins as flat stainless steel sheet and is formed through a mold.
Uneven Material Flow
Different parts of the sheet experience different strain during forming.
This can create residual stress in:
- Bowl walls
- Corners
- Bottom radii
- Faucet deck
- Flange
Springback
After the forming force is removed, the metal recovers slightly.
Uneven springback can produce:
- Long-edge bow
- Corner lift
- Diagonal twist
- Flange variation
Trimming Stress Release
The untrimmed flange can temporarily help balance the formed part.
When excess material is removed, residual stress may redistribute and change rim flatness.
Flatness should therefore be inspected after trimming.
Rim and Clip-Channel Forming
Top-mount sinks may include:
- Folded rims
- Rolled edges
- Clip channels
- Faucet decks
Uneven secondary forming can introduce local waves or different rim heights.
Tool Wear or Misalignment
A worn or misaligned tool can cause:
- One side to draw differently
- Uneven bowl height
- Asymmetrical flange shape
- Repeated corner lift
- Batch-to-batch flatness changes
Hole Punching
Faucet and accessory holes can reduce local stiffness or distort the rear deck if the area is not properly supported.
Flatness should be checked after all punching and edge-forming operations.
Explore Matrix pressed and drawn kitchen sinks.
Manufacturing Causes: Handmade Sinks
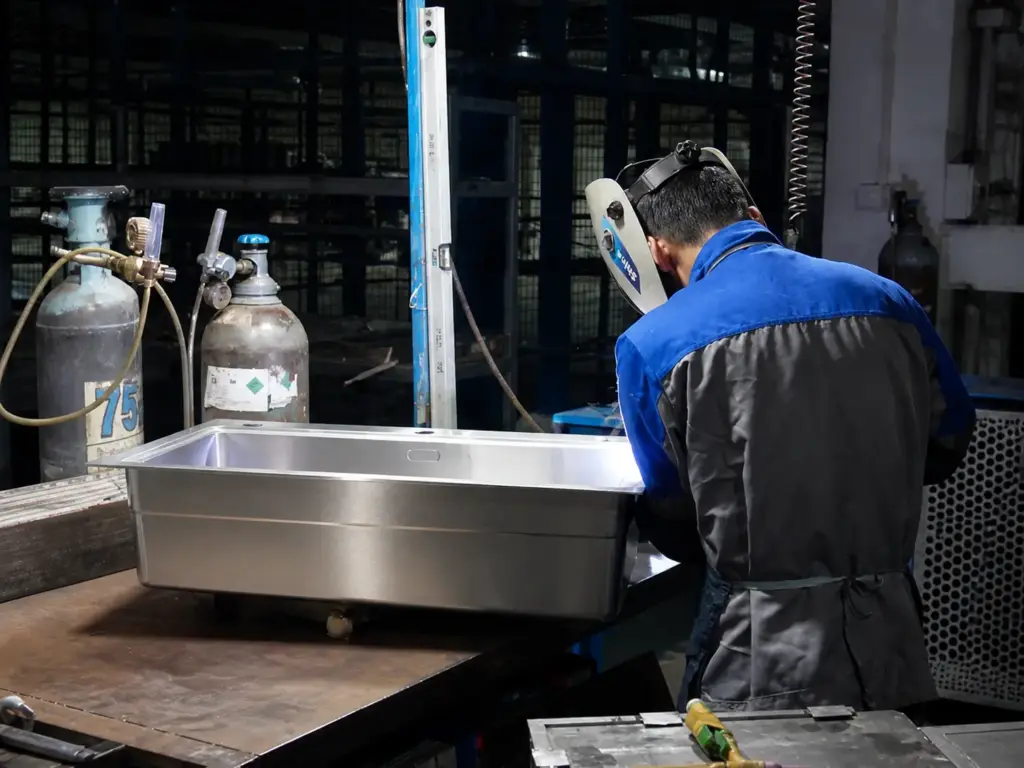
A handmade sink is cut, bent, welded, ground and finished.
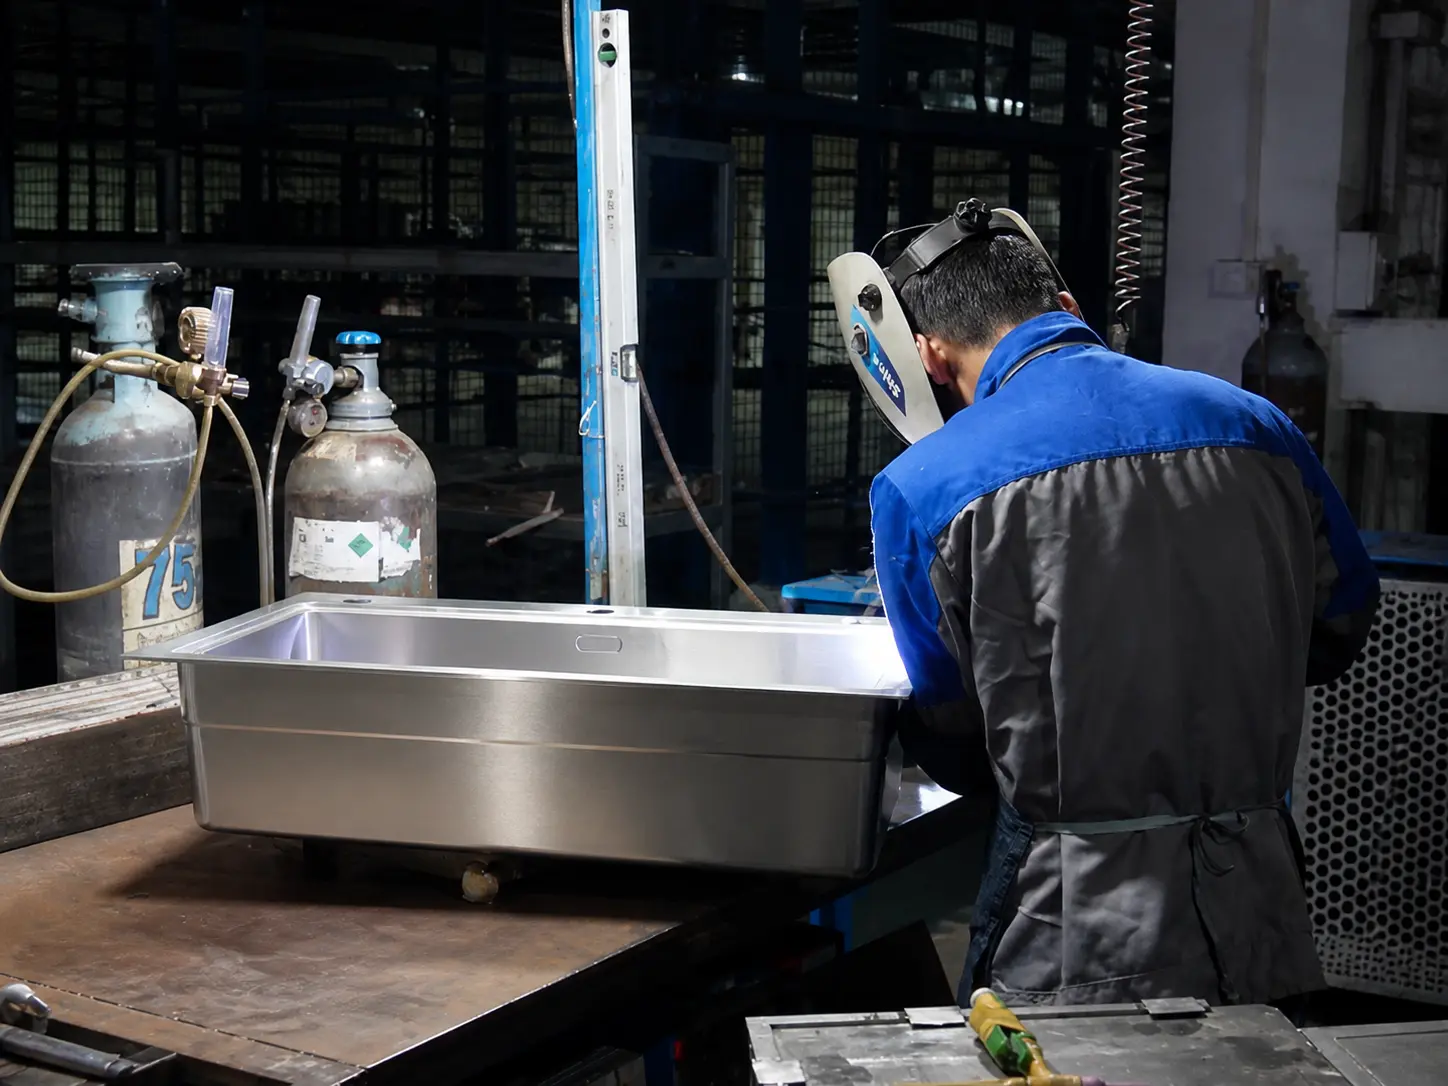
Its main flatness risk is often thermal distortion.
Welding Heat
Stainless steel expands when heated and contracts while cooling.
Uneven heating and shrinkage can pull the rim or bowl out of plane.
Welding Sequence
Long welds completed in one direction can concentrate distortion.
A controlled sequence helps balance:
- Heat input
- Cooling
- Weld shrinkage
- Structural movement
Fixturing
The sink should be held in a suitable fixture during fabrication.
The fixture must control:
- Rim plane
- Bowl squareness
- Corner position
- Workstation ledges
- Apron alignment
Fixture Removal
A sink may appear flat while clamped and move after the fixture is released.
Final inspection should be performed after:
- Welding is complete
- The sink has cooled
- Clamping force is removed
- Grinding and finishing are finished
Grinding and Polishing
Uneven finishing can remove material, generate local heat or release weld stress.
Workstation ledges and apron panels introduce additional welded structures that must be controlled with the rim.
Explore Matrix handmade kitchen sinks.
Packaging and Transport Causes
A sink can pass factory inspection and become distorted after packing.
Possible causes include:
- Heavy accessories placed against the rim
- Insufficient corner support
- Incorrect nesting
- Carton compression
- Excessive pallet-strap tension
- Vertical storage on one corner
- Impact during transport
- Mixed sink sizes stacked together
- Clip rails pressed by internal packaging
Warning Signs
Inspect for:
- Crushed carton corners
- Torn foam supports
- Rim impact marks
- Bent clip channels
- Scratches from accessories
- One corner pushed into the carton
- Deformed internal supports
For B2B programs, flatness should be reviewed after packaging trials—not only before packing.
Why a Flat Sink Does Not Sit Flat on the Countertop
The Cutout Is Too Small
The bowl or clip channel may contact the countertop before the rim reaches the surface.
This can create a large gap even when the sink itself is flat.
Check the complete perimeter—not only length and width.
The Cutout Corners Are Wrong
A sink with rounded bowl corners may require matching cutout radii.
If one corner is too tight, the sink may sit high diagonally.
The Countertop Is Uneven
Possible causes include:
- Stone fabrication variation
- Countertop seam
- Laminate swelling
- Unsupported span
- Cabinet twist
- Uneven fastening
For undermount sinks, inspect the countertop underside. It may not match the flatness of the polished top.
Old Sealant or Debris Remains
Even a small piece of cured silicone, stone dust, sawdust or adhesive can hold up one part of the rim.
The Sink Is Off-Center
The bowl, flange or clip rail may contact one side of the cutout.
Center the sink during the dry fit.
Mounting Hardware Interferes
Possible obstructions include:
- Clip tabs
- Anchor studs
- Support rails
- Cabinet braces
- Countertop reinforcement
- Faucet hardware
How Mounting Clips Affect Sink Rim Flatness
Mounting clips should hold the sink evenly against the countertop.
They are not intended to repair severe permanent distortion.
Incorrect Clip Type
Clips must match:
- Sink rail
- Countertop thickness
- Installation type
- Countertop material
A clip that is too short, too long or incorrectly shaped can apply force in the wrong direction.
Too Few Clips
Large unsupported distances can leave gaps between attachment points.
Uneven Clip Spacing
Clusters of clips can create local pull-down and leave other areas unsupported.
Incorrect Tightening Sequence
Fully tightening one side first can shift or twist the sink.
Overtightening
Excessive force can cause:
- Local rim waves
- Clip-rail deformation
- Opposite-side lift
- Countertop stress
- Excessive sealant loss
Correct General Method
Unless the sink instructions specify otherwise:
- Engage all clips first.
- Confirm the sink position.
- Tighten gradually.
- Alternate between opposing areas.
- Repeat in several passes.
- Stop when the rim is firmly seated.
Do not invent a generic torque value. Follow the hardware instructions for the exact sink.
Can Clips Flatten a Slightly Warped Sink?
They may draw down a small elastic deviation if:
- The sink is designed for that clip system.
- The required force remains normal.
- The countertop is flat.
- The rim seats continuously.
- No permanent crease or clip-rail damage exists.
Clips should not be used to correct:
- Severe twist
- A bent corner
- Transport impact
- Damaged flange
- Large long-edge bow
- Incorrect cutout
- Countertop distortion
If excessive force is required, stop the installation.
Can Silicone Fix a Raised Sink Rim?
Silicone can seal small surface irregularities. It cannot correct structural misalignment.
Correct use requires:
- Clean mating surfaces
- Continuous bead
- Suitable sealant
- Even compression
- Proper cure time
Do not use a large bead to hide:
- Permanent sink distortion
- Incorrect cutout
- Uneven countertop
- Missing clips
- Inadequate support
A thick bead can leave the sink floating above the countertop and make future removal more difficult.
Top-Mount Sink Not Sitting Flat
For a top-mount or drop-in sink, inspect the problem in this order:
- Test the uninstalled rim.
- Verify countertop flatness.
- Clean the cutout area.
- Dry-fit the sink.
- Check bowl and clip-channel clearance.
- Confirm the correct clips.
- Apply the specified sealant.
- Tighten progressively in an alternating pattern.
- Check the complete visible rim.
- Remove excess sealant.
A correctly installed top-mount rim should not leave open water-entry paths.
Explore Matrix top-mount kitchen sinks.
Undermount Sink Flange Gap
For an undermount sink, the upper flange face must fit the countertop underside.
Check:
- Flange flatness
- Countertop underside
- Cutout reveal
- Anchor position
- Support-rail position
- Sealant continuity
- Clip pressure
- Sink alignment
The support system should carry the sink safely. Sealant should not be assumed to provide the entire structural support unless the approved system explicitly requires it.
An undermount flange should not be pulled into position using extreme point loads.
Explore Matrix undermount kitchen sinks.
Farmhouse Sink Rim Gap
A farmhouse sink normally requires a level cabinet support platform.
If the support is:
- Too high on one side
- Twisted
- Uneven front to back
- Bearing on one corner
the sink can be forced against the countertop unevenly.
Level and support the sink body before final countertop contact is established.
Workstation Sink Considerations
A workstation sink has two separate alignment requirements:
- Rim or flange flatness
- Accessory-ledge alignment
A sink can have a flat rim but uneven ledges. It can also have correct ledges while the outer flange is twisted.
Both systems should be inspected independently.
When Is the Sink Probably Defective?
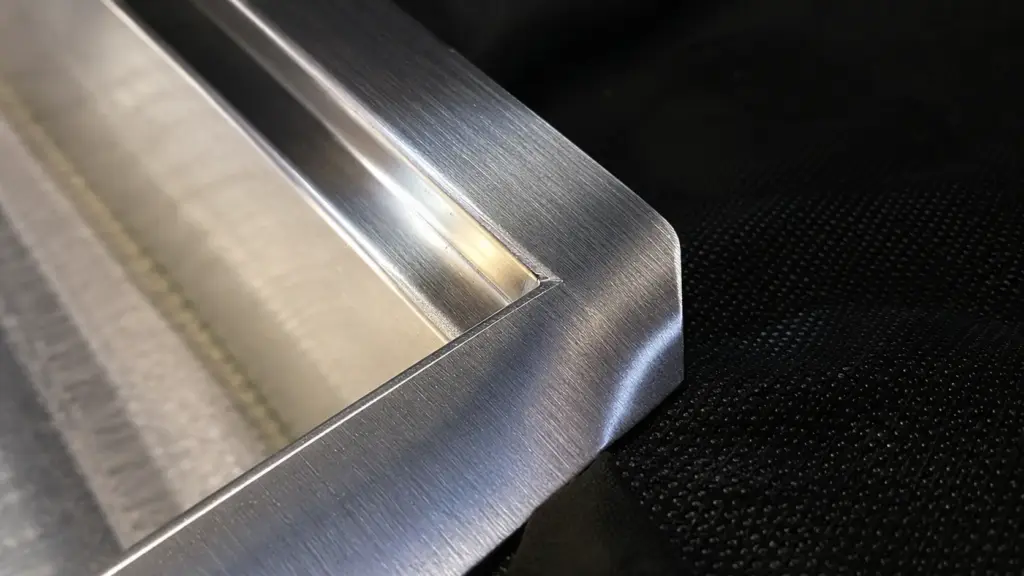
A manufacturing or transport problem is more likely when:
- The free-state mating face exceeds the agreed tolerance.
- The sink has permanent diagonal twist.
- One corner contains a visible crease.
- A clip rail is bent.
- Distortion follows a weld or formed corner.
- Multiple countertop tests produce the same raised area.
- Normal approved clips cannot seat the rim.
- Matching sinks show inconsistent free-state shape.
- The carton shows impact at the raised corner.
When Is Installation the More Likely Cause?
An installation problem is more likely when:
- The sink passes the free-state test.
- The countertop is uneven.
- The cutout contacts the bowl.
- Old sealant or debris remains.
- The gap moves during clip tightening.
- The wrong clips are used.
- One side was fully tightened first.
- An undermount support is not coplanar.
- A farmhouse support platform is twisted.
Can a Warped Stainless Steel Sink Be Repaired?
The answer depends on the severity and production stage.
Slight Installation-Related Gap
Possible corrections include:
- Cleaning the mating surface
- Correcting cutout interference
- Re-centering the sink
- Replacing incorrect clips
- Reinstalling with even tightening
- Correcting the cabinet support
Manufacturing Distortion
Factory-level correction may use controlled fixtures and appropriate forming equipment, followed by reinspection.
Severe or Finished-Product Distortion
Replacement is usually safer when the sink has:
- Permanent crease
- Severe twist
- Damaged clip rail
- Cracked finish
- PVD coating damage
- Distortion requiring excessive installation force
Do not attempt to repair a finished sink with:
- Hammering
- Torch heating
- Rapid heating and cooling
- Uncontrolled bending
- Screws used as excessive pull-down devices
These methods can create additional damage and residual stress.
Why Severe Rim Distortion Matters
Installing a badly distorted sink can cause:
- Water leakage
- Sealant failure
- Dirt accumulation
- Visible gaps
- Clip damage
- Countertop stress
- Uneven undermount reveal
- Sink movement
- Future support failure
Flatness is not only a visual issue. It affects sealing and installation reliability.
B2B Flatness Control Requires Two Specifications
A complete sink program should define both:
1. Free-State Flatness
How flat the sink must be without mounting pressure.
2. Installed-State Seating
How the sink must contact a controlled countertop fixture when installed with approved hardware.
These two tests answer different questions.
A sink may have a small free-state bow but seat correctly under normal clip force. Another sink may appear flat until clips introduce twist.
Both conditions should be controlled.
Copyable B2B Rim Flatness Specification
Product Definition
- Sink model: ______
- Installation type: ______
- Material and thickness: ______
- Drawing revision: ______
- Defined mating face: ______
- Approved clip or support system: ______
Free-State Flatness Test
- Reference fixture: Drawing ______
- Sink support points: ______
- Bowl or undercoating contact permitted: No
- External clamping force: None
- Maximum permitted straight-edge gap: ______ mm
- Maximum permitted diagonal rocking: ______ mm
- Measurement locations: ______
- Measurement tool: ______
- Measurement stage: Finished product before packing
Installed-State Seating Test
- Countertop test fixture: ______
- Clip type: ______
- Clip quantity: ______
- Clip spacing: ______
- Tightening sequence: ______
- Maximum permitted seating gap: ______ mm
- Excessive local deformation permitted: No
- Continuous sealing contact required: Yes
Workmanship Requirements
- Permanent corner crease: Not permitted
- Bent clip rail: Not permitted
- Crack: Not permitted
- Sharp edge: Not permitted
- Visible transport distortion: Not permitted
- Local rim waviness limit: ______
Packaging Verification
- Rim protection required: Yes
- Accessories allowed to contact rim: No
- Nesting method: ______
- Pallet-strapping control: ______
- Post-packaging flatness test: Yes / No
- Transport trial required: Yes / No
The actual limits should be developed for the individual sink and mounting system.
B2B Flatness Inspection Process
After Main Forming
Identify mold-related bow or springback.
After Trimming and Rim Forming
Check whether stress release has changed the flange.
After Welding
For handmade sinks, inspect after cooling and fixture removal.
After Brushing and Polishing
Confirm that finishing has not introduced visible distortion.
After Hole Punching
Inspect faucet decks and nearby rim areas.
At Final Assembly
Confirm clip rails, flanges and accessories.
After Packaging Trial
Verify that internal supports and pallet loads do not distort the sink.
During Repeat Orders
Record:
- Batch number
- Gap measurements
- Deformation type
- Measurement location
- Packaging condition
- Corrective action
Flatness data should be repeatable—not based only on visual judgment.
Manufacturing Controls That Reduce Rim Distortion
Pressed Sink Controls
- Stable incoming sheet
- Controlled blank orientation
- Balanced forming
- Mold alignment
- Controlled trimming
- Consistent edge forming
- Tool-maintenance records
- Free-state flatness inspection
Handmade Sink Controls
- Balanced welding sequence
- Controlled heat input
- Rigid fixturing
- Cooling before release
- Controlled grinding
- Rim and ledge inspection
Packaging Controls
- Reinforced rim corners
- Accessories isolated from the sink
- Controlled nesting pressure
- Balanced carton supports
- Controlled pallet straps
- Post-packaging verification
How Matrix Supports Rim Flatness Control
Matrix manufactures and supplies pressed, handmade, top-mount and undermount stainless steel sinks for importers, distributors, private-label brands and project buyers.
Depending on the program, Matrix can review:
- Rim and flange design
- Pressed-sink forming
- Handmade-sink welding
- Free-state flatness
- Installed seating
- Clip system
- Countertop cutout
- Installation template
- Workstation ledges
- Surface finish
- Packaging protection
- Batch inspection requirements
Related Matrix resources include:
- Pressed and drawn kitchen sinks
- Handmade kitchen sinks
- Top-mount kitchen sinks
- Undermount kitchen sinks
- Stainless steel sink manufacturing
For an OEM, wholesale or project program, send the sink model, installation type, mating-surface definition, flatness requirement and packaging plan to contact Matrix.
Final Recommendation
If a new stainless steel sink rim is not flat, do not immediately tighten the clips harder or add more silicone.
Use this order:
- Identify the actual countertop mating face.
- Test the sink in its free state.
- Measure bow, twist or waviness.
- Inspect the countertop separately.
- Dry-fit without sealant.
- Check cutout and hardware interference.
- Install with the correct clips.
- Tighten gradually in an alternating sequence.
- Stop if excessive force is required.
- Replace or professionally review a severely distorted sink.
A small controlled elastic deviation may seat correctly with the intended mounting system. Permanent twist, damaged corners and large structural gaps should not be hidden during installation.
Frequently Asked Questions
Why is one corner of my new sink raised?
Possible causes include sink twist, transport damage, countertop unevenness, a tight cutout corner or uneven clip tightening.
Is a stainless steel sink supposed to be completely flat?
It should meet the flatness required for its design and seat evenly using the specified mounting system. Zero measurable free-state deviation is not a universal requirement.
How do I know whether the sink or countertop is uneven?
Test the uninstalled sink on a controlled fixture, inspect the countertop separately and then perform a dry fit without sealant.
Can I use a spirit level to test sink-rim flatness?
Not by itself. A level checks horizontal orientation, not local flatness or diagonal twist.
Can clips flatten a slightly bowed sink rim?
They may draw down a small elastic bow when used with the intended sink and countertop. They should not correct severe permanent distortion.
Can overtightening clips make the rim worse?
Yes. Excessive local force can create waves, twist, clip-rail damage or countertop stress.
Can silicone fill a gap under the sink rim?
Silicone can seal minor surface variation. It should not hide a large structural gap or replace proper support.
Can a cutout that is too small lift the sink?
Yes. The bowl, rim transition or clip channel may contact the cutout before the mating face reaches the countertop.
Why is my drop-in sink not sitting flat?
Common causes include cutout interference, old sealant, an uneven countertop, incorrect clips, sink distortion or uneven tightening.
Why does my undermount sink flange have a gap?
The flange, countertop underside, support system, anchors or sealant may be uneven. Inspect each separately.
Why do pressed sink rims warp?
Residual forming stress, springback, trimming, edge forming, hole punching and mold alignment can affect the rim.
Why do handmade sink rims warp?
Welding heat, cooling shrinkage, fixture release, grinding and polishing can distort fabricated stainless steel.
Can shipping warp a stainless steel sink?
Yes. Corner impacts, nesting pressure, accessories and tight pallet straps can distort a finished sink.
Should I hammer a raised corner flat?
No. Hammering, heating or uncontrolled bending can damage the sink and create additional stress.
Is there one universal sink-rim flatness tolerance?
No. The permitted limit should be defined for the sink design, mating face, installation type and mounting system.
Should flatness be inspected after packaging?
Yes. Packaging and transport loads can distort a sink that previously passed production inspection.