Water pooling is not always a drain problem. For buyers and QC teams, the first step is to separate sink geometry, drain assembly and installation before deciding whether the sink itself is defective.
Quick Answer
Water usually pools in a kitchen sink for one of four reasons:
- a local low spot in the bowl
- insufficient or uneven bottom slope
- a drain flange sitting higher than the surrounding bowl surface
- the sink or countertop being installed out of level
These causes can create very similar symptoms.
A sink should therefore not be rejected based on a photo of standing water alone.
For a proper investigation, first check:
- whether the sink is level
- where the water actually remains
- whether the drain flange is proud of the bowl surface
- whether the same pooling pattern appears on multiple sinks from the batch
Water pooling is a symptom. The sourcing decision depends on identifying the actual low point that created it.
First: Droplets Are Not the Same as Pooling
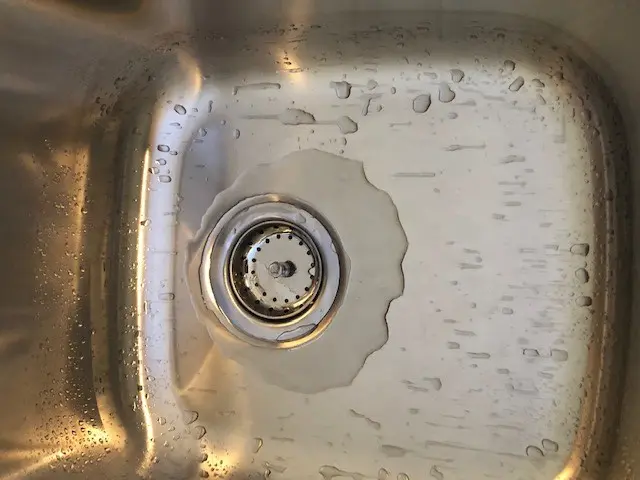
After draining, a stainless steel sink will normally retain some:
- droplets
- thin water film
- moisture around corners
because of surface tension and the sink’s surface condition.
That is different from a visible puddle that repeatedly remains in the same area.
For QC and claim review, distinguish between:
Surface Water
Small droplets or a thin film remaining across the bowl.
Local Pooling
A defined area where water collects because that point is lower than the surrounding drainage path.
The second condition deserves further investigation.
1. Local Low Spots Are a Common Cause
A sink does not need to have an obviously flat bottom to hold water.
Even a small local depression can create a point that sits lower than the path toward the drain.
Water then follows:
surrounding surface → local low point
instead of:
surrounding surface → drain
Possible causes depend on the manufacturing route.
Pressed / Drawn Sink
Local geometry can be influenced by:
- mold shape
- forming distribution
- bottom geometry
- secondary forming
- residual forming stress
Handmade Sink
Local geometry can be influenced by:
- sheet fabrication
- welding
- grinding
- bottom-panel distortion
- assembly flatness
This is why a pooling claim should be reviewed against the actual production method rather than treated as one generic sink problem.
For the manufacturing differences, see Stainless Steel Sink Manufacturing.
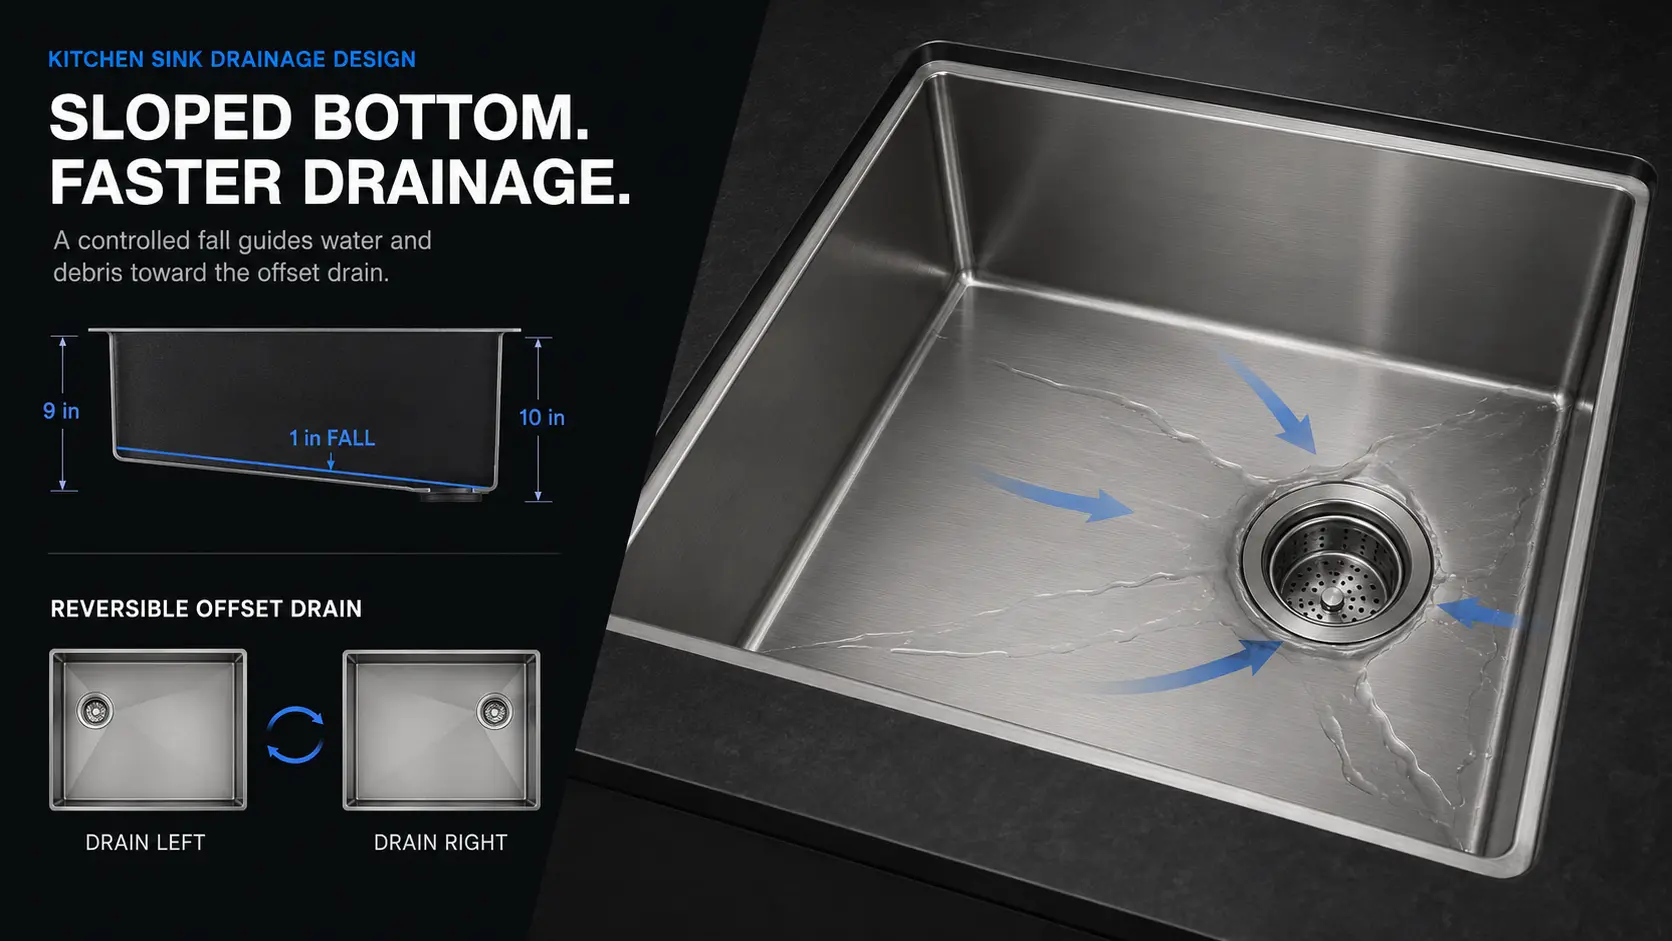
2. The Bowl May Not Have Enough Effective Slope
A sink bottom does not need to look steep to drain.
But there must be a continuous drainage path toward the drain.
Problems can occur when:
- slope is too shallow
- the slope changes direction
- one area becomes flatter than intended
- the lowest point is not at the drain
The important word is effective slope.
A bowl may appear to slope visually while still containing one local area that sits lower than the path to the drain.
3. X-Grooves Do Not Automatically Solve Drainage
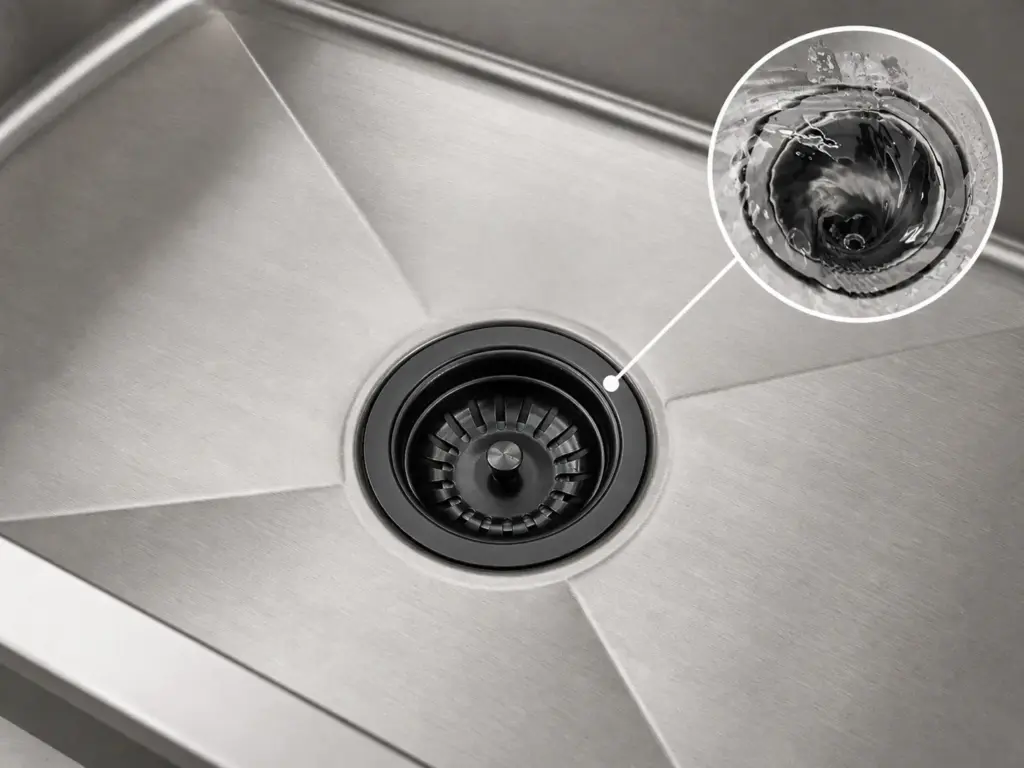
X-grooves are often used to visually or physically guide water toward the drain.
But grooves cannot compensate for incorrect bowl geometry.
If the sink has:
- a local low spot
- insufficient bottom slope
- an elevated drain flange
- an out-of-level installation
adding stronger X-grooves does not necessarily remove the root cause.
For buyers, the better question is:
Does the finished bowl have a continuous drainage path to the drain?
not:
Does the sink have X-grooves?
4. Check the Drain Flange Height
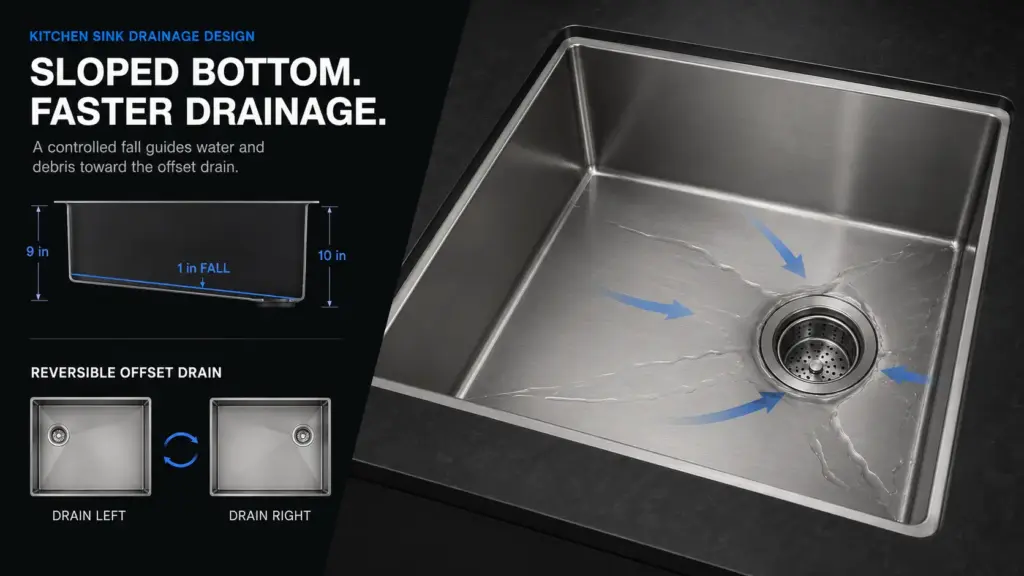
This is one of the most overlooked causes of apparent water pooling.
The drain opening may be correctly positioned, but the installed strainer flange can sit slightly above the surrounding sink bottom.
Water can then reach the drain area but remain trapped behind the flange edge.
Think of it as a small barrier:
bowl surface → raised drain flange → drain opening
If the flange is the highest point immediately around the drain, residual water can remain even when the bowl geometry itself is acceptable.
Before rejecting the sink, check:
- drain-hole geometry
- strainer flange thickness
- gasket position
- assembly method
- whether the flange sits flush with the intended drain seat
5. Installation Level Can Create the Same Symptom
A correctly formed sink can appear to drain poorly if it is installed out of level.
This can come from:
- countertop level
- cabinet support
- mounting pressure
- uneven clips
- uneven adhesive
- sink rim distortion
- incorrect support
For example, if the whole sink tilts slightly away from the drain, water may collect on the opposite side.
That is why drainage should ideally be checked:
before installation
and, if a field claim occurs:
again after checking installation level.
Matrix’s Kitchen Sink Installation Guides cover the installation details that should be confirmed before a sink is judged only by its installed condition.
6. Rim Flatness Can Affect Bowl Orientation After Installation
Overall dimensions can pass inspection while the sink still does not sit evenly.
This is especially relevant to:
- handmade sinks
- top-mount sinks
- large workstation sinks
If the rim or flange is distorted, installation pressure may pull the sink into a slightly different orientation.
That can change how water behaves inside the bowl.
Therefore:
correct length and width do not automatically prove correct installed drainage.
For installation-sensitive programs, rim flatness should be part of the inspection plan.
7. Drain Position and Bowl Geometry Must Work Together
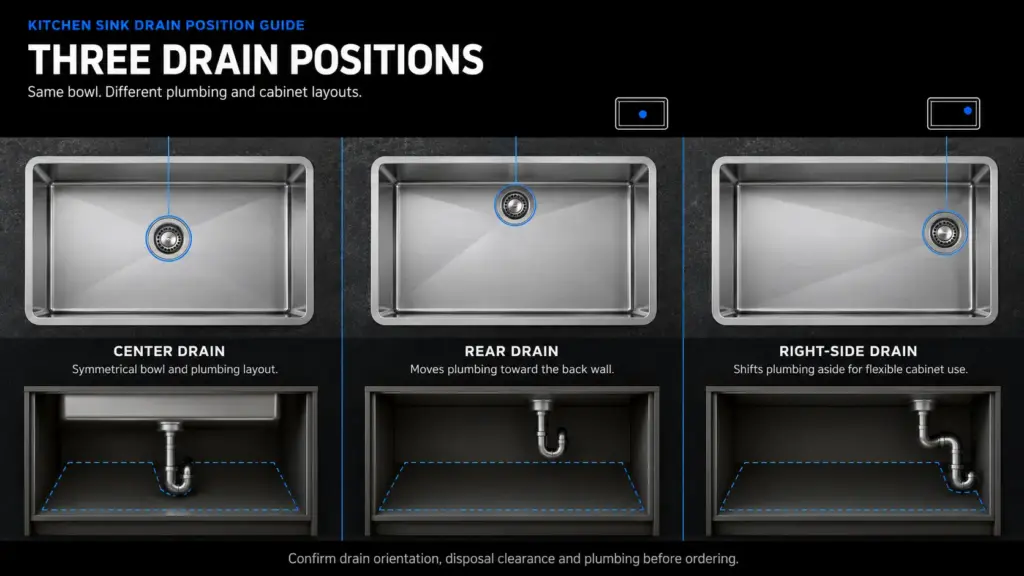
Drain position should not be treated as an isolated hole location.
The sink bottom is designed around a drainage path.
Changing the drain from:
- center
- rear center
- rear left
- rear right
can affect how the bottom geometry should direct water.
This is particularly important when modifying an existing design.
A buyer should not assume:
move the drain first, keep everything else unchanged.
For custom projects, drain location should be frozen in the approved drawing before production.
8. Pressed Sinks: Check Whether the Pattern Repeats
For a pressed sink claim, one important question is:
Does the same low spot appear in the same location across multiple units?
If several sinks show the same pooling pattern, investigate:
- mold geometry
- forming setup
- secondary forming
- trimming / rim condition
- repeatable bottom deformation
If only one unit shows the issue, the investigation may shift toward:
- isolated deformation
- handling
- transport
- installation
Repeatability helps distinguish:
process-related geometry
from:
single-unit variation.
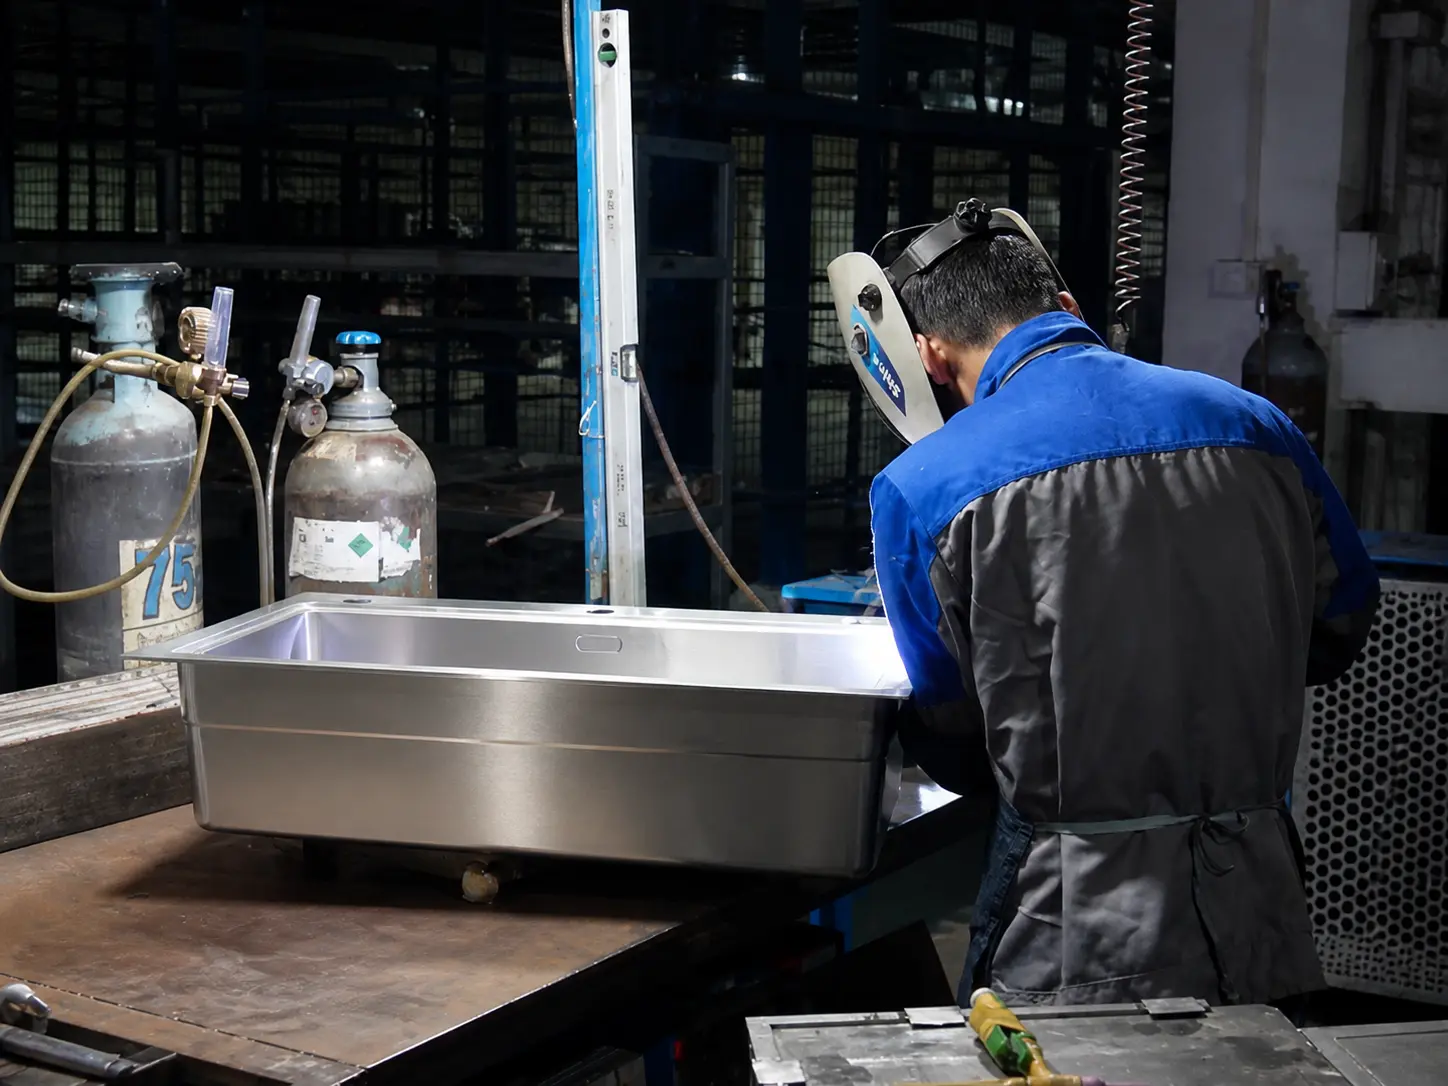
9. Handmade Sinks: Check Fabrication and Welding Distortion
For handmade sinks, the drainage surface is created through fabrication rather than one-piece deep drawing.
The QC team should consider:
- bottom-panel flatness
- welded corner geometry
- heat distortion
- grinding
- rim flatness
- bowl assembly
A bowl can meet overall dimensions but still contain a local low point created during fabrication.
For custom handmade programs, drainage geometry should therefore be reviewed on the physical sample before repeat production.
10. Do Not Diagnose Pooling from One Photo
A customer photo can show:
water is present here.
It cannot prove:
why water is present there.
Before making a supplier claim, collect:
- sink model
- production batch
- photo of the complete bowl
- close-up of the pooled area
- drain assembly photo
- installation-level check
- quantity affected
- whether unused units show the same behavior
This makes root-cause analysis much more reliable.
A Practical Water Pooling Investigation
A buyer or QC team can use the following sequence.
Step 1 — Check the Sink Without Assuming the Cause
Identify:
- exact pooling location
- size of the puddle
- whether the pattern repeats
Step 2 — Check Level
Use an appropriate level reference to determine whether:
- countertop is level
- sink rim is level
- bowl orientation has been changed by installation
Step 3 — Check the Drain Assembly
Look at:
- flange height
- gasket
- strainer fit
- drain-seat geometry
Step 4 — Check the Bowl Surface
Look for:
- local low spots
- reversed slope
- flat areas
- visible deformation
Step 5 — Compare Multiple Units
If possible, compare:
- approved sample
- current production
- affected unit
- unaffected unit
The pattern matters more than one isolated photo.
Water Pooling Root-Cause Table
| Symptom | Possible Cause | What to Check |
|---|---|---|
| Water stays in one corner | Local low spot | Bowl geometry / surface level |
| Water remains opposite drain | Sink installed out of level | Countertop and rim level |
| Water reaches drain but stops around it | Raised drain flange | Drain seat and strainer |
| Same location pools across multiple units | Production geometry | Mold / forming / fabrication |
| Only one installed sink pools | Installation or isolated distortion | Level, rim, handling |
| Small droplets remain everywhere | Surface tension | Usually not local pooling |
| Water follows grooves but still stops | Low spot or drain barrier | Bottom geometry / flange |
Should a Sink Drain Completely Dry?
Not necessarily.
A stainless steel sink should not be evaluated on whether every visible droplet disappears.
The practical concern is whether there is:
repeatable standing water caused by a local geometry or installation condition.
For B2B approval, the acceptance requirement should be defined before production if drainage performance is commercially critical.
Do not create an acceptance rule only after a customer complaint appears.
How Buyers Should Approve Drainage on a Sample
For projects where drainage is important, sample approval can include:
- sink installed or positioned level
- approved drain assembly
- water drainage observation
- check for repeatable local puddles
- rim flatness review
- photos or video of the approved result
The goal is not to create an unnecessarily complicated test.
It is to establish:
what the approved drainage condition looks like before mass production begins.
Repeat Orders Should Use the Same Reference
If the first sample is approved without recording drainage condition, later claims become harder to resolve.
For repeat programs, retain:
- approved drawing
- drain position
- drain component
- golden sample
- drainage reference if relevant
- inspection photos
Matrix’s Quality Control & Inspection explains how drawings, samples, accessories and packing references can be carried into repeat-order inspection.
What Should Buyers Put in the RFQ?
For a standard sink, buyers do not normally need to write a complicated drainage specification.
But for a custom project, clarify:
- bowl dimensions
- bowl depth
- drain position
- drain-hole diameter
- drain component
- installation type
- workstation configuration if applicable
If the project has a specific drainage requirement, communicate it before drawing approval.
The Kitchen Sink RFQ Checklist can be used to define these details before quotation.
Custom Sink Development: Do Not Move the Drain in Isolation
For a custom sink, changing one detail can affect another.
For example:
move drain rearward
may also affect:
- bowl slope
- bottom grid
- disposal clearance
- cabinet space
- workstation accessories
This is why Matrix reviews custom sink dimensions, installation and drain configuration as part of the same product program rather than treating each feature separately.
See Custom Kitchen Sink Programs for the broader development process.
Common Buyer Misdiagnoses
“Water is pooling, so the sink must have the wrong slope.”
Not necessarily.
First check:
- local low point
- drain flange
- installation level
“The sink has X-grooves, so drainage should be perfect.”
Not necessarily.
Grooves cannot correct every geometry or installation issue.
“The drain is in the correct position, so it cannot be the drain.”
The drain center may be correct while the flange sits too high.
“The sink dimensions passed inspection, so installation cannot be the cause.”
Overall dimensions do not prove rim flatness or installed level.
“One customer photo proves the whole batch is defective.”
No.
Compare the affected unit with other units from the same production batch before deciding whether the cause is systematic.
Buyer Takeaway
When a sink holds water, do not start with:
“The sink is defective.”
Start with four checks:
Local Low Spot → Bowl Slope → Drain Flange → Installation Level
Then determine whether the pattern is:
- model-related
- batch-related
- single-unit
- installation-related
The most useful question is not:
“Why is there water in the sink?”
It is:
“Where is the actual lowest point, and why is it lower than the intended drain path?”
Frequently Asked Questions
Why does water pool in one corner of a kitchen sink?
A local low spot, uneven bowl slope or an out-of-level installation can make one corner lower than the path toward the drain.
Can a drain flange cause water pooling?
Yes. If the strainer flange sits above the surrounding bowl surface, it can create a small barrier that prevents residual water from reaching the drain opening.
Can installation cause a sink to drain poorly?
Yes. If the countertop, rim or sink is installed out of level, water can move toward the wrong side of the bowl.
Do X-grooves guarantee better drainage?
No. They can help guide water, but they cannot compensate for a local low spot, incorrect bowl geometry, a raised drain flange or an out-of-level installation.
Is standing water always a manufacturing defect?
No. Manufacturing geometry is one possible cause, but drain assembly and installation should also be checked.
How should buyers inspect a water pooling complaint?
Check the sink level, exact puddle location, drain flange, bowl geometry and whether the same pattern appears on several units from the same batch.
Should drainage be checked during sample approval?
For projects where drainage performance is important, yes. Establishing an approved reference makes repeat-order and claim evaluation much easier.
Investigating a Sink Drainage Issue?
Send the sink drawing, drain configuration and photos showing the pooling location and installation condition.
Matrix can help review whether the issue is more likely related to sink geometry, drain assembly or installation before the product is changed.