Workstation sink accessories are not universally interchangeable.
A cutting board, colander or roll-up rack may look approximately the right size and still rock, jam, rub the finish or fall into the bowl. Correct fit depends on the workstation ledge—not simply the sink’s advertised width.
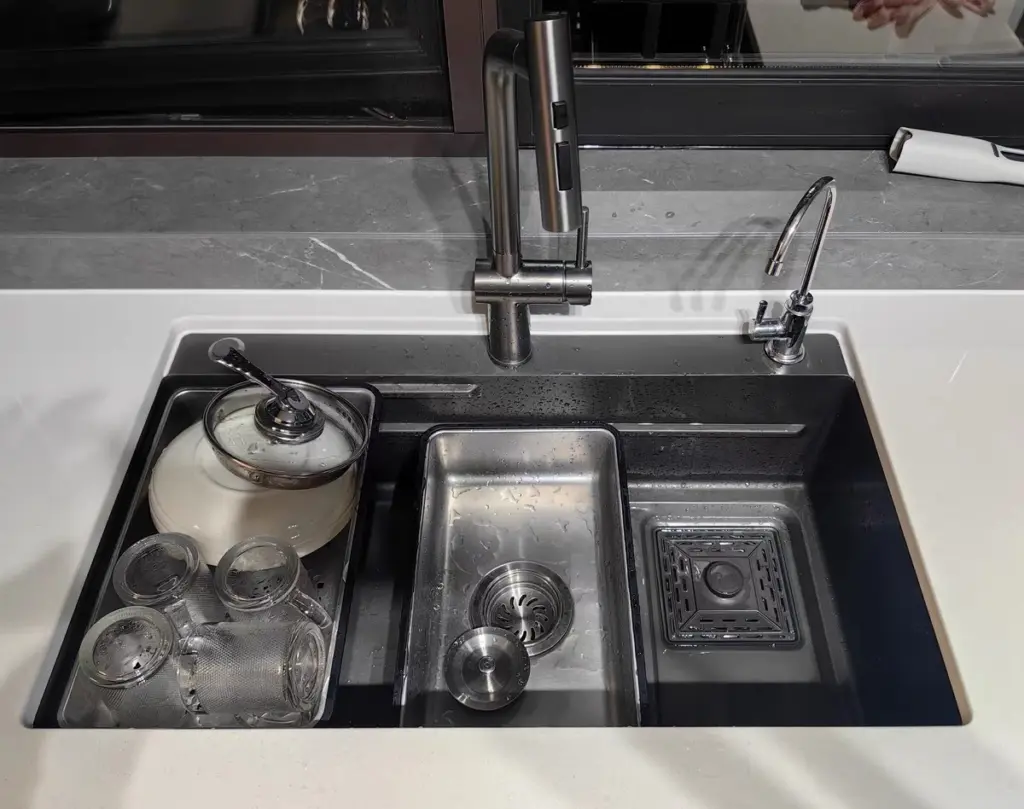
To match an accessory correctly, confirm:
- The exact sink model
- The ledge level being used
- The unsupported opening between the ledges
- The available space at ledge level
- The accessory’s bridging dimension
- The support overlap on both sides
- The corner radius
- The sliding clearance
- The intended load and function
The most reliable replacement is an accessory approved for the exact sink model. If the original part is unavailable, measure the ledge system rather than ordering by nominal sink size.
Quick Answer: Are Workstation Sink Accessories Universal?
No. Most workstation sink accessories are model-specific or system-specific.
Two sinks can both be sold as 30-inch workstation sinks while having different:
- Internal bowl dimensions
- Ledge positions
- Ledge widths
- Corner radii
- Wall angles
- Accessory tiers
- Drain locations
- Manufacturing tolerances
A cutting board designed for one 30-inch sink may be too short, too long or too wide for another.
The word “universal” is meaningful only when an accessory provides:
- An adjustable fit range
- A clearly stated minimum and maximum sink opening
- A support method suitable for the sink
- Enough overlap at every approved adjustment
Appearance and nominal sink size are not proof of compatibility.
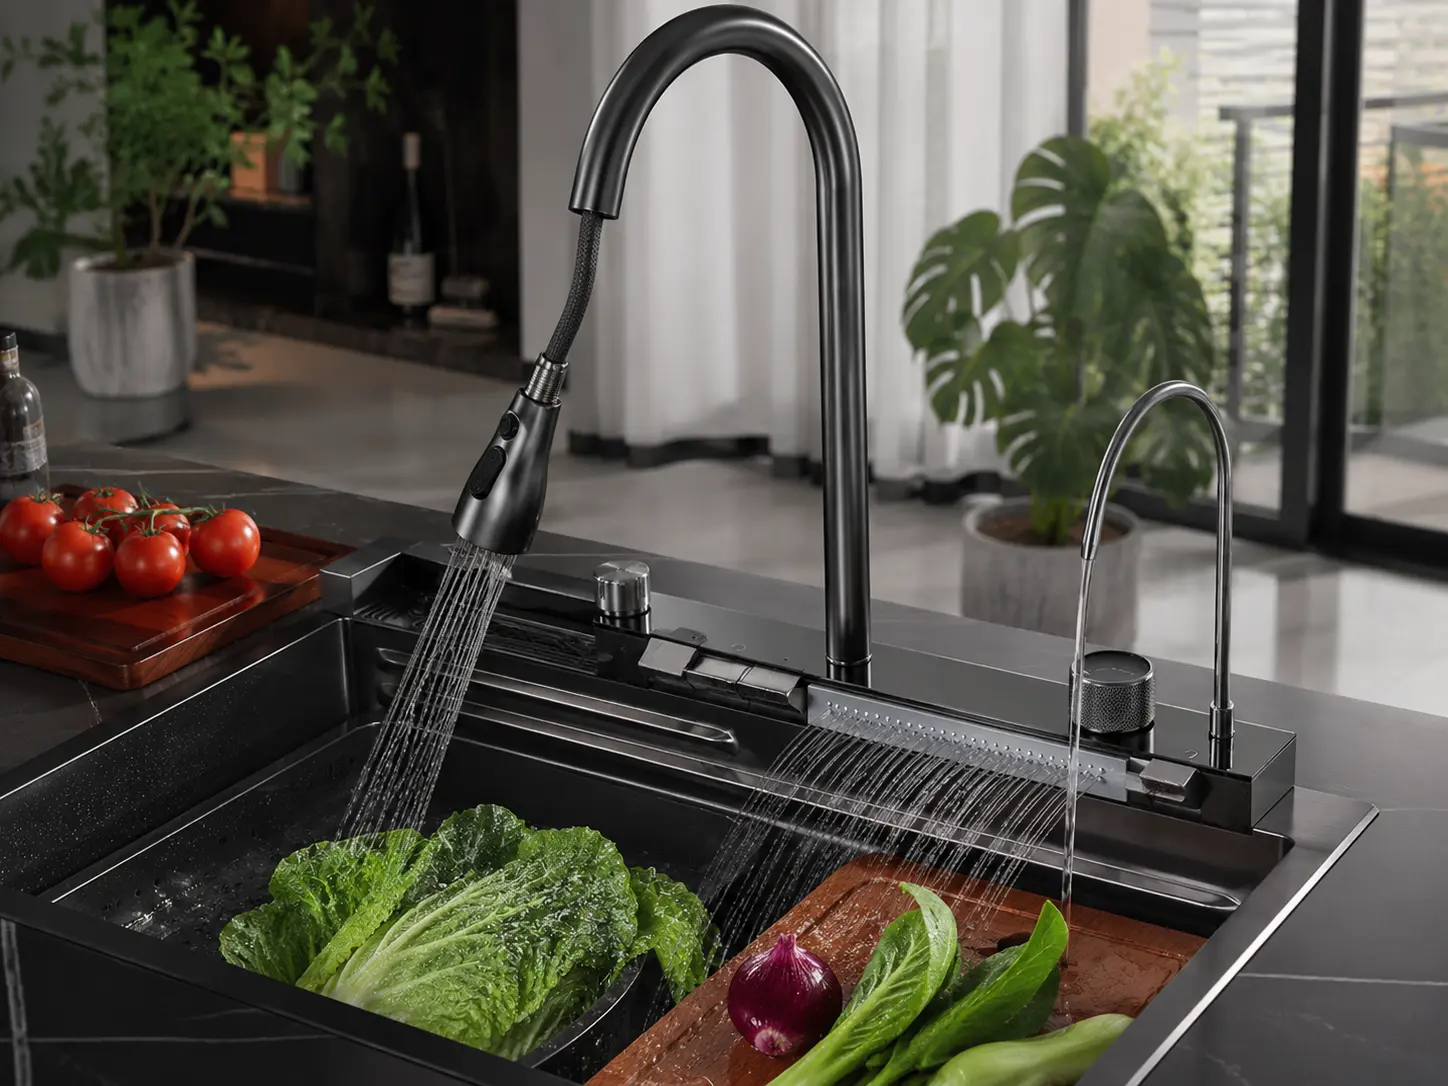
A Workstation Sink Is an Accessory System
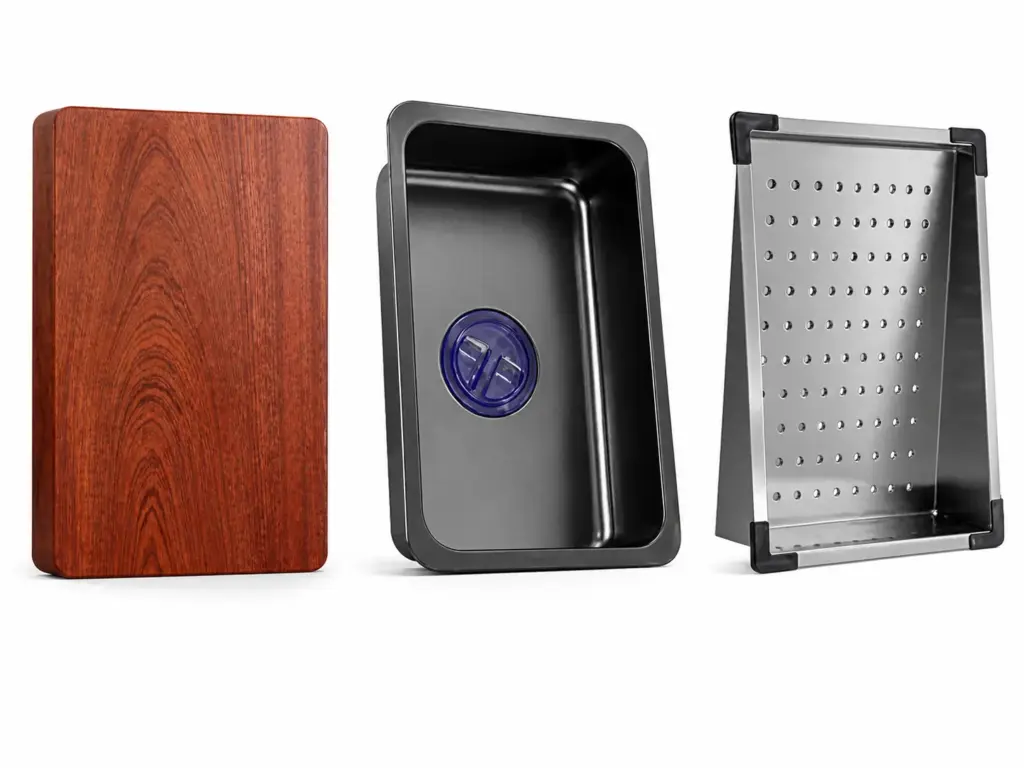
A true workstation sink has one or more integrated ledges that support accessories over or inside the bowl.
Common workstation accessories include:
- Cutting board
- Colander
- Rinsing basket
- Roll-up drying rack
- Drainboard
- Prep tray
- Soaking container
- Bottom grid
- Drain cover
These accessories do not all fit the same part of the sink.
Ledge-Supported Accessories
These bridge the bowl and rest on two opposing ledges:
- Cutting boards
- Colanders
- Baskets
- Roll-up racks
- Drainboards
- Prep trays
Bowl-Supported Accessories
These sit inside the sink rather than on the workstation ledge:
- Bottom grids
- In-sink racks
- Drain covers
- Basin protectors
A bottom grid therefore cannot be matched using the same measurements as a workstation cutting board.
Why Nominal Sink Width Does Not Determine Accessory Fit
A “30-inch workstation sink” usually describes an overall product dimension. It does not describe the accessory-support span.
The same nominal sink width can contain different combinations of:
- Rim width
- Flange width
- Bowl wall thickness
- Bowl opening
- Ledge profile
- Internal corner radius
- Fabrication method
The accessory may bridge the front and rear ledges while sliding from left to right. In this arrangement, its critical fit dimension is normally related to the front-to-back bowl opening—not the advertised left-to-right sink width.
This is why searching for a “30-inch sink cutting board” is often the wrong approach.
The better search is:
Which cutting board fits this exact workstation sink model and ledge?
Understand the Three Dimensions That Control Ledge Fit
A workstation accessory has to be large enough to rest on both ledges but small enough to enter the available space.
Three dimensions control this relationship.
1. Unsupported Opening
This is the clear distance between the inside edges of the two supporting ledges.
The accessory must be longer than this opening. Otherwise, it can fall between the ledges.
2. Available Ledge-Level Space
This is the available distance between the opposing walls, shoulders or upper restrictions at the height where the accessory will sit.
The accessory must be smaller than this space. Otherwise, it may jam or fail to drop onto the ledges.
3. Accessory Bridging Dimension
This is the overall accessory dimension that spans from one support ledge to the other.
For a typical workstation cutting board, this is often the front-to-back board dimension. The other dimension determines how much space the board occupies as it slides left to right.
The fit condition is therefore:
- Long enough to overlap both ledges
- Short enough to fit between the surrounding walls
- Clear enough to slide
- Stable enough not to rock or tip
There is no single universal clearance or overlap value. The required amount depends on the accessory material, thickness, intended load and ledge design.
The Engineering Logic Behind a Safe Fit
Let:
- O = unsupported opening between the inside ledge edges
- P = available space at the accessory’s seating level
- A = accessory bridging dimension
The accessory must satisfy two conditions:
A must be greater than O so that the accessory rests on both ledges.
A must be smaller than P so that the accessory can enter and move within the ledge area.
If the ledges are symmetrical, the approximate support overlap on each side is:
Support overlap per side = (A − O) ÷ 2
This formula is useful for understanding fit, but it is not a universal design specification. The required overlap should be established according to the accessory structure and intended use.
A heavy cutting board used with knives needs a different stability assessment from a lightweight drying mat.
Why One Measurement Is Not Enough
Sink walls and workstation ledges may not be perfectly parallel along the complete bowl.
Measure the support span at:
- Left side
- Center
- Right side
Use the largest unsupported opening when checking minimum accessory length.
Use the smallest available ledge-level space when checking maximum accessory length.
This matters because an accessory can fit at one end of the sink but jam when it slides toward the other end.
Single-Tier vs Dual-Tier Workstation Sinks
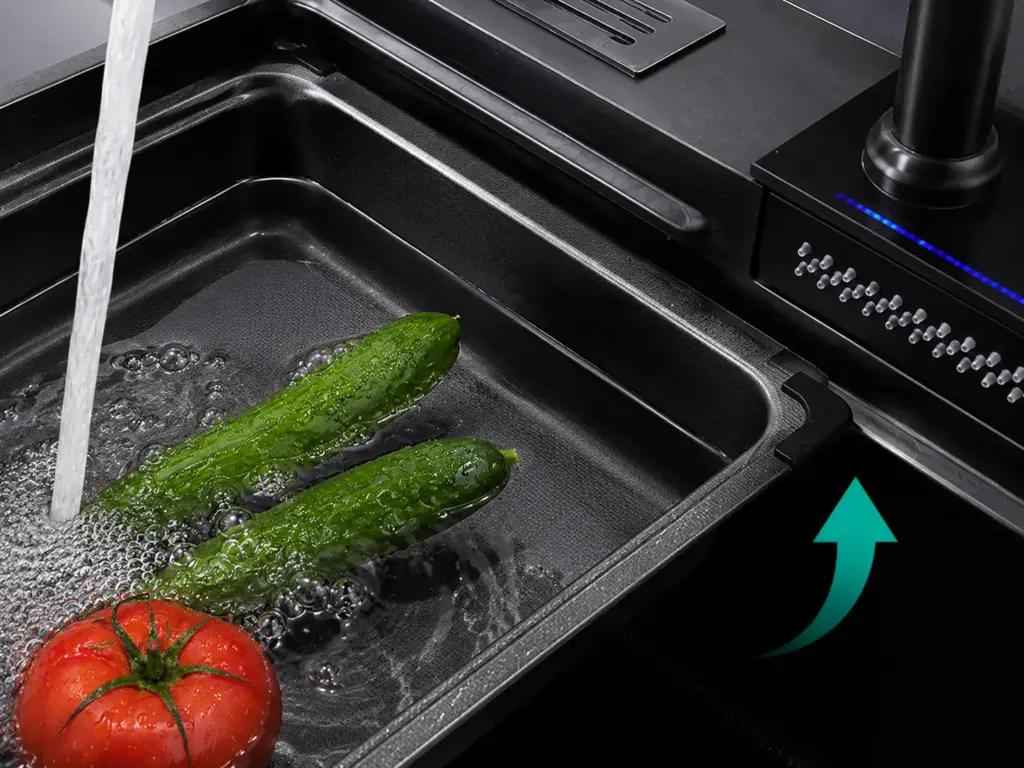
Some workstation sinks have one accessory ledge. Others use two or more levels.
Single-Tier Workstation
All ledge-supported accessories use the same working level.
Advantages include:
- Simpler accessory matching
- Easier replacement
- Fewer vertical-clearance conflicts
However, accessories placed on the same level may block each other.
Dual-Tier Workstation
A dual-tier sink has an upper and lower accessory level.
This can allow:
- Cutting board above a colander
- Drying rack above a prep tray
- Multiple accessories to operate simultaneously
- Accessories to slide past each other on separate levels
But an accessory designed for the upper tier may not fit the lower tier.
The two levels can have different:
- Support spans
- Available widths
- Corner geometry
- Ledge depths
- Load expectations
- Accessory thickness limits
Always identify which tier the replacement accessory is designed to use.
How to Measure a Workstation Sink for Replacement Accessories
Remove all accessories, clean the ledges and measure the bare sink.
Use a rigid tape measure or suitable measuring tool. For more accurate B2B sample approval, use calibrated measuring equipment.
Step 1: Identify the Exact Sink Model
Look for:
- Product label
- Model number
- Order confirmation
- Technical drawing
- Installation manual
- Original accessory part number
Model identification is more reliable than measuring alone.
Step 2: Identify Every Accessory Ledge
Look for horizontal shoulders along the front and rear walls of the bowl.
If the sink has multiple tiers, label them:
- Upper ledge
- Lower ledge
- Bowl bottom
Do not measure from the countertop, sink rim or undermount flange unless the accessory is designed to rest there.
Step 3: Measure the Unsupported Opening
Measure between the inside edges of the two ledges.
Record the measurement at the left, center and right sides of the bowl.
| Position | Unsupported Opening |
|---|---|
| Left | ______ |
| Center | ______ |
| Right | ______ |
Use the largest result when checking whether the accessory has enough support overlap.
Step 4: Measure the Available Space at Ledge Level
Measure the maximum accessory space between the opposing walls or shoulders at the exact seating height.
Record the smallest result. This is the dimension most likely to cause binding.
Step 5: Measure the Ledge Seat Width
Measure how much horizontal surface is available on each ledge.
Record the front and rear ledges separately.
A narrow ledge provides less bearing area and may require more precise accessory dimensions.
Step 6: Measure the Sliding Distance
Measure the usable left-to-right travel area.
Include possible obstructions such as:
- Bowl corner radius
- Divider
- Drain-cover structure
- Sidewall steps
- Secondary ledge
- Faucet deck projection
This determines the accessory’s width and how far it can slide.
Step 7: Measure the Corner Geometry
Record whether the ledge ends use:
- Square corners
- Rounded corners
- Chamfered corners
- Formed transitions
- Welded transitions
A rectangular accessory can have the correct overall dimensions but still fail because its corners contact a smaller sink radius.
Step 8: Measure Vertical Clearance
For multi-tier systems, measure:
- Upper ledge to lower ledge
- Lower ledge to bowl bottom
- Accessory thickness
- Handles, feet or flanges below the accessory
This is important when one accessory is intended to pass above another.
Step 9: Record the Drain Position
Drain position matters for:
- Bottom grids
- Drainboards
- Colanders
- Prep containers
- Drain covers
Record whether the drain is:
- Centered
- Rear-centered
- Left-offset
- Right-offset
Step 10: Measure the Original Accessory
If the original accessory is available, record:
- Overall length
- Overall width
- Thickness
- Corner radius
- Flange width
- Foot position
- Anti-slip pad position
- Handle projection
- Drain opening
An original damaged accessory can still be a valuable fit reference.
Workstation Sink Measurement Sheet
| Measurement | Result |
| Sink model | ______ |
| Nominal sink size | ______ |
| Number of ledge levels | ______ |
| Upper-tier unsupported opening | ______ |
| Upper-tier available space | ______ |
| Lower-tier unsupported opening | ______ |
| Lower-tier available space | ______ |
| Front ledge seat width | ______ |
| Rear ledge seat width | ______ |
| Left-side opening | ______ |
| Center opening | ______ |
| Right-side opening | ______ |
| Usable sliding distance | ______ |
| Internal corner radius | ______ |
| Upper-to-lower tier clearance | ______ |
| Bowl depth | ______ |
| Drain position | ______ |
| Accessory function | ______ |
| Original accessory part number | ______ |
Photograph the sink from above and photograph each ledge in close-up. Include a measuring tool in the image for scale.
Cutting Board Fit
A workstation sink cutting board must remain stable while resting on the ledges.
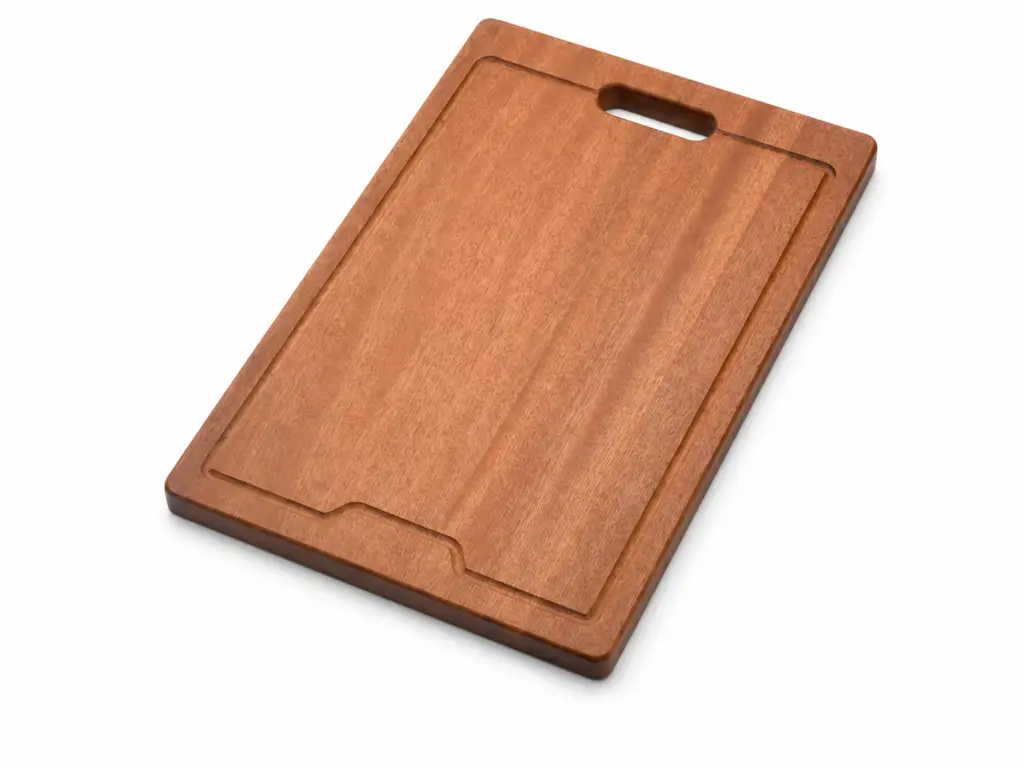
The correct fit depends on:
- Bridging dimension
- Support overlap
- Board width
- Board thickness
- Corner profile
- Anti-slip features
- Material movement
- Drain-groove orientation
Signs of a Correct Cutting Board Fit
A properly matched board should:
- Rest on both ledges
- Sit flat without rocking
- Move along its intended path without jamming
- Maintain sufficient overlap while moving
- Avoid scraping the sink walls
- Stay stable during its intended preparation tasks
- Be removable without excessive force
Why a Wood Board Can Fit Initially and Jam Later
Wood responds to moisture and humidity.
A tightly fitted wood cutting board may swell after:
- Repeated washing
- Soaking
- High humidity
- Improper drying
- Dishwasher exposure when not approved
A board that is already difficult to move when dry may become unusable after moisture exposure.
Wood accessories need controlled clearance, material conditioning and appropriate care instructions. They should not be designed as a press fit.
Why a Board Rocks
Possible causes include:
- Warped board
- Non-coplanar sink ledges
- Debris on one ledge
- Unequal ledge heights
- Twisted sink body
- Anti-slip pads positioned incorrectly
- Board contacting the bowl radius before reaching the ledges
Never use a rocking or unstable cutting board for knife work.
Explore Matrix sink cutting board options for workstation and OEM accessory programs.
Colander and Basket Fit
A colander usually rests on a flange, rim or projecting handles.
Its overall container size is not the main fit dimension. The supporting flange is.
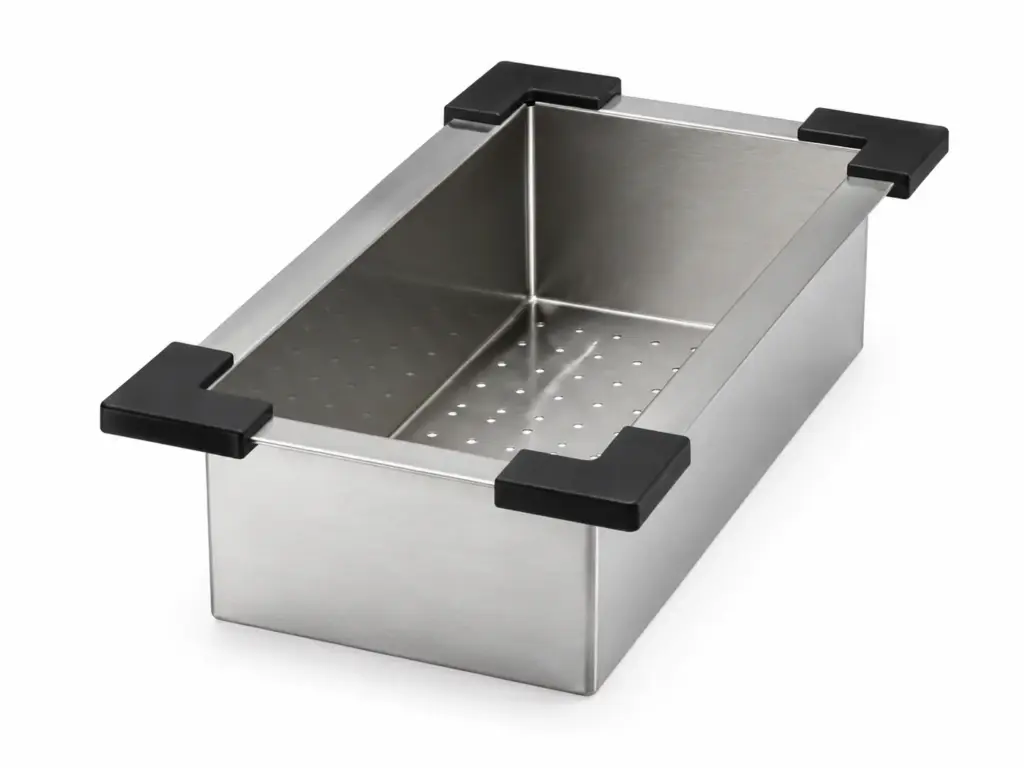
Check:
- Flange-to-flange dimension
- Flange width
- Body depth
- Corner radius
- Handle position
- Drainage openings
- Clearance from bowl walls
- Clearance from the drain
- Compatibility with other accessory tiers
A Colander Can Fit the Ledge but Still Be Wrong
Possible problems include:
- Body contacts the sink wall
- Bowl is too deep and touches the sink bottom
- Flange is too narrow
- Handles block another accessory
- Drain holes discharge onto a flat sink surface
- Container cannot be lifted when another accessory is installed
- Colander jams near the bowl corners
Test the complete colander body—not only the top flange.
Roll-Up Drying Rack Fit
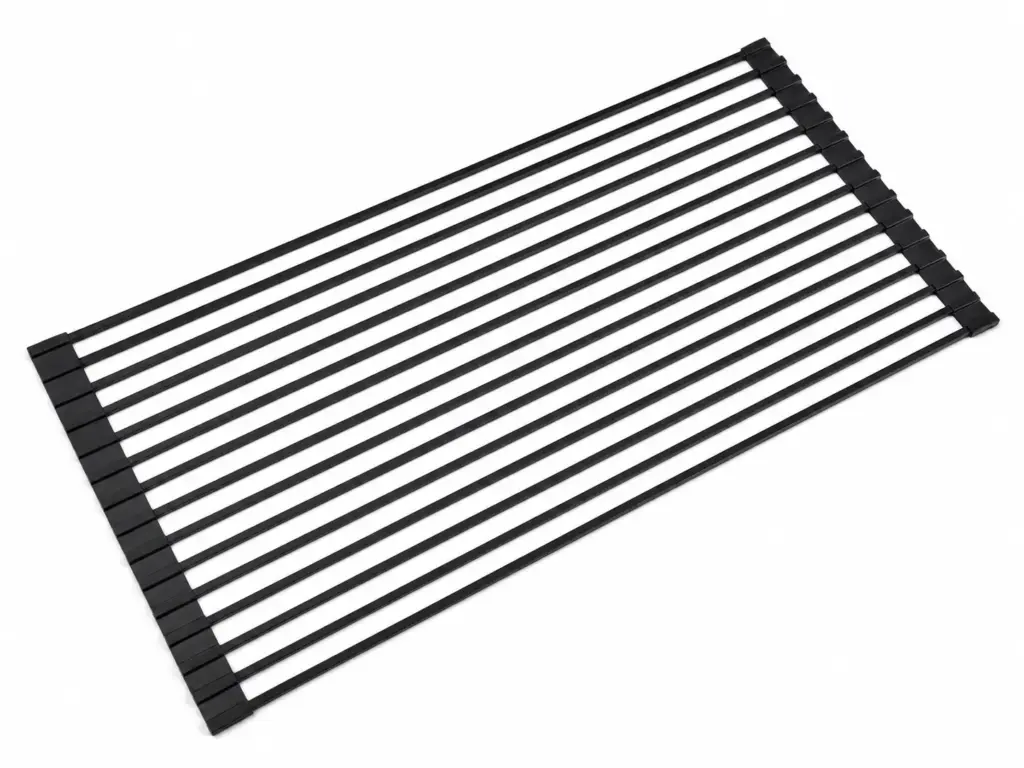
A roll-up rack usually uses rigid rods connected by flexible end strips.
The critical dimension is the length of the rigid rods or the total support span, depending on the design.
Check:
- Overall bridging dimension
- End-strip contact area
- Rod length
- Rack width
- End-cap shape
- Maximum intended load
- Resistance to rolling sideways
- Clearance from sink walls
- Storage size when rolled
Common Roll-Up Rack Problems
Rack Is Too Short
The end strips have insufficient support and can slip into the bowl.
Rack Is Too Long
The rack bends upward, cannot sit flat or rubs against the sink walls.
Rack Rolls or Shifts
The contact surface may be too narrow, wet or poorly matched to the ledge.
Rack Bows Excessively
The span or load may exceed the accessory’s intended use.
Do not assume every roll-up rack is approved for hot cookware. Heat resistance depends on the rods, silicone components and product specification.
Drainboard and Prep-Tray Fit
A workstation drainboard should direct water back into the sink rather than onto the countertop.
Check:
- Ledge fit
- Tray slope
- Drainage direction
- Lip position
- Surface flatness
- Orientation
- Interaction with the faucet
- Clearance above lower-tier accessories
A drainboard installed backwards may collect water instead of draining it.
For left- and right-hand versions, the product drawing and packaging should show the intended orientation clearly.
Bottom Grid Fit Is Different
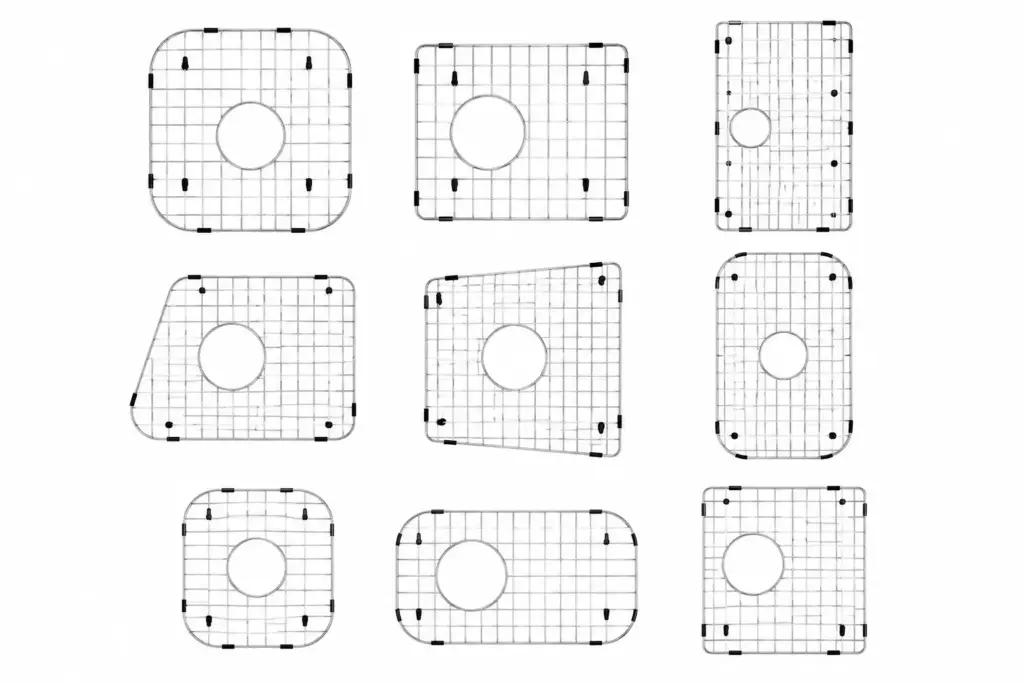
A bottom grid does not normally rest on the workstation ledge. It sits inside the bowl on protective feet.
Its fit depends on:
- Bowl-bottom dimensions
- Bowl-wall taper
- Corner radius
- Drain location
- Drain-cover size
- Grid-wire spacing
- Foot height
- Disposal or strainer access
A grid should not be selected from the workstation ledge dimensions.
The correct grid should:
- Sit flat
- Avoid direct metal-to-metal contact
- Clear the bowl walls
- Match the drain location
- Allow water and food debris to move toward the drain
- Remain removable for cleaning
A grid with the correct outer size can still be incompatible if its drain opening is in the wrong position.
Accessory Fit for Single- and Double-Bowl Workstation Sinks
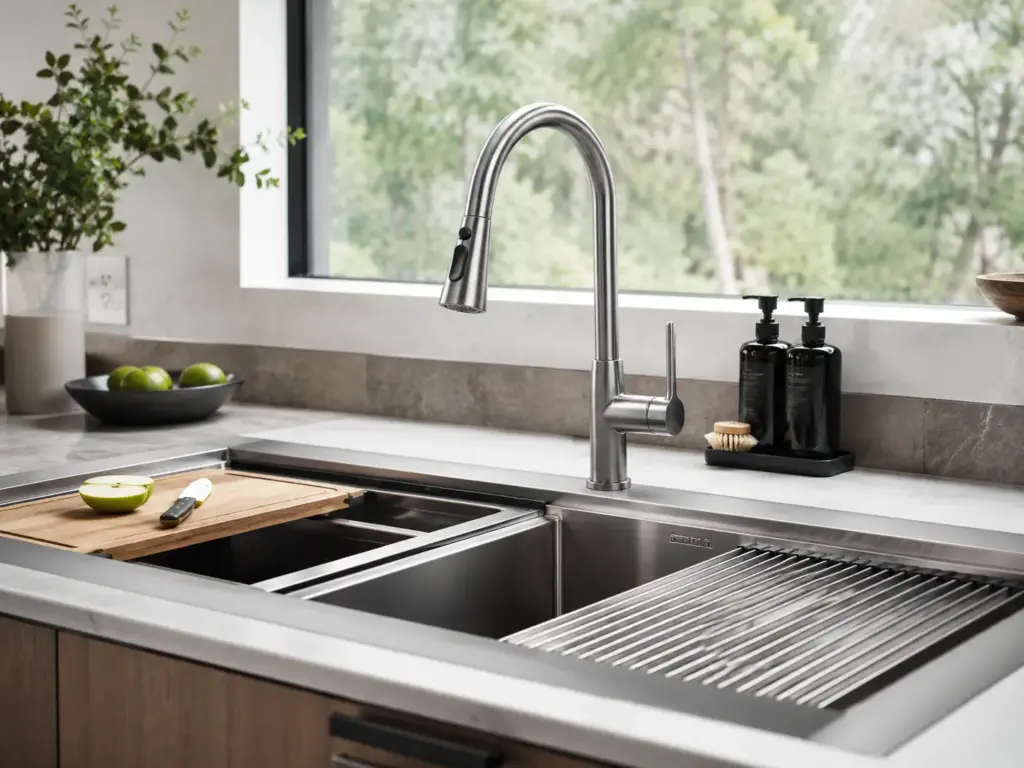
Single-Bowl Workstation Sink
A large single bowl normally provides a continuous sliding area.
Confirm:
- Full travel distance
- Drain-cover interference
- Sidewall radius
- Accessory storage space
- Whether multiple accessories can share the ledge
Double-Bowl Workstation Sink
A double-bowl workstation may use:
- One accessory system across both bowls
- Separate ledges for each bowl
- A continuous upper ledge
- Different accessories for the large and small bowls
The bowl divider can limit:
- Accessory depth
- Lower-tier movement
- Colander position
- Bottom-grid design
- Drainboard orientation
Do not assume accessories for the larger bowl also fit the smaller bowl.
Can You Use a Regular Over-the-Sink Cutting Board?
Possibly, but an over-the-sink board is not automatically a workstation accessory.
A regular over-sink board may rest on:
- Countertop
- Sink rim
- Top-mount flange
- Workstation ledge
Its fit should still provide:
- Stable support on both sides
- Sufficient overlap
- Anti-slip contact
- No rocking
- No interference with the faucet
- A defined intended use
A board that balances loosely across a sink should not be used with a sharp knife.
Can You Use Accessories from Another Sink?
Only after confirming the actual dimensions and support system.
Cross-model or cross-system compatibility depends on:
- Same support span
- Same available ledge-level space
- Suitable corner geometry
- Adequate support overlap
- Similar accessory tier
- Sufficient vertical clearance
- Correct drain position where relevant
A visual match is not enough.
Even products with identical outside dimensions can have different internal ledges.
Accessory Fit vs Accessory Function
An accessory is not suitable simply because it physically fits.
It must also perform its intended function.
| Accessory | Fit Question | Function Question |
| Cutting board | Does it sit securely? | Is it stable for food preparation? |
| Colander | Does the flange rest on the ledge? | Can water drain freely? |
| Roll-up rack | Does it bridge the opening? | Can it support its intended items? |
| Drainboard | Does it fit the tier? | Does water flow into the sink? |
| Prep tray | Does it clear the bowl? | Can it be lifted and cleaned easily? |
| Bottom grid | Does it match the bowl bottom? | Does it preserve drainage and drain access? |
Fit should be tested together with intended use.
Why Accessories Scratch Colored or PVD Sinks
Workstation accessories repeatedly contact the sink ledge as they move.
Scratches or finish wear may be caused by:
- Insufficient clearance
- Sharp metal edges
- Exposed fasteners
- Damaged silicone end caps
- Food particles trapped under the accessory
- Rough wood edges
- Sliding under heavy load
- Accessory distortion
- Metal-to-metal contact
Colored stainless steel requires particular attention to contact areas.
A product can have a durable decorative finish and still develop localized wear when a poorly fitted accessory repeatedly rubs the same edge.
Possible design controls include:
- Smooth contact surfaces
- Rounded accessory edges
- Suitable protective pads
- Controlled sliding clearance
- Replaceable end caps
- Clear cleaning instructions
Common Workstation Accessory Fit Problems
| Problem | Likely Cause |
| Accessory falls into bowl | Too short or insufficient ledge overlap |
| Accessory will not enter ledge | Too long, wrong tier or corner interference |
| Accessory fits one side but jams on the other | Bowl or ledges vary along the sink |
| Cutting board rocks | Warped board or ledges not in one plane |
| Wood board becomes tight | Moisture expansion or insufficient clearance |
| Colander flange slips | Insufficient support width |
| Colander body hits bowl | Body depth or corner shape is incompatible |
| Roll-up rack bends upward | Rack is too long |
| Roll-up rack slips inward | Rack is too short or has inadequate contact |
| Drainboard holds water | Incorrect slope or orientation |
| Accessory scratches ledge | Tight clearance, debris or rough contact edge |
| Accessories cannot pass each other | Wrong tier or insufficient vertical clearance |
| Bottom grid covers drain | Incorrect drain position |
| Bottom grid rocks | Incorrect foot position or bowl-bottom shape |
How to Test a Replacement Accessory
1. Seating Test
Place the accessory on the intended ledges.
Confirm that both sides are supported and all contact points sit correctly.
2. Rocking Test
Press each corner individually.
The accessory should not rock due to warping, uneven ledges or corner interference.
3. Sliding Test
Move the accessory through its full intended travel.
Check for:
- Binding
- Scraping
- Sudden loose areas
- Reduced support near the ends
- Collision with other features
4. Removal Test
Lift the accessory using the intended handles or edges.
It should be removable without twisting dangerously or striking the faucet.
5. Functional Test
Use the accessory only according to its intended purpose and load rating.
Confirm stability during:
- Food preparation
- Rinsing
- Draining
- Drying
- Storage
6. Wet-Condition Test
For products exposed to water, confirm that:
- Surfaces do not become dangerously slippery.
- Water drains in the intended direction.
- Wood does not bind after normal moisture exposure.
- Protective pads remain in place.
- Metal parts do not scratch the ledge.
7. Cleaning and Storage Test
Verify that the accessory:
- Can be cleaned properly
- Can be removed without difficulty
- Does not trap debris
- Fits the intended storage location
- Follows its material-specific care instructions
B2B Engineering: Control the Sink and Accessories as One System
For importers, distributors and private-label brands, workstation accessories should not be sourced only by approximate size.
The sink and accessory set need a controlled interface specification.
Define the Functional Dimensions
The technical drawing should identify:
- Unsupported ledge opening
- Available ledge-level space
- Ledge seat width
- Ledge height
- Accessory bridging dimension
- Accessory travel width
- Corner radius
- Required clearance
- Required support overlap
- Vertical tier spacing
- Drain position
- Contact-surface material
Avoid using only descriptions such as:
- Fits 30-inch sink
- Standard workstation board
- Universal colander
- Large drying rack
These descriptions are not sufficient for production control.
Design for the Tolerance Range, Not Only the Nominal Sample
A common development mistake is approving an accessory because it fits one sample sink.
Mass-produced sinks and accessories have dimensional variation.
The fit should be verified at the dimensional limits.
Let:
- Omax = largest permitted unsupported opening
- Pmin = smallest permitted available ledge-level space
- Amin = smallest permitted accessory bridging dimension
- Amax = largest permitted accessory bridging dimension
The system should be designed so that:
- Amin still provides the required overlap across Omax.
- Amax still fits within Pmin with the required movement clearance.
This is tolerance-stack control.
Without it, the nominal sample may fit while later production batches become:
- Too loose
- Too tight
- Difficult to slide
- Unsafe under intended use
The required overlap and clearance should be established according to the accessory’s material, structure and function.
Accessory-Specific Tolerance Risks
Wood Cutting Boards
Watch for:
- Moisture expansion
- Warping
- Thickness variation
- Corner distortion
- Surface-finish buildup
Plastic Boards and Trays
Watch for:
- Molding shrinkage
- Warping
- Heat deformation
- Rib distortion
- Dishwasher limitations
Stainless Steel Colanders
Watch for:
- Flange flatness
- Weld distortion
- Sharp edges
- Body depth variation
- Handle alignment
Roll-Up Racks
Watch for:
- Rod-length variation
- End-strip deformation
- Uneven rod spacing
- Loose end caps
- Rolling alignment
Bottom Grids
Watch for:
- Outer shape
- Drain-opening position
- Weld distortion
- Foot height
- Protective-foot placement
B2B Workstation Accessory Specification Checklist
Sink Information
- Sink model and SKU
- Installation type
- Overall dimensions
- Bowl dimensions
- Bowl corner radius
- Number of ledge tiers
- Drain position
- Sink material and finish
Ledge Information
- Unsupported opening
- Available seating space
- Ledge seat width
- Ledge height
- Tier spacing
- Left, center and right measurements
- Corner transition
- Permitted dimensional tolerance
Accessory Information
- Accessory name
- Accessory part number
- Intended ledge tier
- Overall dimensions
- Bridging dimension
- Required support overlap
- Sliding clearance
- Material
- Thickness
- Corner profile
- Intended function
- Load limit where applicable
- Care instructions
Compatibility Information
- Approved sink models
- Approved sink sizes
- Left- or right-hand orientation
- Drain compatibility
- Other accessories used simultaneously
- Replacement part availability
Packaging Information
- Individual protection
- Contact-surface protection
- Moisture control for wood
- Anti-scratch separation
- Carton position
- Accessory quantity
- SKU label
- Replacement part number
- Care card and instructions
Workstation Accessory QC Checklist
Sink Ledge Inspection
Check:
- Ledge dimensions
- Left-to-right consistency
- Front-to-rear alignment
- Ledge flatness
- Tier height
- Corner transition
- Surface condition
Accessory Inspection
Check:
- Overall dimensions
- Bridging dimension
- Flatness
- Corner shape
- Contact edges
- Handle position
- Foot or pad position
- Material condition
Fit Inspection
Test each approved accessory for:
- Support on both ledges
- Overlap
- Sliding movement
- Rocking
- Removal
- Tier compatibility
- Contact with the finish
- Interaction with other accessories
Packaging Inspection
Check that:
- The accessory set matches the sink SKU.
- Accessories cannot strike the sink during transport.
- Metal parts are separated from finished surfaces.
- Wood products are packed appropriately.
- Small parts cannot move freely inside the carton.
- Replacement part numbers are documented.
- Installation and care instructions match the supplied set.
Replacement Accessories Are Part of the Product Strategy
Workstation accessories receive more wear than the sink body.
A cutting board may warp, a silicone rack component may become damaged or a colander may be lost while the sink remains installed for many years.
For a B2B workstation program, consider:
- Replacement accessory SKUs
- Model compatibility chart
- Accessory dimensions in the manual
- Part numbers on packaging
- Long-term supplier consistency
- Separate accessory cartons
- Online replacement ordering
- Alternative material options
A workstation sink loses much of its value if compatible replacements cannot be identified later.
How Matrix Supports Workstation Sink Programs
Matrix develops workstation kitchen sinks and matching accessories for importers, distributors, private-label brands and project buyers.
Depending on the program, Matrix can review:
- Sink size and bowl layout
- Single- or dual-tier ledge structure
- Ledge tolerance
- Cutting board fit
- Colander and basket fit
- Roll-up rack fit
- Bottom grid and drain position
- Material and finish
- Accessory SKU planning
- Replacement accessory options
- Protective packaging
- Batch fit inspection
Related Matrix product resources include:
- Workstation kitchen sinks
- Sink cutting boards
- Stainless steel dish racks
- Custom kitchen sink programs
For an OEM, wholesale or project workstation program, send the sink drawing, intended accessory list, target market and packaging requirements to contact Matrix.
Final Workstation Accessory Fit Checklist
Before ordering or approving a workstation accessory, confirm:
- Is the exact sink model known?
- Which ledge tier supports the accessory?
- What is the largest unsupported opening?
- What is the smallest available ledge-level space?
- How much support overlap is required?
- Is there enough sliding clearance?
- Do the accessory and sink corner radii match?
- Does the accessory sit flat?
- Can it move without binding or scratching?
- Does it remain stable during its intended use?
- Does it clear the bowl walls and drain?
- Can it work with other accessories?
- Has material movement been considered?
- Is the replacement part number documented?
- Has the fit been tested across production tolerances?
If these questions cannot be answered, compatibility has not been confirmed.
Frequently Asked Questions
Are workstation sink accessories universal?
No. Most accessories are designed for a specific sink, ledge system or product series. Match the actual support dimensions and model compatibility.
How do I measure a workstation sink for a cutting board?
Measure the unsupported opening between the ledges, available space at ledge level, ledge seat width, sliding distance and corner geometry. Measure at the left, center and right sides.
Can I buy a cutting board based on the sink’s advertised width?
Not reliably. The advertised width usually describes the sink’s overall size, not the accessory-support span.
Why does my workstation cutting board fall into the sink?
The board may be too short, the support overlap may be insufficient or it may be designed for a different ledge tier.
Why does my wood cutting board no longer slide?
Moisture expansion, warping or insufficient original clearance may cause a wood board to become tight.
Why does the cutting board rock?
The board may be warped, the sink ledges may not be level or the board corners may be contacting the sink before the support surfaces do.
Can I use a regular cutting board over a workstation sink?
Only if it has stable support, sufficient overlap and appropriate anti-slip contact. A loosely balanced board should not be used for knife work.
How should a roll-up rack fit?
It should bridge the sink securely, rest fully on the intended supports and lie flat without excessive bending or slipping.
Does the bottom grid use the workstation ledge dimensions?
No. A bottom grid is matched to the bowl bottom, corner radius, drain position and protective-foot layout.
Can accessories from another workstation sink fit?
Possibly, but only if the support span, available space, ledge tier, corner geometry and functional dimensions are compatible.
How much clearance should a workstation accessory have?
There is no universal clearance. It depends on the accessory material, manufacturing tolerance, intended load and whether the accessory needs to slide.
Should accessories be tested with only one sample sink?
No. B2B programs should evaluate the complete tolerance range so the smallest accessory still has enough support and the largest accessory still fits the smallest permitted ledge space.
Why do workstation accessories scratch colored sinks?
Common causes include insufficient clearance, trapped debris, sharp edges, damaged protective caps and repeated metal-to-metal contact.
What should be checked before approving a workstation sink set?
Check the sink dimensions, ledge system, every included accessory, drain position, finish contact areas, packaging, instructions and replacement part plan.