A stainless steel sink should not pass inspection simply because it looks clean in a product photo.
Real sink quality includes material, thickness, dimensions, rim flatness, surface finish, welding or forming, drainage, holes, sound pads, accessories, installation fit and packaging.
For importers, kitchen brands, distributors and project buyers, the goal is not only to approve one good sample. It is to make sure the same specification can be repeated across the full order and future batches.
The short inspection checklist
Before approving a stainless steel sink, check:
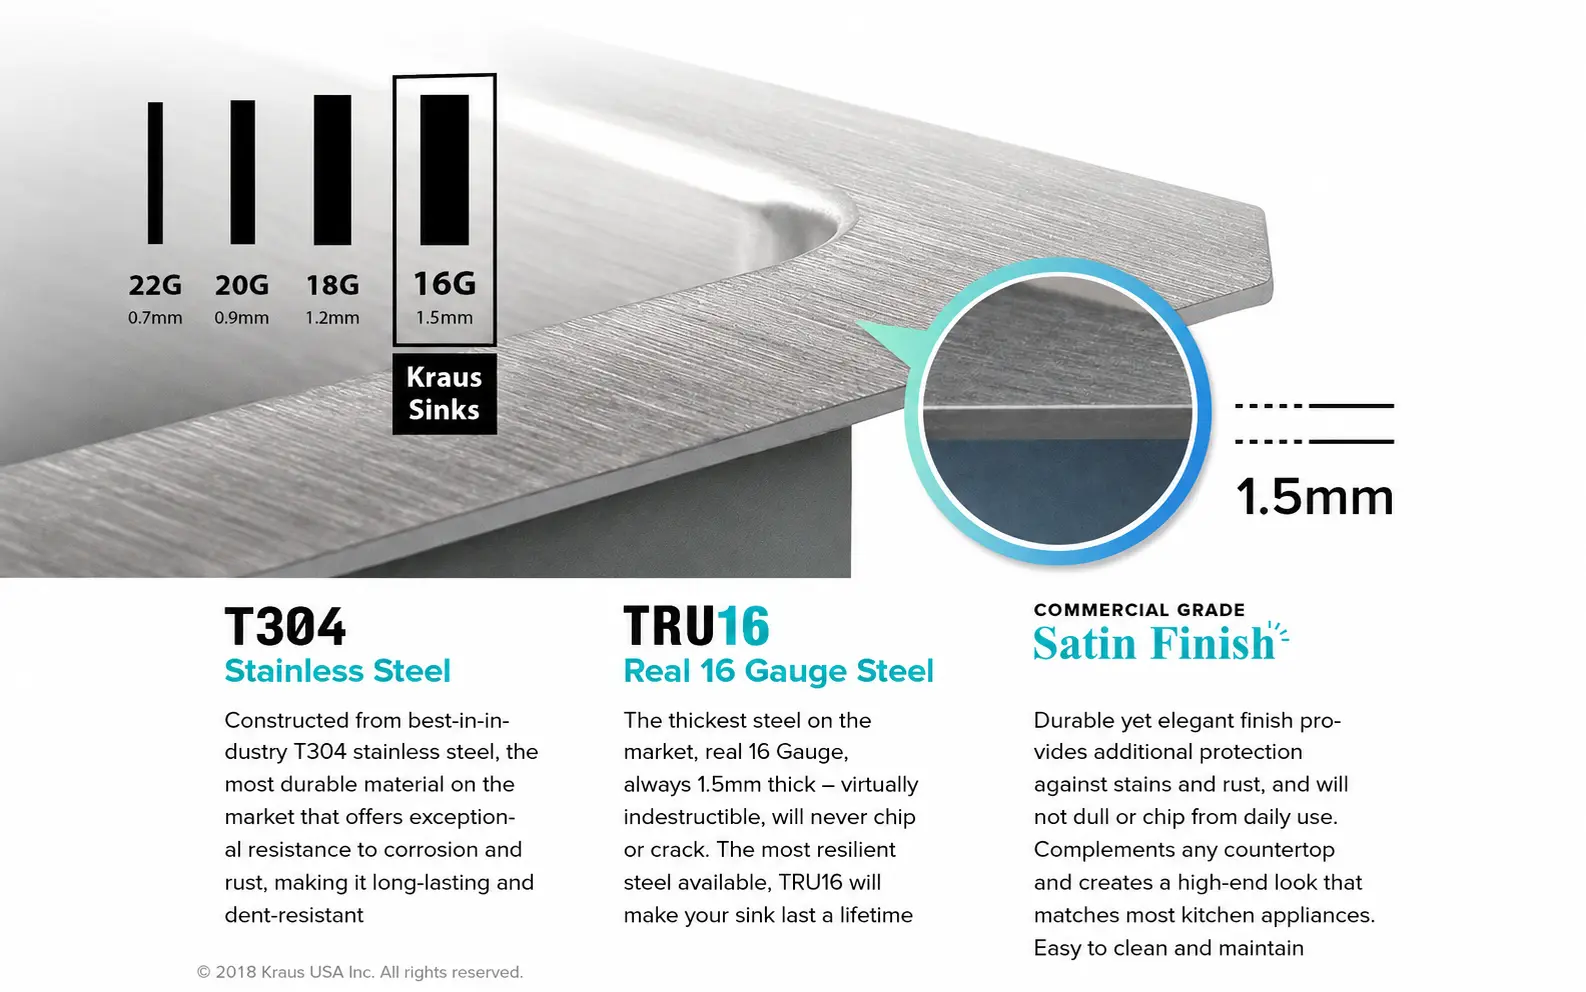
- Material grade and thickness
- Overall dimensions and bowl dimensions
- Rim flatness and bowl geometry
- Surface finish and visible defects
- Welding quality or pressed-forming quality
- Drainage and water pooling
- Drain, faucet and overflow holes
- Edges, corners and burrs
- Sound pads and undercoating
- Drain and accessory fit
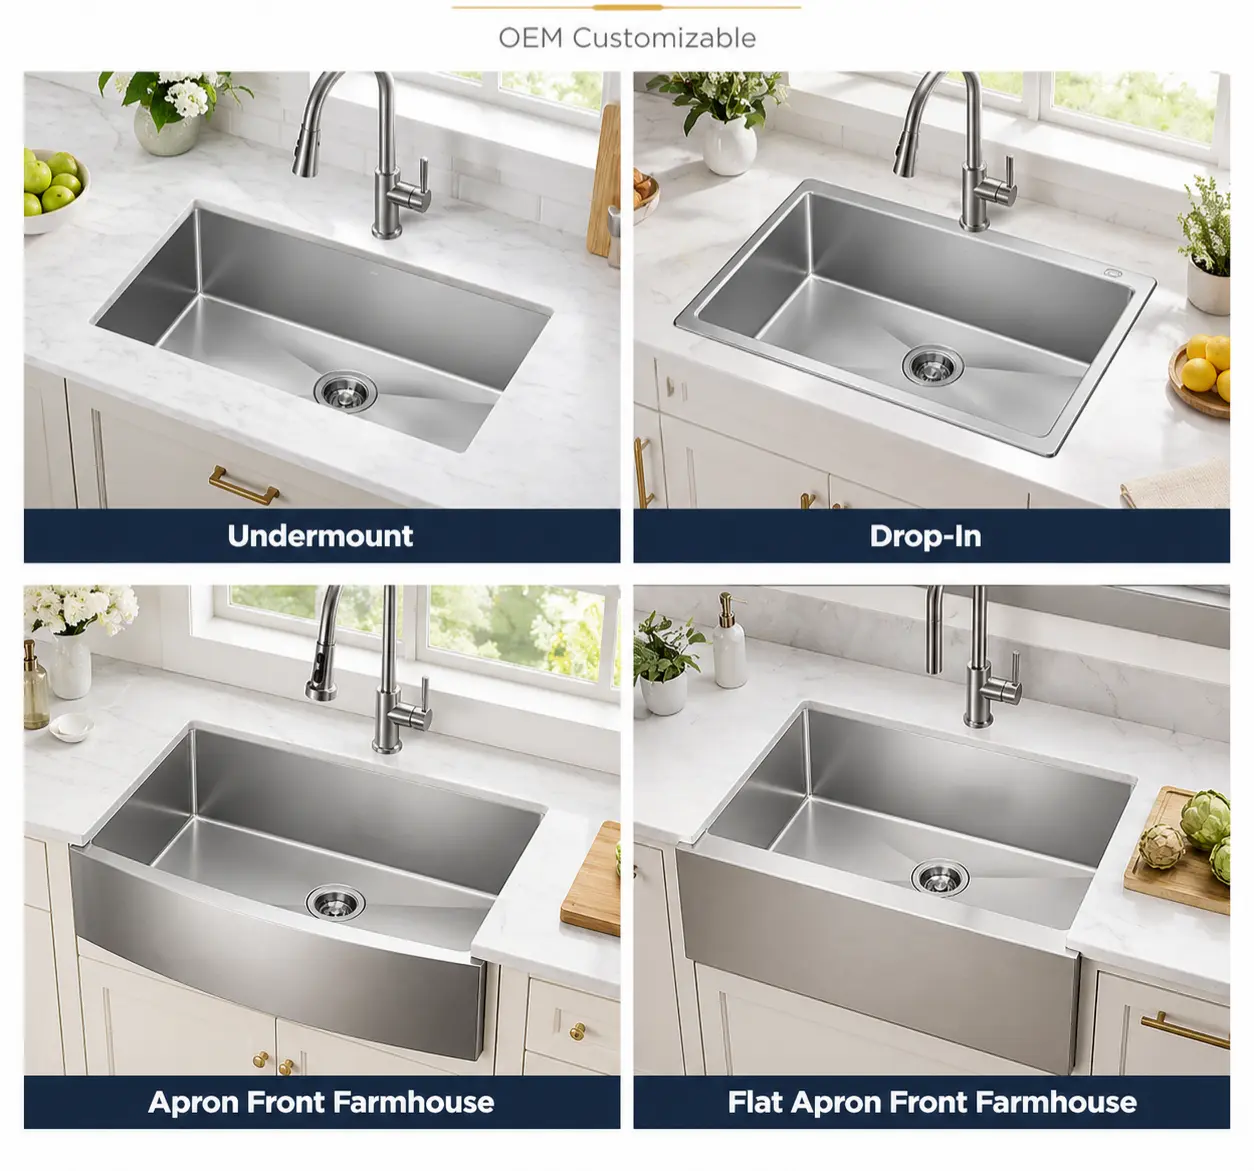
- Installation and cut-out compatibility
- Labels, packaging and quantity
The inspection criteria should be defined before production. A buyer cannot fairly reject a batch for a requirement that was never included in the drawing, approved sample or purchase specification.
Quality inspection starts before the goods are finished
Final inspection is the last checkpoint, not the entire quality system.
Before production, the buyer and supplier should confirm:
- Approved product drawing
- Overall and bowl dimensions
- Material grade
- Nominal thickness and measurement method
- Installation type
- Surface finish or approved finish sample
- Drain and faucet-hole layout
- Accessory list
- Logo and label details
- Packaging method
- Acceptable defect criteria
- Inspection or sampling plan
Without these references, inspectors are forced to make subjective decisions at the end of production.
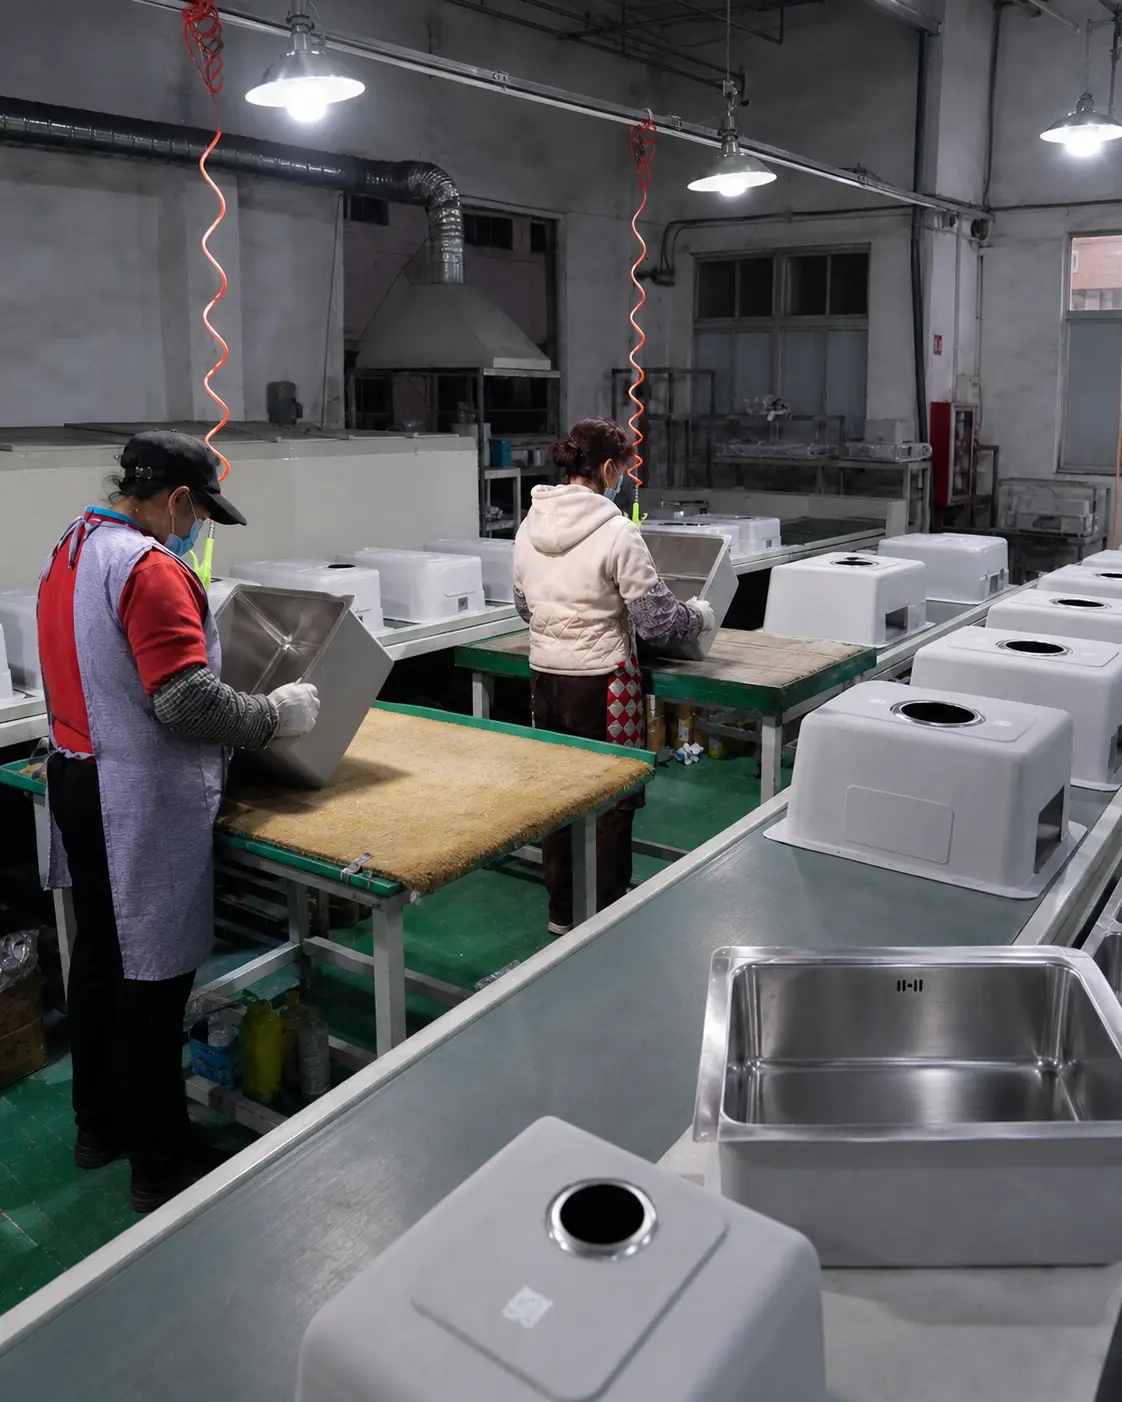
Matrix explains the main production stages in its stainless steel sink manufacturing overview.
Inspection tools to prepare
A practical sink inspection station may use:
- Tape measure
- Vernier caliper
- Thickness gauge or micrometer suitable for the measurement point
- Straightedge
- Feeler gauge where flatness criteria are defined
- Depth gauge
- Stable inspection table
- Consistent white lighting
- Approved finish or color sample
- Drain and accessory samples
- Water supply and drainage test area
- Camera or phone for inspection records
- Carton and label reference
The measuring tools should suit the tolerance being checked. A tape measure is useful for overall size, but not for a small hole-diameter tolerance.
1. Verify the material specification
The inspection should begin with the material requirement stated in the order.
Confirm:
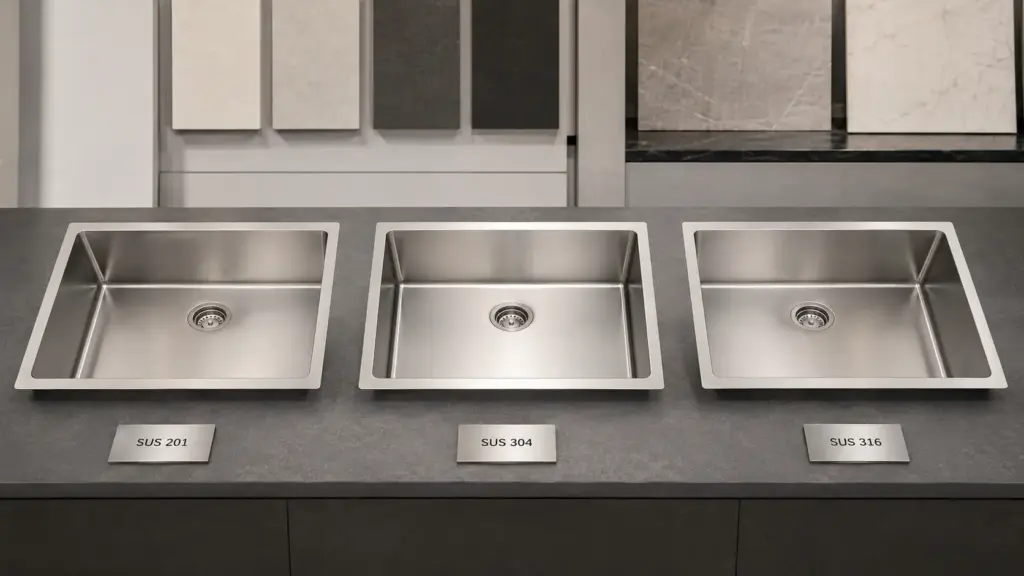
- Stainless steel grade, such as SUS201 or SUS304
- Material requirement for the bowl, deck and attached parts
- Surface finish
- Material batch or internal lot reference when used
- Agreed verification method if material identity must be tested
A “SUS304” stamp is not a complete quality-control system. It does not confirm thickness, finish, welding, drainage or whether every relevant component follows the same specification.
Material grade should be reviewed together with the intended environment and product position. See the Matrix comparison of 201 vs 304 vs 316 stainless steel sinks.
2. Check thickness at agreed measurement points
Do not inspect thickness by gauge wording alone.
The purchase specification should state:
- Nominal sheet thickness
- Permitted tolerance
- Whether the value refers to raw sheet or finished product
- Measurement locations
- Measurement method
- Sampling quantity
Handmade sinks
Handmade sinks are fabricated from cut and formed stainless steel sheets. Thickness is usually more consistent across large flat areas, but welded, ground or heavily finished areas should still be reviewed.
Pressed or drawn sinks
Pressed sinks are formed by stretching sheet into a bowl. Thickness can change through the sidewalls, bottom and corners after drawing.
One reading near the rim cannot represent the entire finished bowl. If formed thickness matters, agree on several measurement points before production.
The Matrix 16 gauge vs 18 gauge sink guide explains why material grade and thickness require separate checks.
Counterintuitive truth #1: a thicker sink can still fail inspection
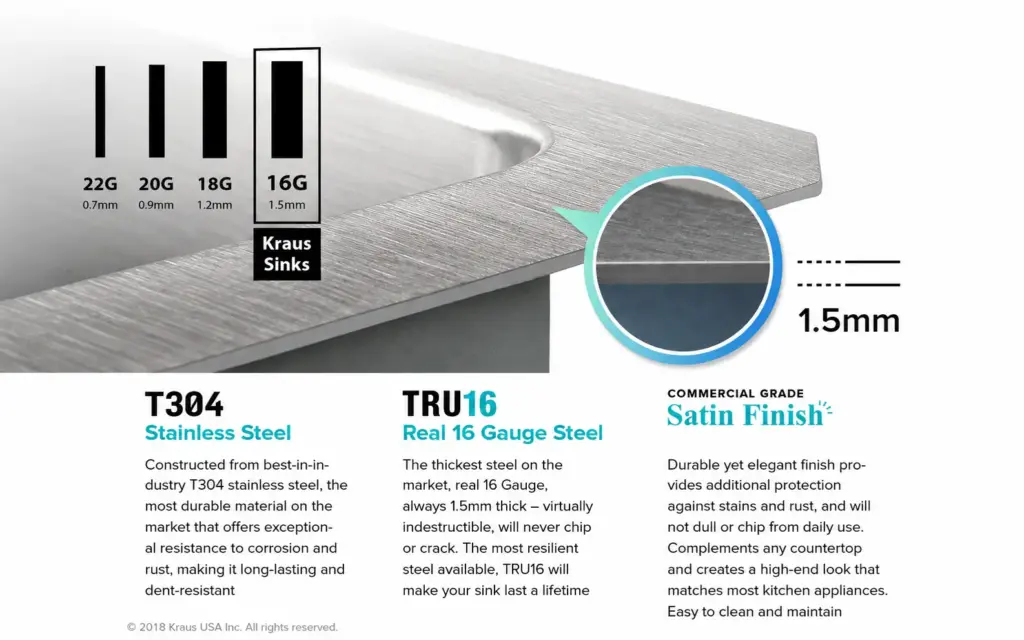
A thick sink can still have:
- An uneven rim
- Poor drainage
- Visible welding defects
- Inconsistent brushing
- Incorrect drain position
- Loose sound pads
- Mismatched accessories
- Weak packaging
Thickness affects product structure and positioning, but it does not replace the rest of the inspection.
3. Measure all critical dimensions
Compare the finished sink with the approved drawing, not only with the catalog title.
Check:
- Overall length and width
- Bowl length and width
- Bowl depth
- Rim width
- Corner radius
- Divider position and height for double bowls
- Workstation ledge width and height
- Drain-hole diameter and position
- Faucet-hole number, diameter and spacing
- Overflow-hole position if included
- Apron width and height for apron-front models
- Cut-out and minimum cabinet requirement
Record the actual results rather than writing only “pass.” Measurements make it easier to compare samples, production lots and repeat orders.
For sink-to-cabinet fit, use the Matrix standard kitchen sink sizes and cabinet compatibility guide.
4. Check rim flatness and overall geometry
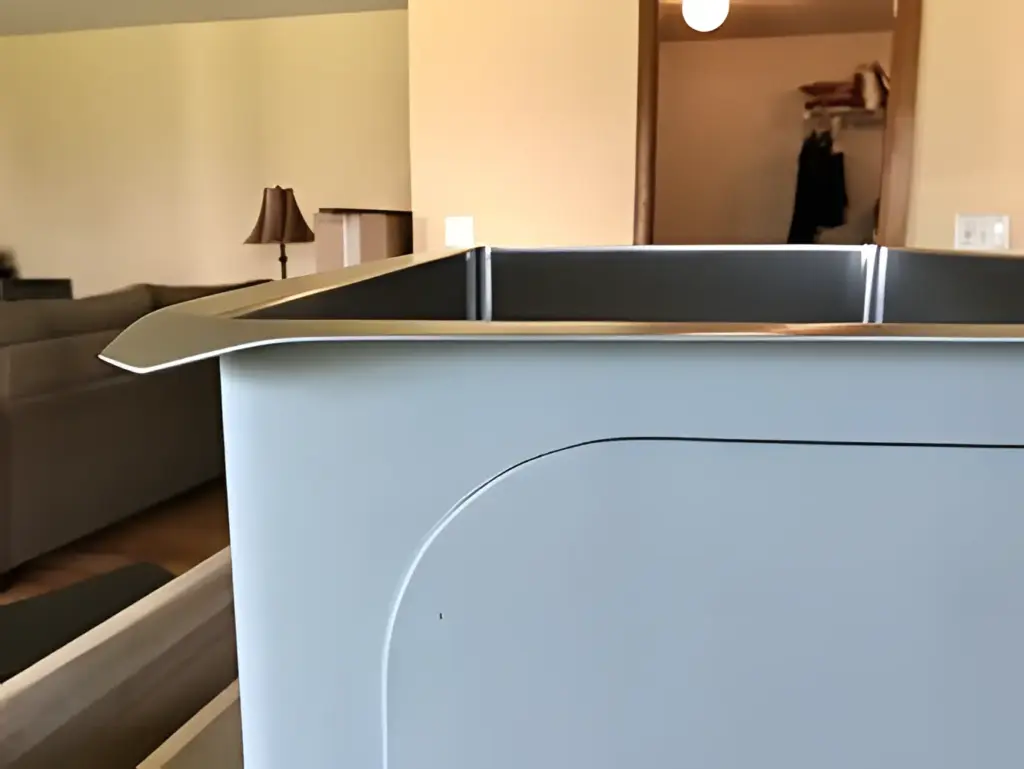
Rim flatness directly affects installation and sealing.
Place the sink on a stable reference surface or use the agreed inspection method. Look for:
- Rocking or twisting
- Raised corners
- Uneven mounting flanges
- Distortion around welded areas
- Bowed faucet decks
- Deformed apron panels
- Asymmetrical bowl shape
- Sidewall bulging or wrinkling
Undermount sinks
The rim needs stable contact with the underside of the countertop. Warping can create inconsistent reveal, sealing gaps or difficult support.
Top-mount sinks
The visible rim should sit evenly on the countertop. A distorted rim can create gaps, movement or an uneven seal.
Apron-front sinks
Check the front-panel flatness, corner alignment, apron height and relationship between the apron and bowl.
Installation-related checks are explained further in Matrix’s sink installation guides.
5. Inspect the visible surface under consistent lighting
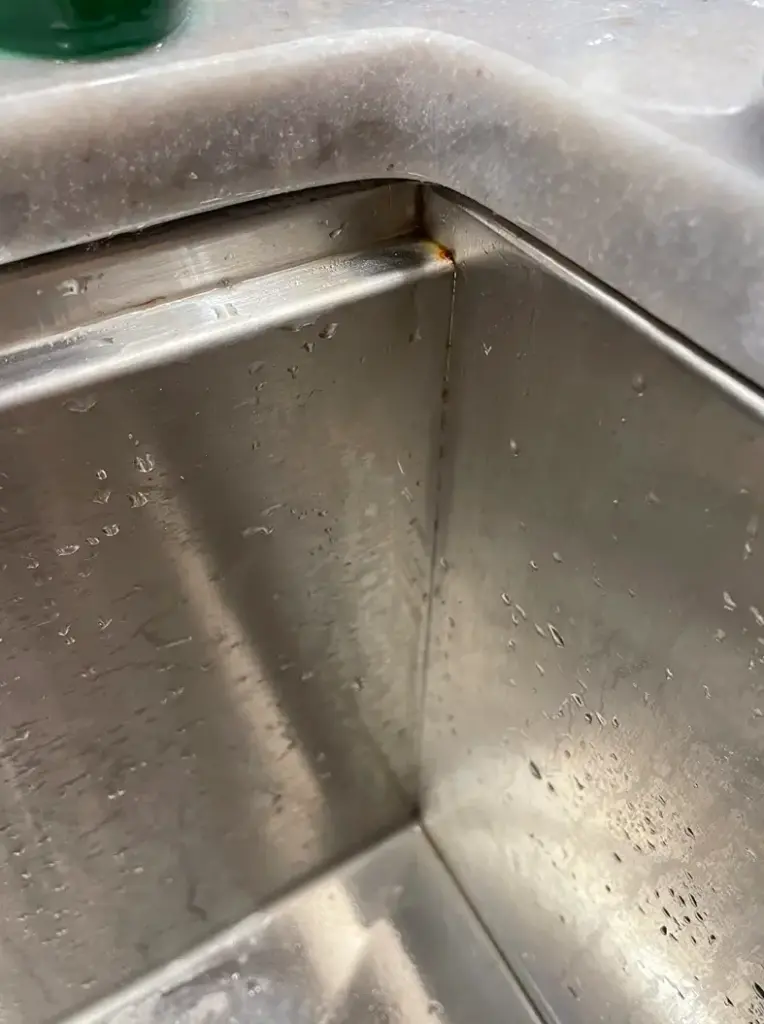
Surface inspection should take place in stable, bright lighting after the sink has been cleaned.
Look for:
- Scratches
- Dents
- Scuffs
- Polishing shadows
- Uneven brushing
- Inconsistent grain direction
- Grinding marks
- Discoloration
- Water spots or chemical residue
- Fingerprints trapped under protective film
- Iron-particle or rust-like contamination
- Coating or color variation
- Marks caused by accessories rubbing during packing
Define which surfaces are highly visible after installation and which are concealed. A small mark on the hidden underside should not necessarily be classified the same way as a mark in the center of the bowl.
Brushed and satin sinks
Check the direction, density and consistency of the grain. Reworked areas should not create obvious patches under normal viewing conditions.
Polished sinks
Check reflection consistency, swirl marks and local dull areas.
Black, PVD or colored sinks
Compare the product with the approved color sample under consistent lighting. Check color uniformity, edge coverage, contact marks and differences between the bowl, drain and accessories.
Avoid unrealistic “scratch-proof” acceptance language. Define acceptable appearance, protection and care expectations instead.
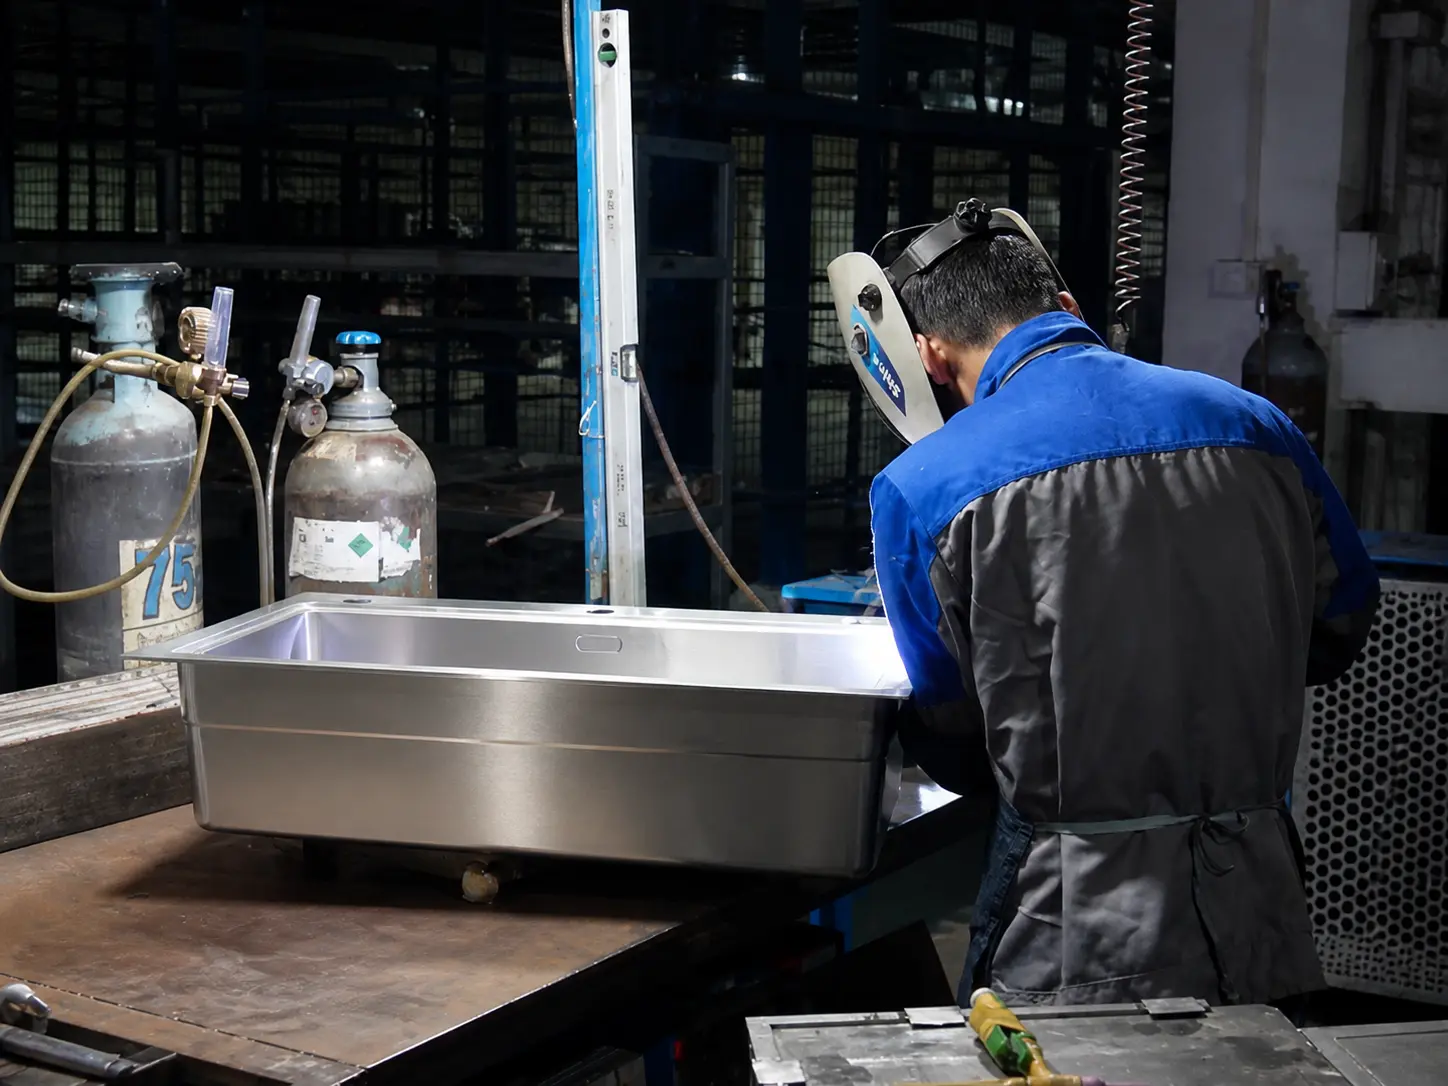
6. Inspect handmade welding and polishing
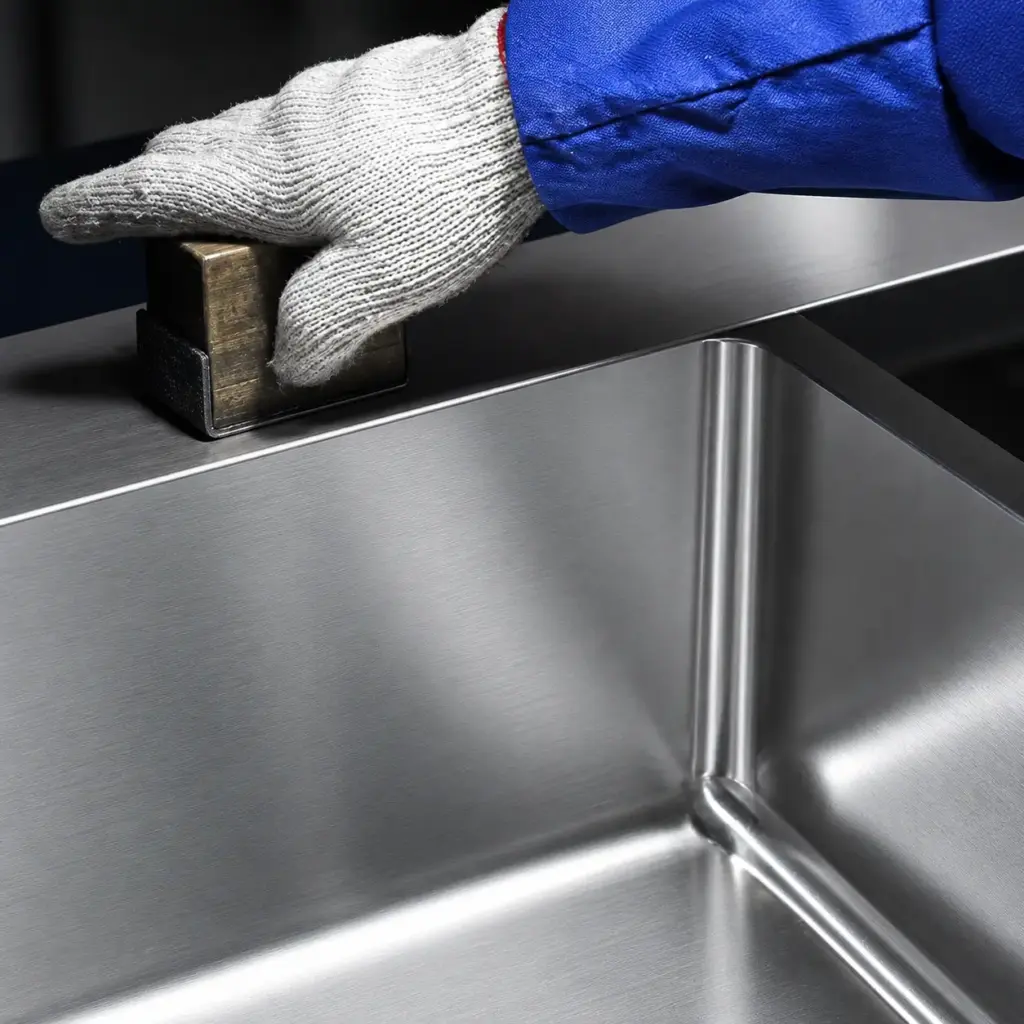
Handmade sinks rely more heavily on cutting, bending, welding, grinding and corner finishing.
Inspect welded areas for:
- Cracks
- Pinholes
- Incomplete welds
- Porosity visible at the surface
- Burn-through
- Excessive grinding
- Uneven corner shape
- Deep polishing marks
- Discoloration
- Leakage through the seam
- Distortion caused by welding heat
The weld should be structurally complete and visually consistent with the agreed finish. Polishing should not make the corner unusually thin or change the intended radius.
If the sink has welded bowls, apron panels or drainboards, the relevant seams should be included in the agreed leak-check process.
7. Inspect pressed or drawn forming quality
Pressed sinks have different risks from handmade sinks.
Inspect for:
- Wrinkles near corners or rims
- Stretched or locally thin areas
- Forming cracks
- Uneven bowl depth
- Deformed drain areas
- Inconsistent rim shape
- Tool marks
- Surface drag marks
- Asymmetry between bowls
- Unstable dimensions across the batch
Pressed sinks should not be treated as automatically lower quality. A stable mold and controlled forming process can provide consistent dimensions and efficient volume production.
Compare the two manufacturing routes in the Matrix handmade vs pressed sink guide.
8. Test drainage without promising an impossible “zero water” result
A sink should guide water toward the drain, but inspection criteria need to be realistic and repeatable.
A practical drainage check can include:
- Place the sink in the agreed level position.
- Apply a consistent quantity of water across the bowl.
- Allow water to flow to the drain for the agreed time.
- Observe any persistent pools away from the drain.
- Record the location and approximate size of retained water.
Check:
- Bottom slope
- Drain depression
- X-lines or drain channels when included
- Local high or low spots
- Deformation around the drain
- Water retained near corners
- Effect of the sink’s installed level
Small droplets can remain because of surface tension. The useful question is whether the sink has a structural low area that creates a repeatable pool—not whether every droplet disappears.
Counterintuitive truth #2: X-shaped drain lines do not guarantee drainage
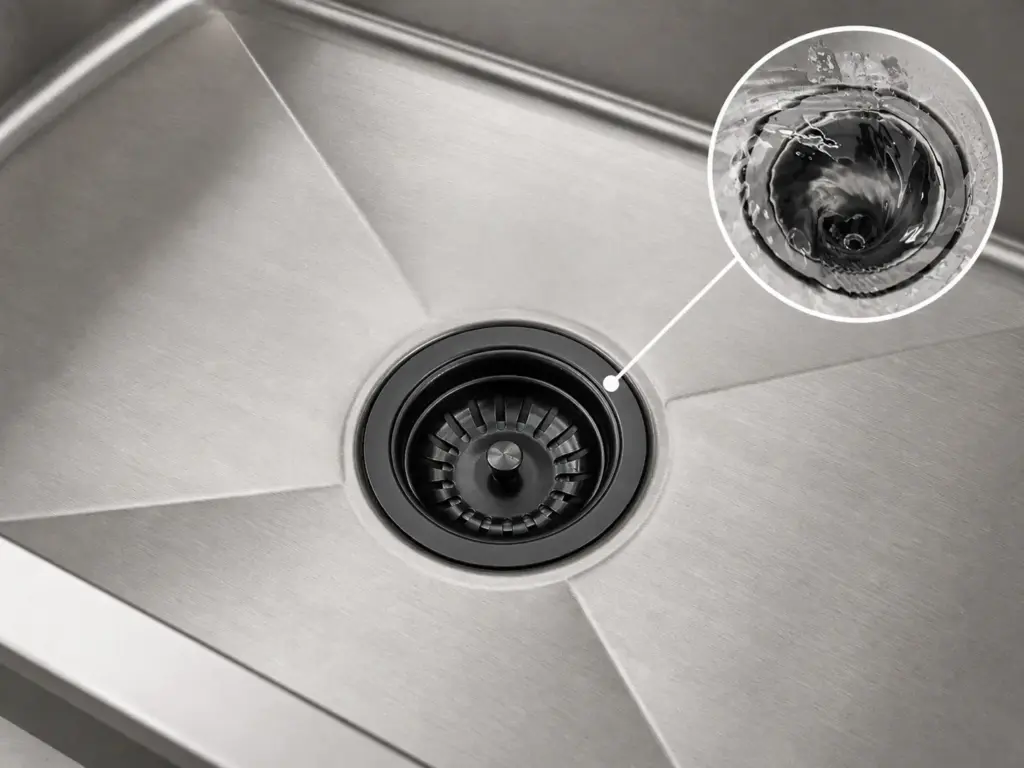
Drainage depends on the complete bottom geometry, drain position and installation level.
A visible X pattern can exist on a bowl that still retains water. Inspect the actual water flow instead of accepting the pattern as proof.
9. Check drain, faucet and overflow holes
Inspect every punched, drilled or formed opening.
Confirm:
- Hole diameter
- Position from the approved reference points
- Roundness
- Edge smoothness
- Absence of burrs
- Absence of cracks or deformation
- Flat sealing area around the drain
- Fit with the approved drain, faucet or overflow component
A drain hole can be the correct diameter but still leak if the surrounding sealing surface is distorted.
For top-mount sinks with faucet holes, check that the faucet base has enough flat contact area and does not interfere with the bowl, clips or backsplash.
10. Check all exposed edges and corners
Run a protected hand or suitable inspection material along accessible edges.
Look for:
- Sharp burrs
- Unfinished cut edges
- Dangerous corners
- Rough faucet holes
- Exposed wire ends on accessories
- Sharp drain openings
- Poorly finished mounting tabs
Sharp edges should be treated as a serious safety and installation issue, not a minor appearance defect.
11. Inspect sound pads and undercoating
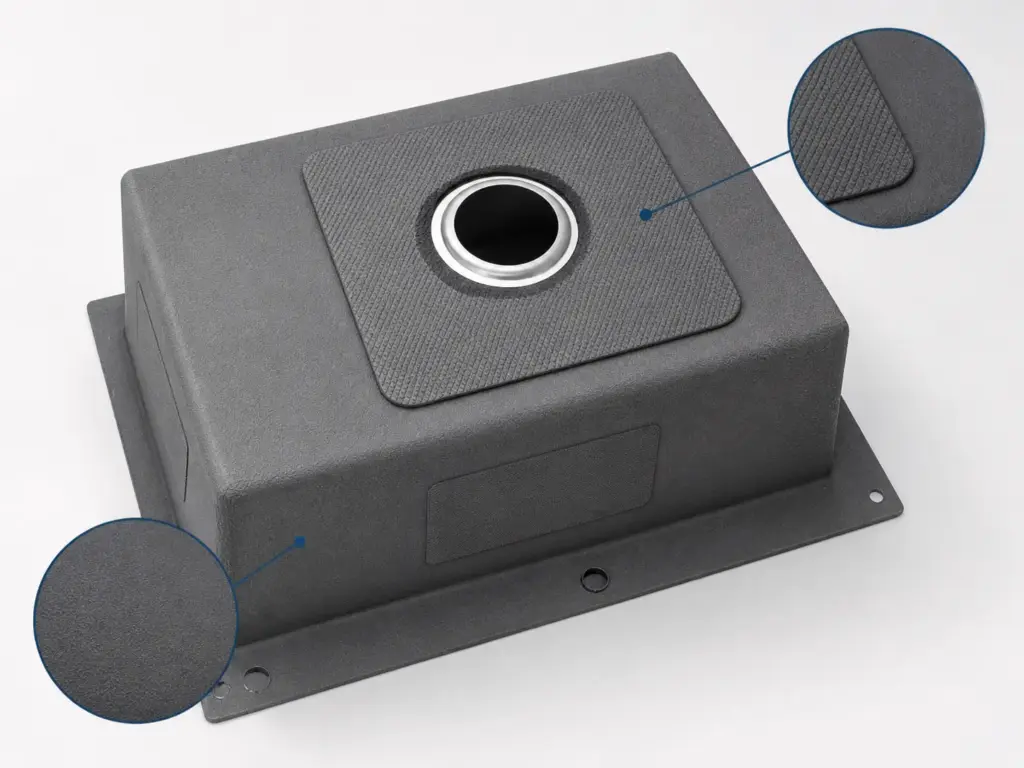
Turn the sink over and check:
- Pad location
- Pad size and coverage
- Full adhesion
- Lifted corners
- Air bubbles
- Cracks or tears
- Contamination under the pad
- Interference with clips, rails or plumbing
- Undercoating coverage
- Coating consistency and dryness
- Excessive coating on mounting or sealing areas
A large pad is not useful if it detaches during transport or use. Coverage, adhesion and position should be checked together.
Undercoating should not hide structural defects, sharp edges or poorly finished welds.
12. Test drain and accessory compatibility
Do not approve accessories from a list or photo alone. Test them with the actual sink model.
Drain and strainer
Check:
- Flange fit
- Gasket contact
- Thread engagement
- Basket operation
- Drain-cover alignment
- Finish and color match
- Leakage after assembly when included in the test scope
Bottom grid
Check:
- Overall fit
- Corner radius
- Drain-opening alignment
- Rubber-foot location
- Wire ends and welds
- Stability inside the bowl
- Surface contact points
Workstation accessories
For a workstation kitchen sink, check:
- Cutting-board stability
- Colander fit
- Roll-up rack width
- Accessory movement along the ledge
- Ledge contact area
- Wobbling or slipping
- Interference between accessories
- Packing separation
- Replacement identification
A sink can pass dimensional inspection while its accessories fail the user experience.
13. Verify installation compatibility
Inspect the sink as an installed product, not only as a metal bowl.
Confirm:
- Cut-out template matches the finished sink
- Rim width supports the intended reveal
- Mounting clips or brackets are included and fit
- Top-mount clips can be accessed inside the cabinet
- Undermount support method is practical
- Apron-front support requirements are clear
- Faucet and drain positions match the drawing
- Installation instructions match the exact model
- Hardware quantity matches the packing list
For project or countertop programs, a wrong cut-out can cost more than the sink itself. Review the broader sink sourcing risks before order approval.
14. Inspect labels, logos and product identity
Check:
- Product model
- SKU or item number
- Barcode when required
- Logo position and orientation
- Logo appearance
- Carton mark
- Quantity per carton
- Accessory list
- Care or installation document
- Country or project label when specified
- Consistency between product, carton and packing list
A good sink packed under the wrong model number can still create warehouse, installation and return problems.
15. Treat packaging as the final quality-control stage
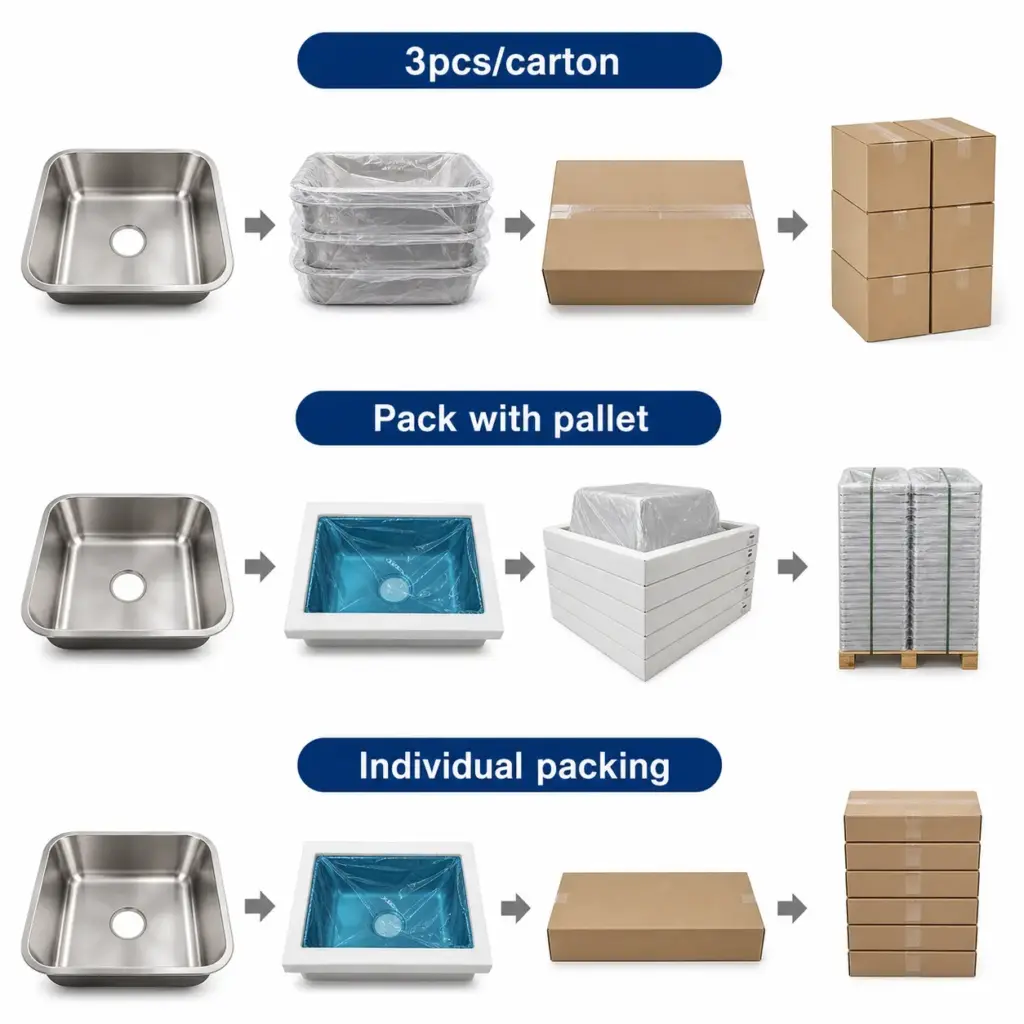
Packaging defects can turn a conforming sink into a damaged product before it reaches the buyer.
Inspect:
- Protective bag or film
- Corner and rim protection
- Foam or carton supports
- Bowl protection
- Separation between sink and accessories
- Movement inside the carton
- Protection for drains and sharp hardware
- Carton strength for the shipping method
- Carton closure
- Label visibility
- Pallet arrangement when used
- Stacking direction and quantity
Workstation accessories, bottom grids and drains should not move freely against the visible sink surface.
Black, colored, polished and apron-front sinks may require additional visible-surface protection.
Counterintuitive truth #3: packaging is part of product quality
If the sink leaves the factory without scratches but arrives with a bent rim, the order still failed.
Packaging should be reviewed during sample approval, not after bulk production is complete.
How to classify sink defects
The final defect definitions should be agreed for the specific order. A practical structure is:
Critical defects
Defects that create a safety risk, make installation impossible or cause complete functional failure.
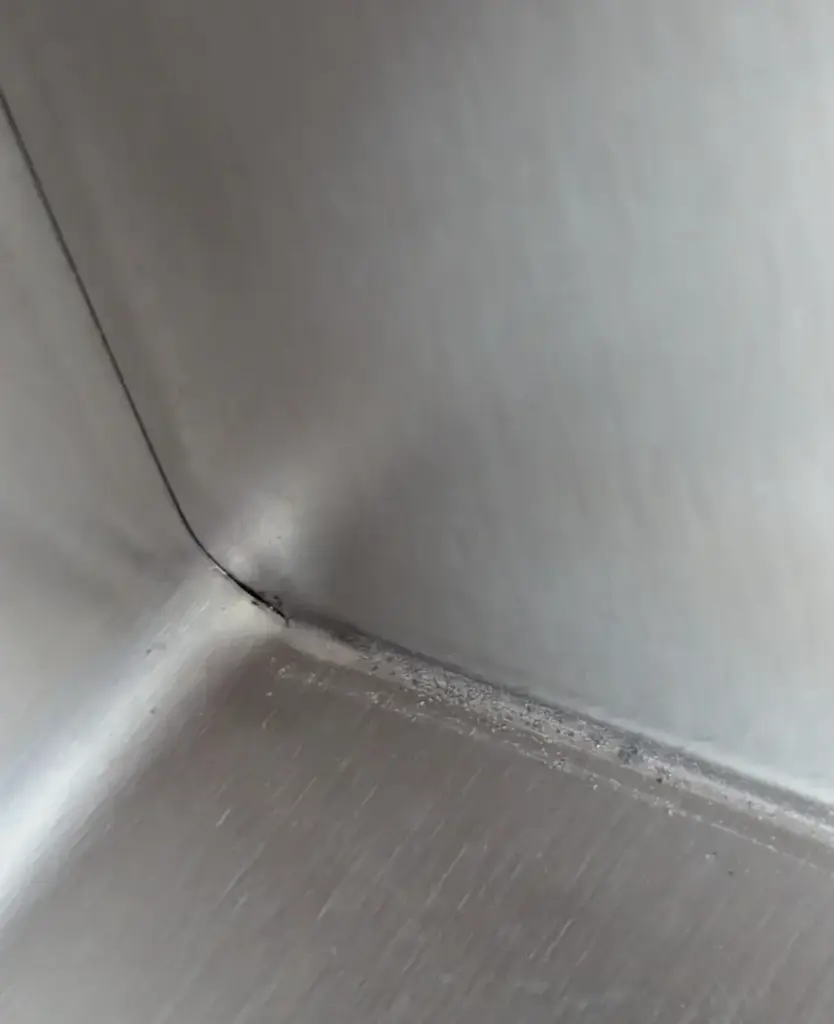
Examples may include:
- Dangerously sharp exposed edge
- Structural crack
- Leaking welded seam
- Wrong product or major size mismatch
- Missing critical installation component
- Drain or faucet hole incompatible with the approved system
Major defects
Defects likely to cause rejection, installation difficulty, return, visible dissatisfaction or reduced function.
Examples may include:
- Rim warping beyond the agreed limit
- Obvious dent or scratch on a visible surface
- Wrong drain position
- Persistent structural water pooling
- Incomplete or visibly poor weld
- Incorrect finish or color
- Loose sound pad
- Accessory mismatch
- Missing accessory
- Packaging unable to protect the product
Minor defects
Small deviations that do not materially affect safety, installation or normal function.
Examples may include limited cosmetic marks in concealed areas when allowed by the agreed standard.
Do not copy generic defect classifications without adapting them to the product, price tier, sales channel and visible installation areas.
Sample inspection or 100% inspection?
Not every characteristic needs the same inspection frequency.
Consider 100% checks for characteristics that are:
- Safety-related
- Easy to inspect quickly
- Critical to installation
- Prone to missing components
- Visually obvious to the end customer
These may include model identity, major surface damage, sharp edges, accessory quantity and packaging condition.
Sampling may be used for selected measurements or destructive and time-consuming tests when the buyer and supplier agree on the plan.
The sampling level, acceptance criteria and response to a failed sample should be defined before inspection begins.
Repeat-order quality checklist
A repeat order should not be approved only because the first order was acceptable.
Compare each batch with:
- Approved drawing
- Approved or retained reference sample
- Approved finish or color sample
- Previous inspection records
- Accessory master list
- Approved packaging reference
- Current label and carton artwork
Pay attention to silent changes in:
- Thickness
- Bowl depth
- Corner radius
- Drain position
- Finish tone
- Sound-pad size
- Accessory material
- Carton structure
Consistency is a separate quality requirement from first-sample appearance.
Stainless steel sink inspection checklist table
| Inspection area | What to check | Result |
|---|---|---|
| Product identity | Model, SKU, logo and order match | Pass/Fail |
| Material | Grade and agreed material verification | Pass/Fail |
| Thickness | Agreed points, method and tolerance | Pass/Fail |
| Overall size | Length, width and rim dimensions | Pass/Fail |
| Bowl size | Internal length, width and depth | Pass/Fail |
| Holes | Drain, faucet and overflow size/position | Pass/Fail |
| Rim | Flatness, twist and mounting area | Pass/Fail |
| Geometry | Bowl symmetry, radius and divider | Pass/Fail |
| Surface | Scratches, dents, brushing and color | Pass/Fail |
| Welding/forming | Cracks, wrinkles, seams and distortion | Pass/Fail |
| Drainage | Water flow and persistent pooling | Pass/Fail |
| Edges | Burrs, sharp corners and unfinished areas | Pass/Fail |
| Sound treatment | Pad adhesion and coating coverage | Pass/Fail |
| Drain fit | Flange, gasket, thread and leakage | Pass/Fail |
| Accessories | Fit, function, quantity and finish | Pass/Fail |
| Installation | Cut-out, clips, brackets and instructions | Pass/Fail |
| Packaging | Surface, rim, corner and accessory protection | Pass/Fail |
| Labels | Carton, barcode, quantity and documents | Pass/Fail |
Add the drawing revision, sample reference, batch number, inspected quantity, defect photos and inspector name to the inspection record.
Quick receiving inspection for homeowners
A homeowner receiving one sink can perform a simplified check before installation:
- Confirm the model and dimensions.
- Check the bowl and rim for shipping damage.
- Place the sink on a flat surface and look for obvious rocking.
- Inspect the visible finish under bright light.
- Check that edges and holes are smooth.
- Confirm the drain and accessories fit the model.
- Count clips, brackets and included parts.
- Compare the sink with the countertop cut-out before fabrication or installation.
- Photograph any damage before discarding the carton.
- Keep the packaging until the sink passes the installer’s fit check.
Do not install a visibly damaged or dimensionally incorrect sink and assume the problem can be corrected later.
How Matrix approaches stainless steel sink quality control
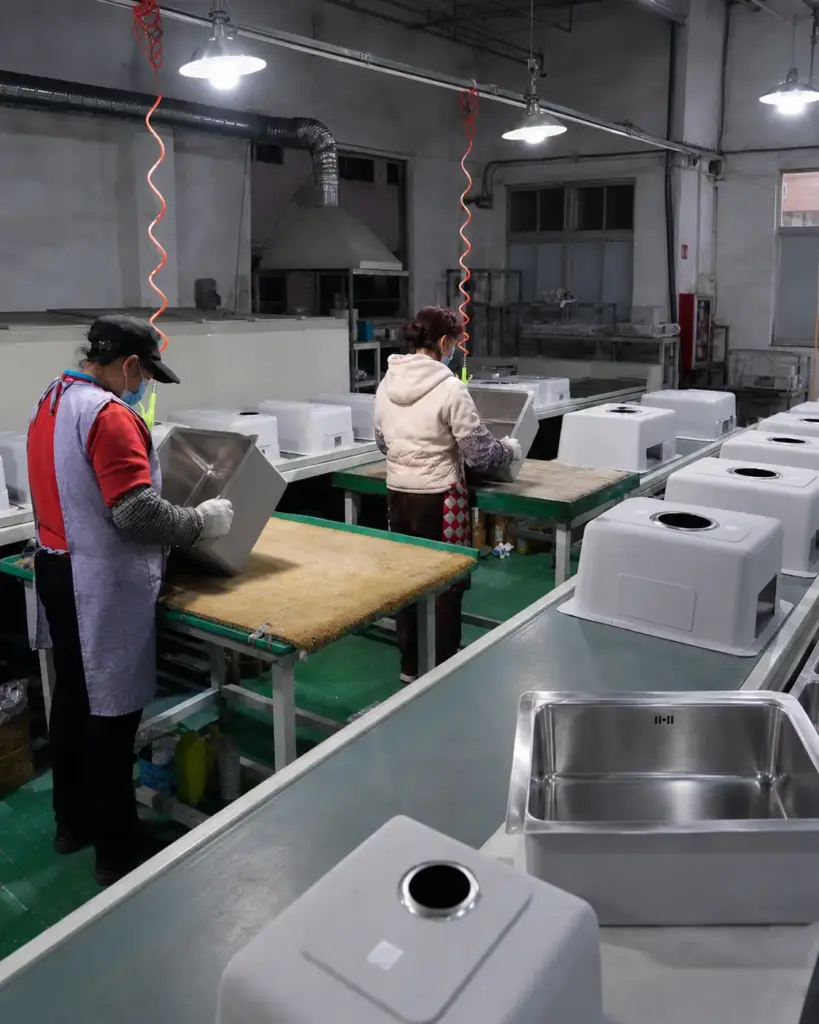
Matrix Manufacture Co., Ltd. manufactures stainless steel sinks for importers, kitchen brands, wholesalers, distributors and project buyers.
Matrix reviews sink quality across material preparation, handmade fabrication or pressed forming, welding, polishing, dimensions, drain and accessory fit, visible finish and export packing.
Inspection requirements can be organized around the buyer’s product type, drawing, target channel, approved sample, accessory set and packaging plan. Critical measurements and acceptance criteria should be agreed before production rather than invented at final inspection.
For OEM and repeat-order programs, buyers can send Matrix their product drawing, material grade and thickness requirement, finish, installation type, accessories, packaging method and inspection priorities for review.
Discuss Your Sink Inspection Requirements
Frequently asked questions
How can I check the quality of a stainless steel sink?
Check material, thickness, dimensions, rim flatness, surface finish, welding or forming, drainage, holes, sound pads, accessory fit, installation compatibility and packaging. Do not judge quality by grade or thickness alone.
What is the most important stainless steel sink inspection point?
There is no single point. Installation-critical dimensions, rim flatness, visible finish and drainage are especially important because failures can lead directly to countertop problems, returns or customer complaints.
How do I check whether a stainless steel sink is 304?
The grade should be defined in the purchase specification with an agreed verification method when testing is required. A stamp or magnet test alone should not be treated as complete proof.
How should sink thickness be measured?
Define the measurement tool, locations, nominal thickness and tolerance before inspection. For pressed sinks, take readings at agreed formed areas because thickness can change during drawing.
How do I check sink rim flatness?
Use a stable reference surface or the agreed flatness method and inspect for rocking, raised corners, twisting and uneven mounting contact. The acceptance limit should be defined for the product and installation type.
How do I test sink drainage?
Place the sink in the agreed level position, apply a consistent amount of water and observe the flow after a defined time. Look for repeatable structural pools rather than expecting every small droplet to disappear.
What should be checked on a handmade sink?
Focus on sheet thickness, dimensions, welding completeness, corner polishing, rim flatness, drainage, visible finish, sound pads, accessories and packaging.
What should be checked on a pressed sink?
Check formed thickness, wrinkles, cracks, tool marks, bowl depth, rim shape, drain area, dimensional consistency, surface finish and packing protection.
Should every sink be inspected?
Inspection frequency depends on the characteristic and agreed plan. Safety issues, obvious visual defects, model identity, missing accessories and packaging condition may justify 100% checks, while selected measurements may follow an agreed sampling plan.
Why should packaging be included in sink inspection?
Poor packaging can cause scratches, bent rims, dents, missing accessories and incorrect labels after the sink has passed production inspection. Packaging is the final protection stage before delivery.