A kitchen sink pre-shipment inspection should verify more than surface appearance.
For B2B buyers, the goal is to confirm that the finished shipment matches the latest approved product specification, complete SKU and packing requirement before the goods leave the factory.
Quick Answer: What Should I Inspect Before Accepting a Kitchen Sink Shipment?
A kitchen sink pre-shipment inspection should cover at least eight areas:
- SKU and quantity
- approved drawing and revision
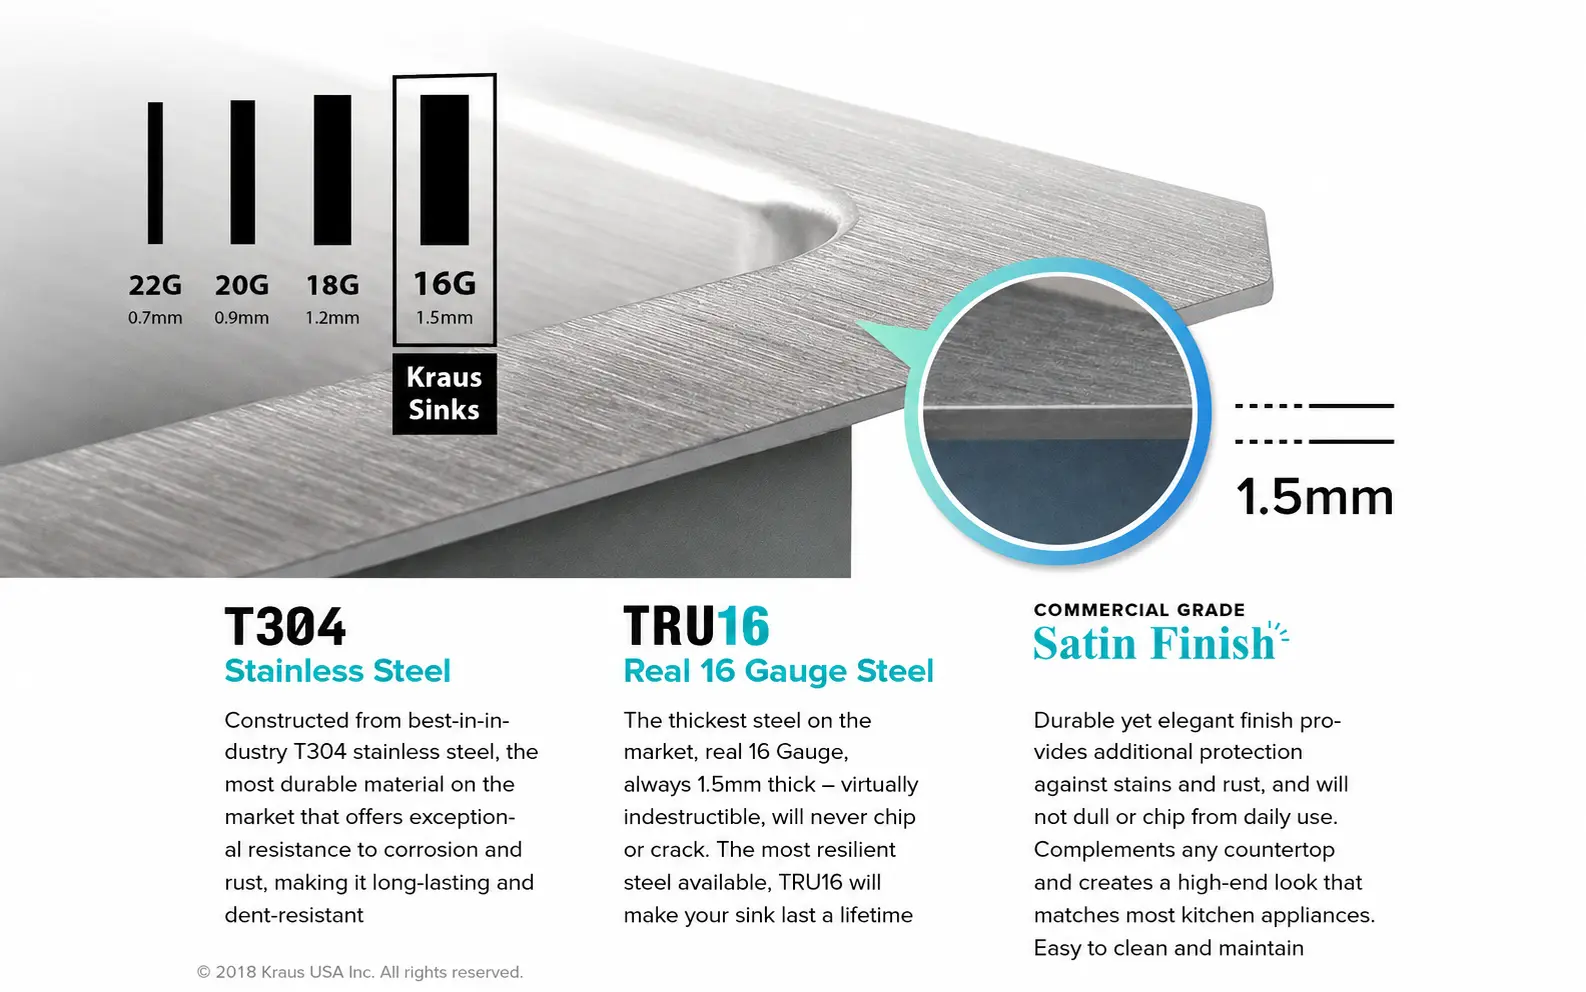
- material and thickness
- critical dimensions and installation geometry
- welding, forming and surface finish
- drain and accessory fit
- logo, labels and private-label details
- packing and carton configuration
For custom or repeat orders, inspection should be compared against:
- latest approved drawing
- golden sample
- material / thickness specification
- finish reference
- accessory list
- packing reference
A sink should not pass PSI only because it looks good. It should pass because the delivered SKU matches the approved specification.

Step 1 — Confirm the Correct SKU Before Inspecting Quality
Before checking scratches or dimensions, first confirm:
- model number
- PO
- size
- bowl configuration
- finish
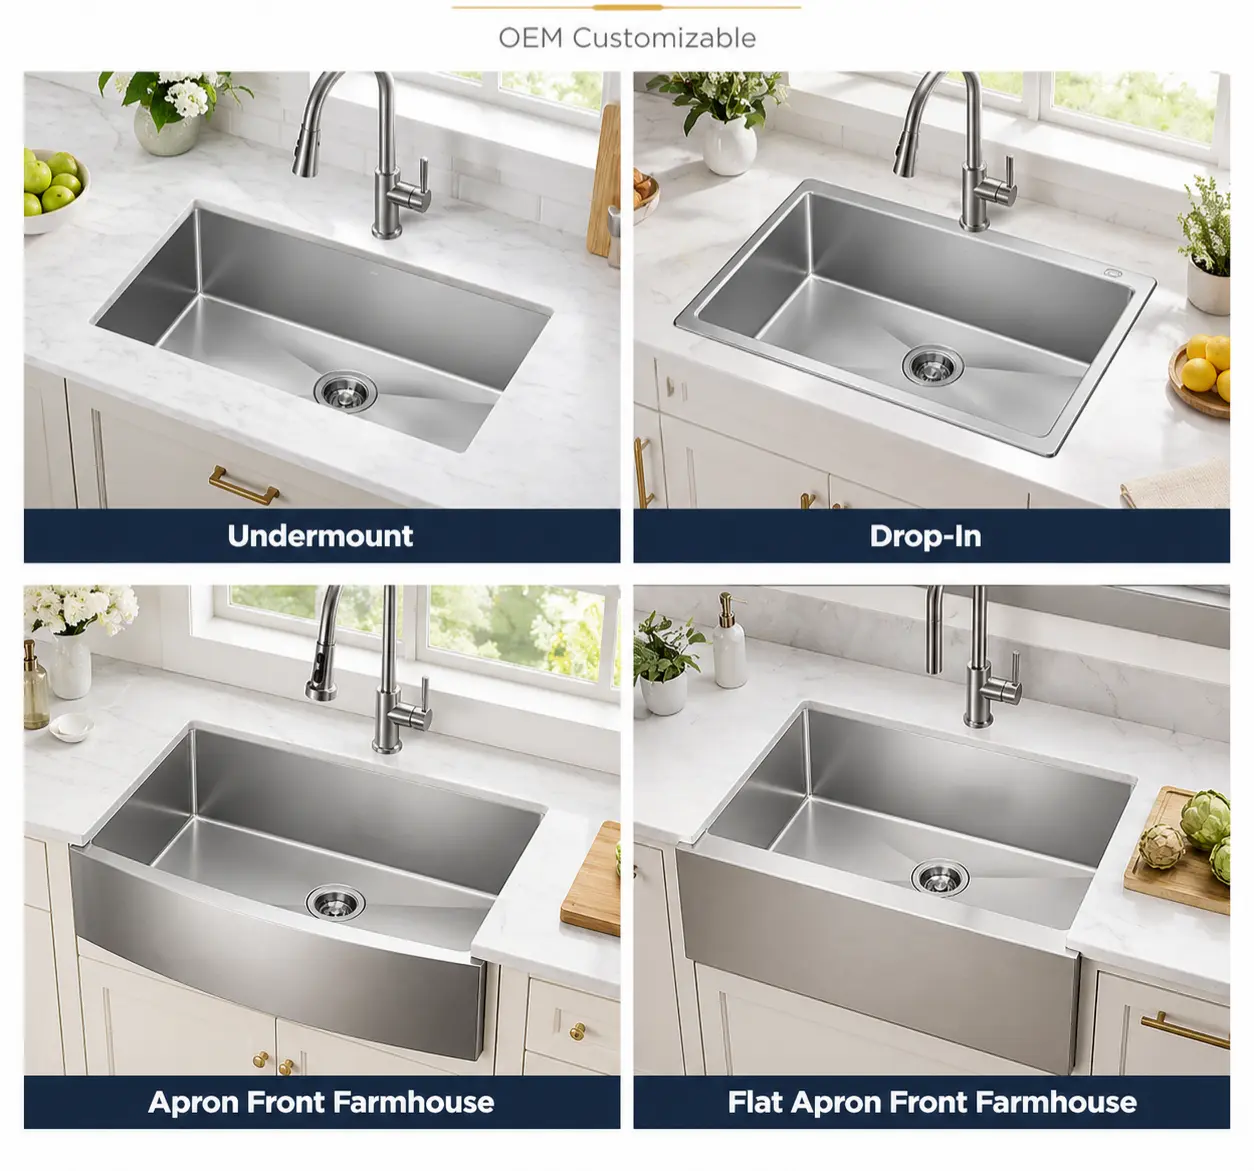
- installation type
- quantity
- carton count
This sounds basic, but the wrong SKU packed correctly is still the wrong shipment.
For multi-model orders, inspectors should confirm the model mix before sampling.
Step 2 — Confirm the Latest Drawing Revision
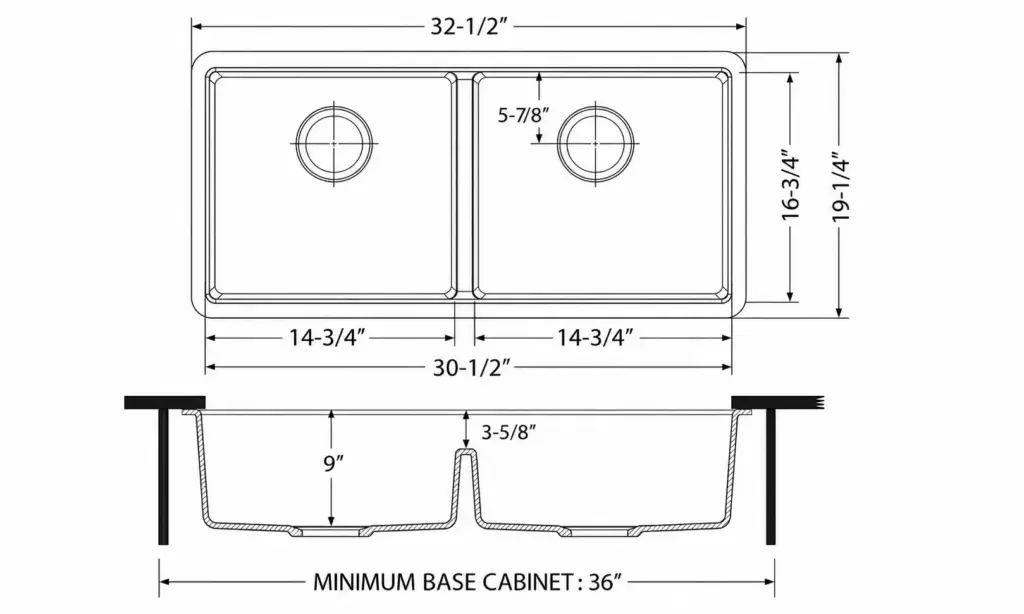
Custom sink projects may go through several revisions.
For example:
Rev.01 — Initial drawing
Rev.02 — Drain moved
Rev.03 — Bowl depth changed
The PSI should use:
Rev.03
not whichever drawing is easiest to find.
The inspection report should ideally record the revision being used.
This creates traceability between:
Purchase Order → Approved Drawing → Inspection Result.
Step 3 — Verify Material Grade
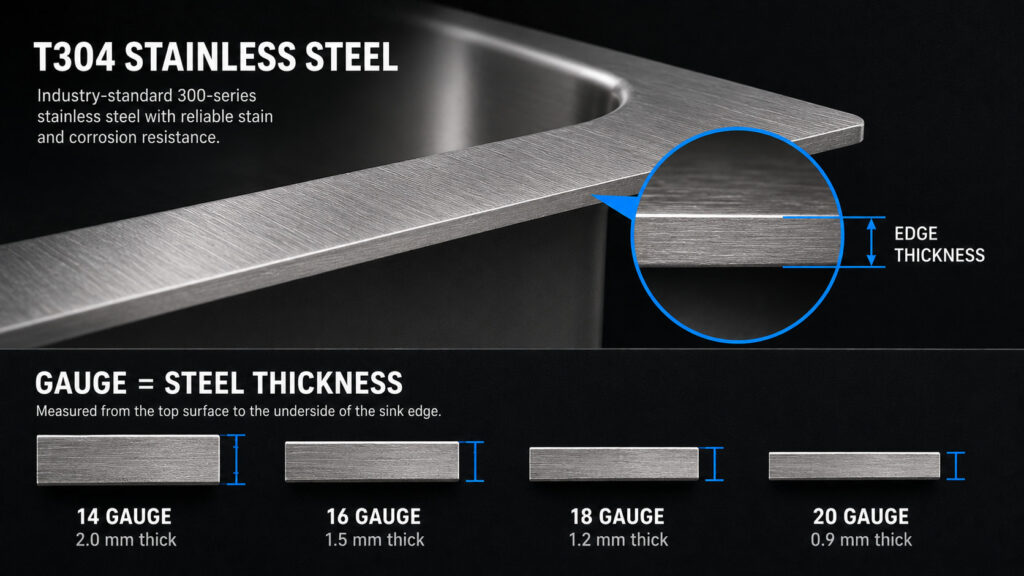
Confirm the required material specification:
- SUS304
- SUS316
- other agreed grade
Do not rely on appearance alone.
If the project requires material documentation, check that the document can be connected to the production batch.
A magnet alone should not be used to prove stainless steel grade.
For material verification, see Is SUS304 Stainless Steel Magnetic?.
Step 4 — Verify Thickness on the Correct Basis
Thickness inspection should match the product specification.
For handmade sinks, this may include:
- bowl thickness
- rim / upper plate thickness
- different structural components
For pressed sinks, distinguish between:
- incoming sheet thickness
- finished local thickness
- minimum finished thickness where specified
Do not accept:
Rim = 1.2 mm
as proof that:
whole pressed bowl = 1.2 mm.
If formed thickness is controlled, use the agreed measurement locations.
See How Pressed Sink Forming Changes Stainless Steel Thickness for the difference between starting and finished thickness.
Step 5 — Inspect Critical Dimensions
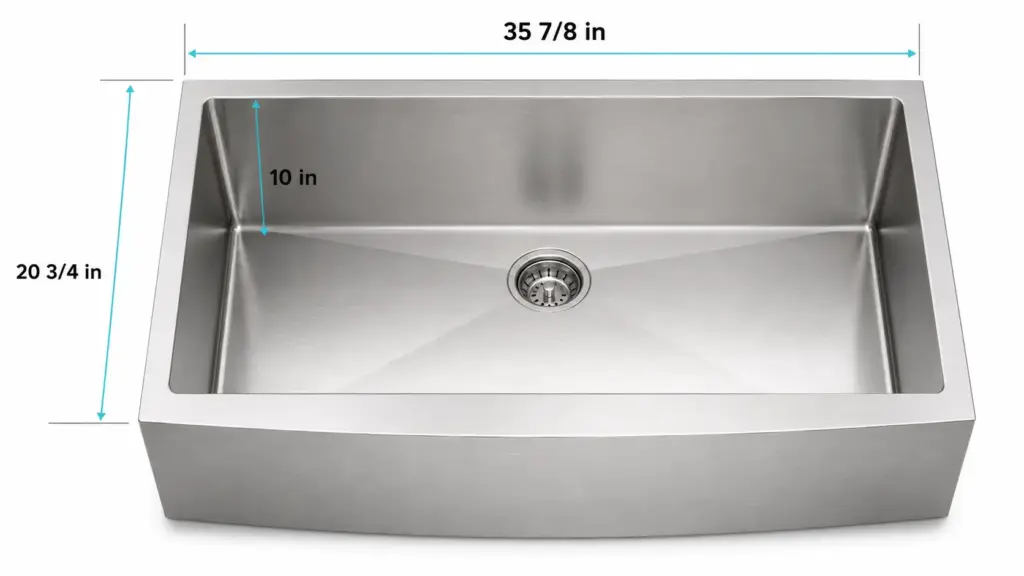
Do not measure every drawing dimension with the same priority.
Focus first on CTQs such as:
- overall size
- bowl opening
- bowl depth
- flange
- drain position
- drain-hole diameter
- faucet holes
- workstation ledge
- apron dimensions
- rim flatness
The exact CTQ list should follow the actual sink.
See How to Define Critical-to-Quality Dimensions for a Kitchen Sink.
Step 6 — Check Tolerances Against the Approved Drawing
The inspector should not create a tolerance during PSI.
For each controlled dimension, compare:
nominal dimension
- approved tolerance
- actual reading
Example:
| Item | Drawing | Tolerance | Actual | Result |
|---|---|---|---|---|
| Overall Width | Approved | Approved | Measured | PASS / FAIL |
| Bowl Depth | Approved | Approved | Measured | PASS / FAIL |
| Drain Position | Approved | Approved | Measured | PASS / FAIL |
The actual tolerance values should come from the approved project specification, not a generic internet standard.
See Kitchen Sink Drawing Tolerances for the decision logic behind tolerance control.
Step 7 — Check Rim Flatness
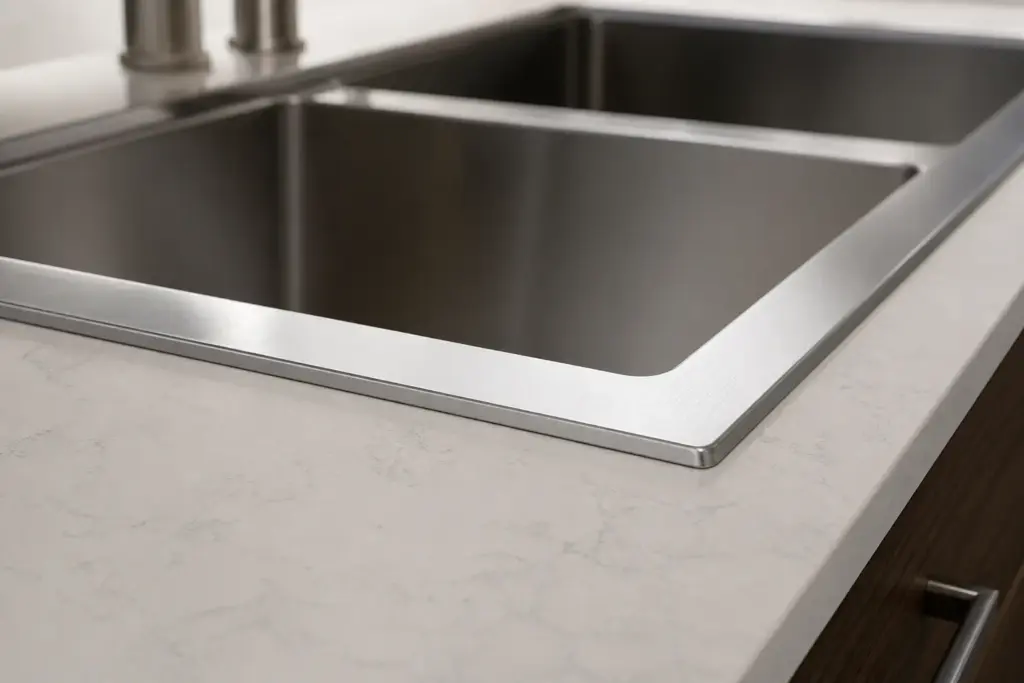
For installation-sensitive sinks, confirm:
- bow
- twist
- raised corners
- rocking
- flange condition
A sink can pass overall dimensions and still create installation problems.
Top-mount, undermount, large handmade and workstation sinks deserve particular attention.
See Why Sink Rim Flatness Causes Installation Claims.
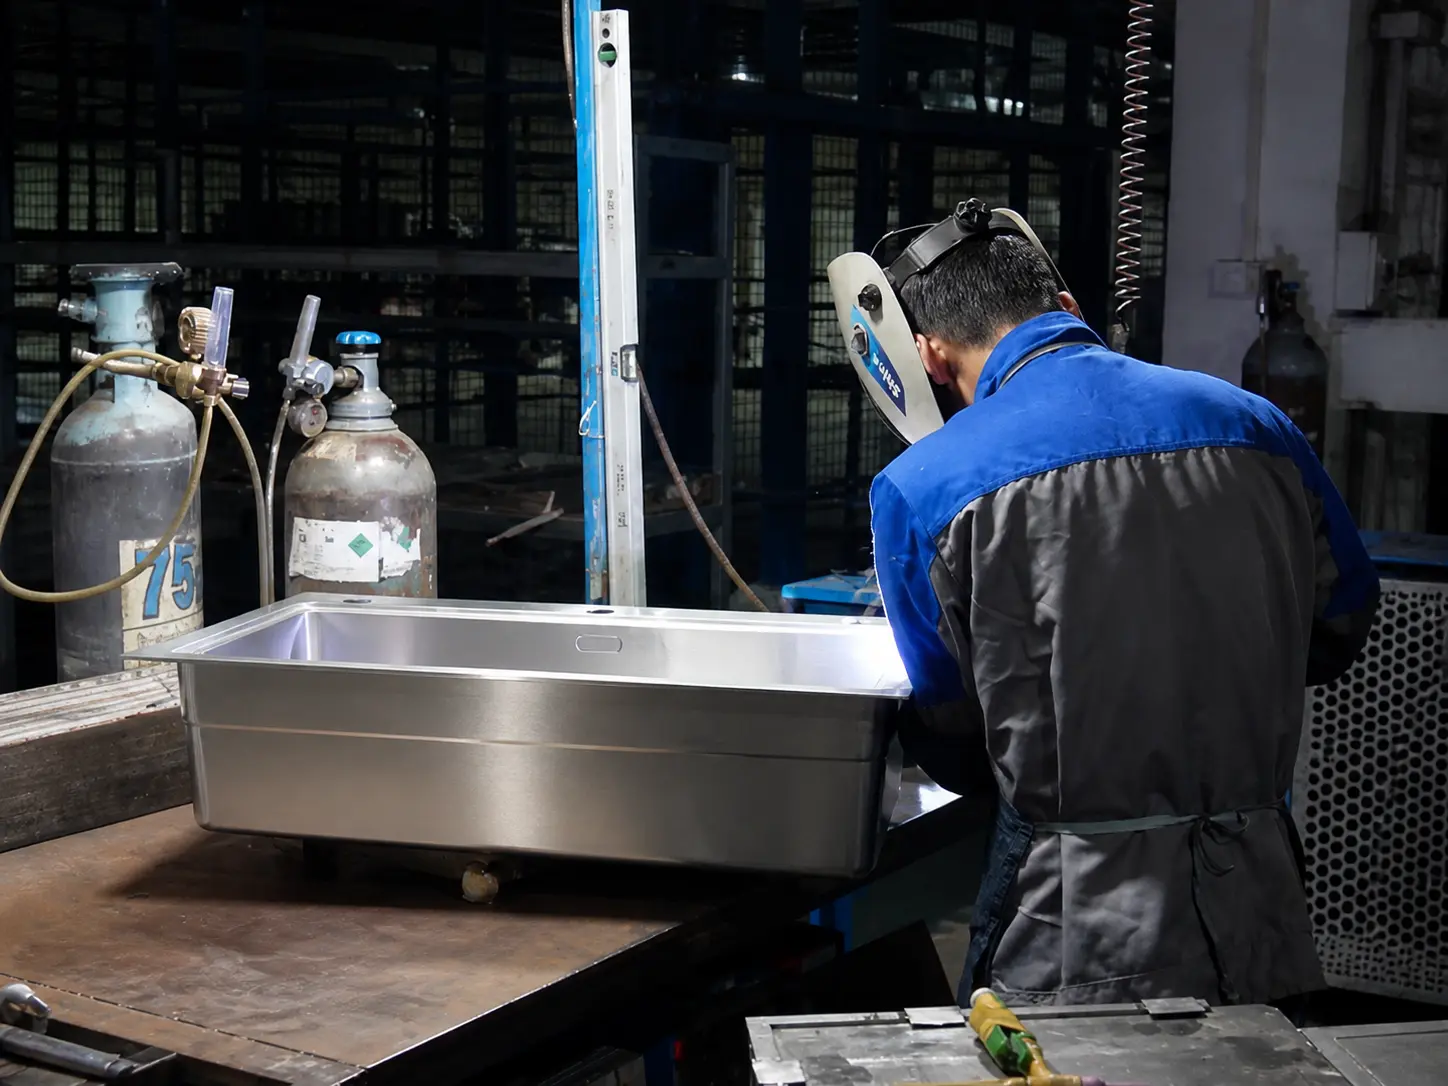
Step 8 — Inspect Handmade Welding
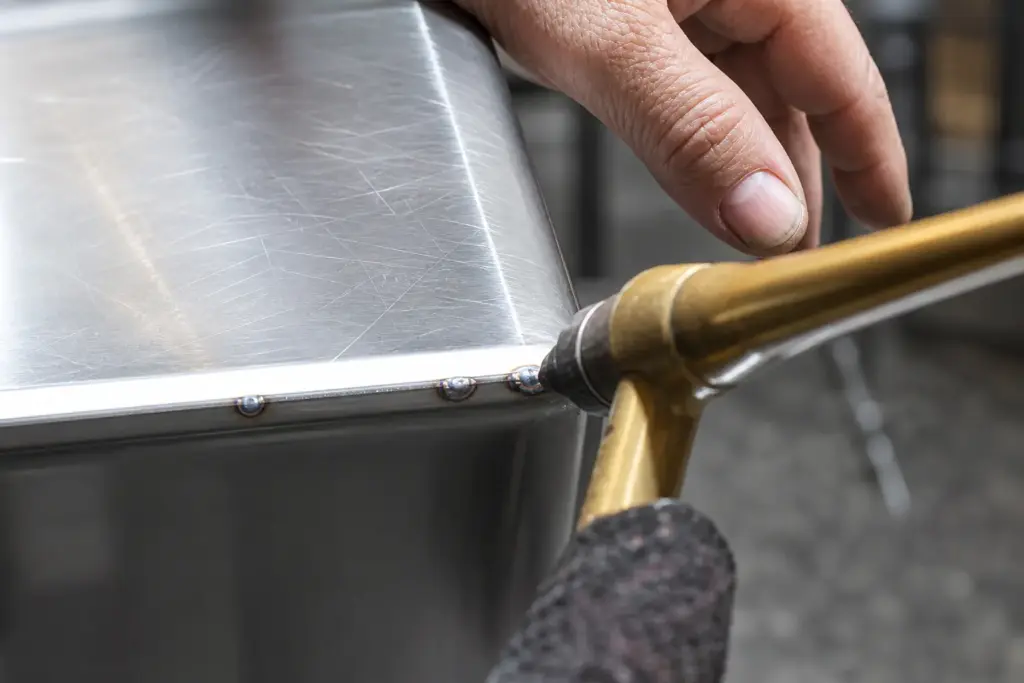
For handmade sinks, check:
- weld continuity
- corner appearance
- grinding
- polishing
- heat distortion
- bowl alignment
- rim geometry
The exact appearance standard should follow the approved sample where relevant.
Do not judge workmanship using a completely different visual standard at PSI than during sample approval.
Step 9 — Inspect Pressed / Drawn Forming
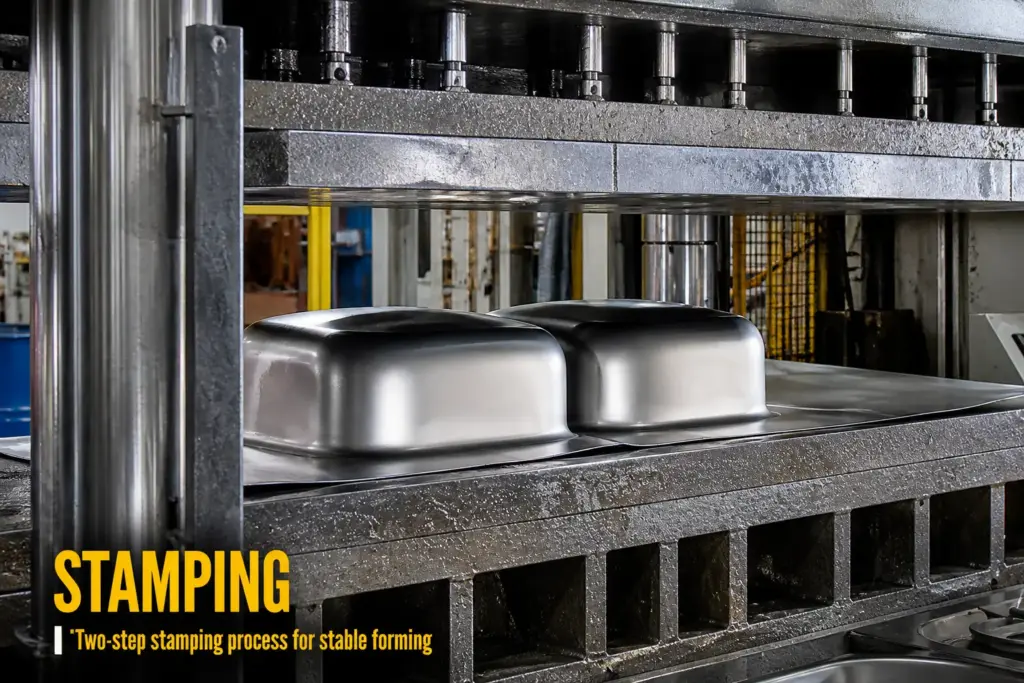
For pressed sinks, look for:
- cracks
- wrinkles
- abnormal stretch marks
- uneven forming
- rim distortion
- incorrect depth
- repeated forming defects
Compare several units.
One good sample does not prove the production batch is consistent.
Step 10 — Inspect Surface Finish Under Consistent Conditions
Check:
- scratches
- polishing marks
- brushing direction
- finish consistency
- visible weld repair
- PVD / colored appearance where applicable
For colored products, compare against the approved physical finish reference where practical.
Do not rely only on:
Black
Gunmetal
Gold
as the inspection standard.
Step 11 — Inspect the Drain and Drain Position
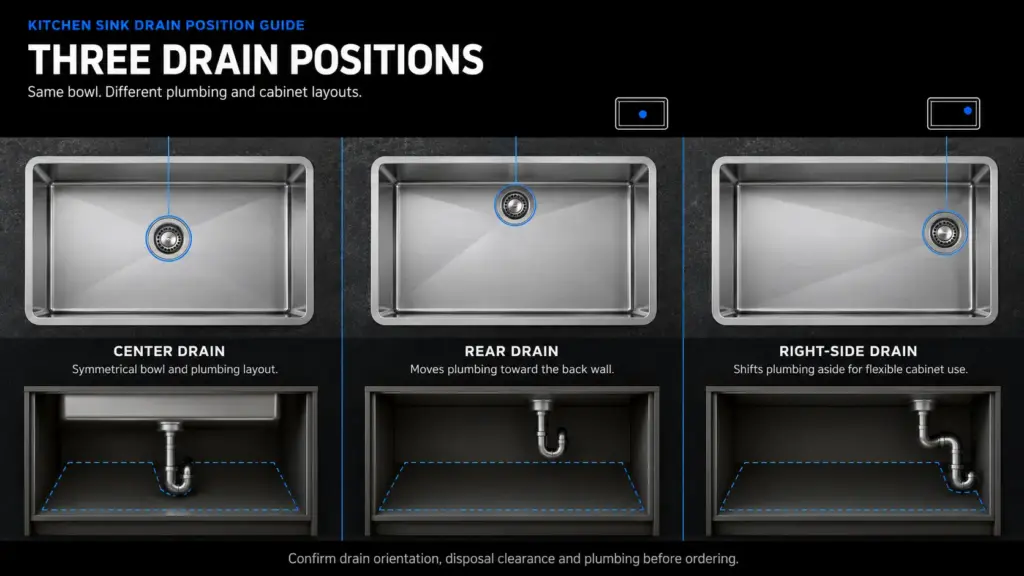
Confirm:
- drain center
- hole diameter
- drain fitting
- flange fit
- drain component
- disposal compatibility where required
For workstation or bottom-grid products, verify the drain together with the accessory system.
A correct drain hole with the wrong drain component is still a complete-SKU failure.
Step 12 — Test Workstation Accessory Fit
For workstation sinks, place the actual accessories on the sink.
Check:
- cutting board
- colander
- roll-up rack
- bottom grid
- drain
- basket where applicable
Inspect:
- support
- clearance
- rocking
- binding
- drain interference
Do not inspect the accessory list only by counting boxes.
Accessory fit should be verified on the actual sink.
Step 13 — Inspect the Underside
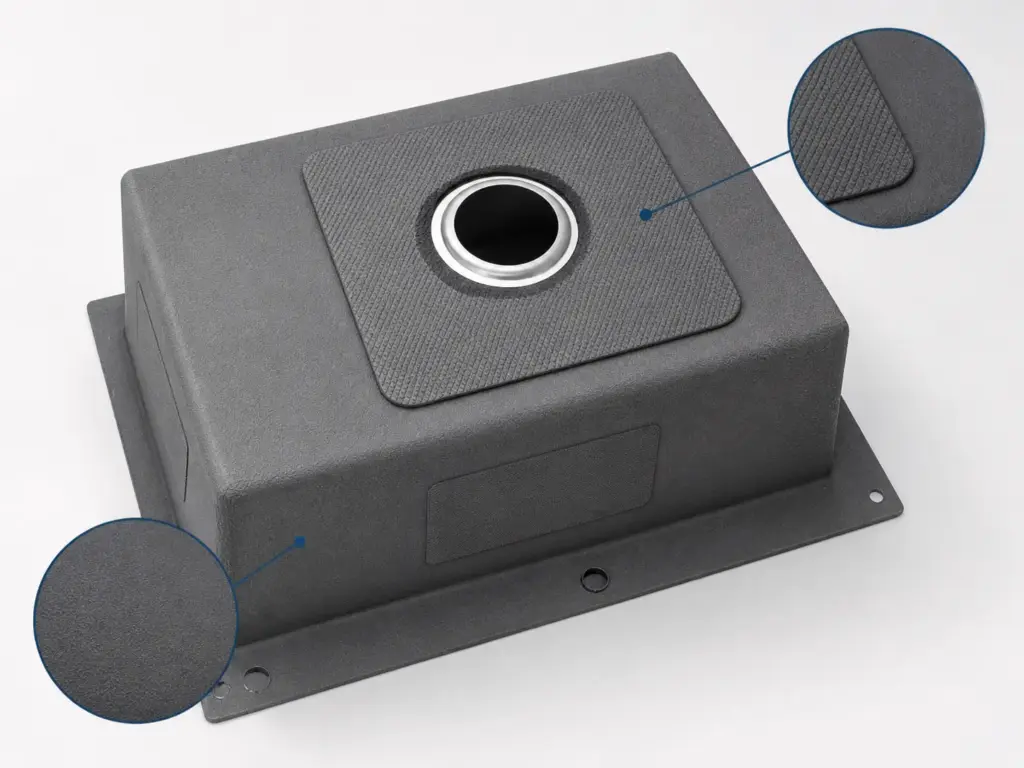
Turn the sink over.
Check:
- sound pads
- pad quantity
- pad position
- undercoating
- drain structure
- mounting components
These details are easy to miss during a top-surface inspection.
They may also differ between suppliers even when the visible sink looks identical.
Step 14 — Verify Logo and Private-Label Details
For private-label programs, check:
- logo method
- logo position
- orientation
- size
- product label
- barcode
- SKU
- carton artwork
- instruction sheet where applicable
A sink can be technically perfect and still be commercially unusable if the barcode or SKU label is wrong.
Matrix’s Private Label Product Programs separates product, branding and packing requirements because all three are part of the delivered SKU.
Step 15 — Check the Complete Accessory Quantity
Compare the actual packed set with the approved accessory list.
For example:
| Component | Required | Actual |
|---|---|---|
| Drain | 1 | Check |
| Bottom Grid | 1 | Check |
| Cutting Board | 1 | Check |
| Colander | 1 | Check |
| Roll-Up Rack | 1 | Check |
| Clips | Set | Check |
Avoid vague inspection statements such as:
Full accessories included.
The complete SKU should be countable.
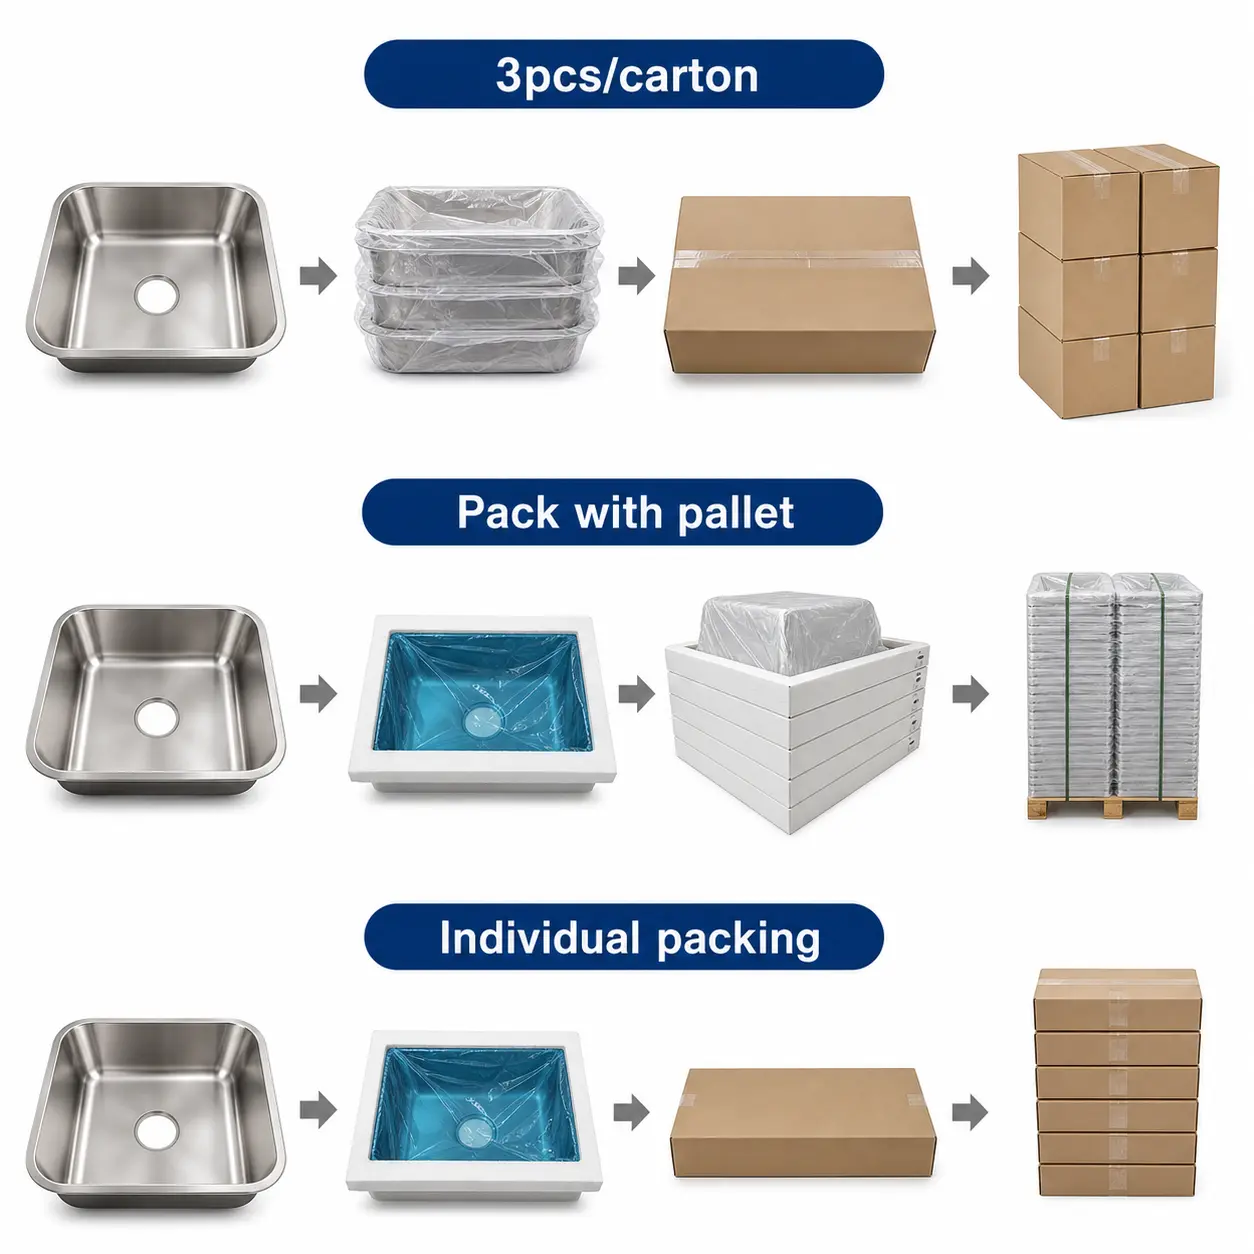
Step 16 — Inspect Packaging Before Shipment
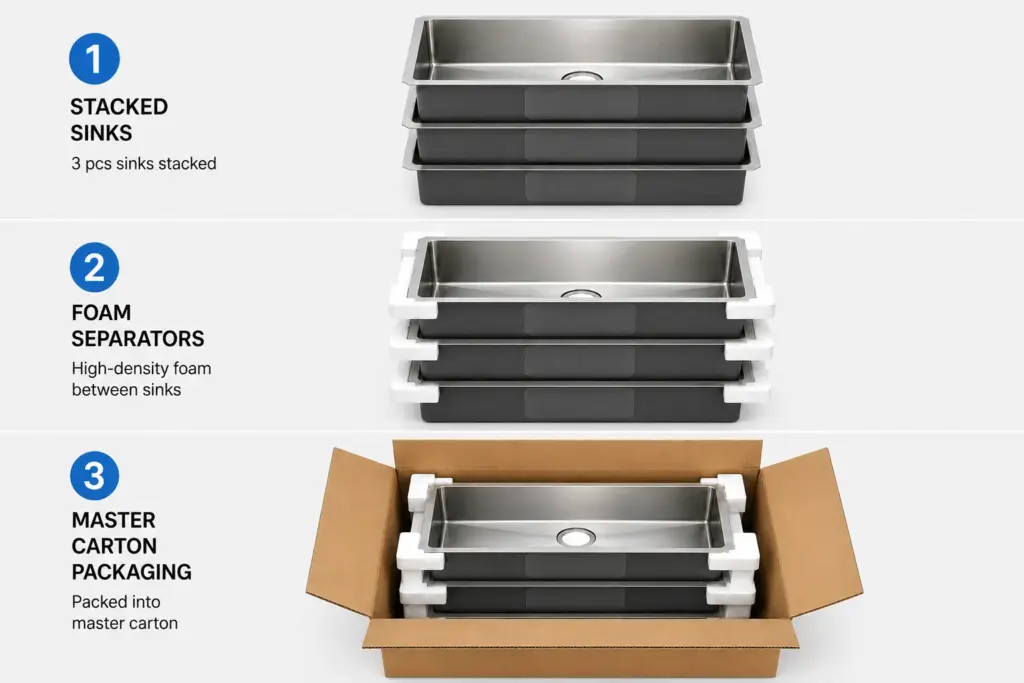
Packaging inspection should confirm:
- pcs per carton
- protective film
- foam
- rim protection
- accessory separation
- carton condition
- carton dimensions
- labels
- shipping mark
- pallet requirement where applicable
For workstation and decorative-finish sinks, accessory movement deserves particular attention.
Metal accessories should not be able to rub directly against finished sink surfaces during transport.
Step 17 — Check Whether the Packing Matches the Distribution Route
The same carton may not be suitable for every logistics route.
Consider:
- container shipment
- pallet distribution
- LCL
- parcel / drop-ship
A carton that works in palletized warehouse distribution may experience much more aggressive handling in parcel delivery.
So PSI should confirm:
not only whether packing matches the approved specification,
but whether that specification matches the actual distribution route.
Step 18 — Inspect Carton Labels and Shipping Marks
Check:
- customer name where required
- PO
- model
- SKU
- barcode
- quantity
- finish
- carton number
- shipping marks
For mixed-model orders, carton identification becomes especially important.
Wrong carton information can create warehouse and retail problems even when the product itself is correct.
Step 19 — Compare the Shipment With the Golden Sample
For repeat or custom programs, compare production against the approved sample where it is useful for:
- appearance
- finish
- logo
- accessories
- workmanship
- packing
But do not use the golden sample to replace measurable drawing requirements.
The stronger system is:
Drawing + Specification + Golden Sample + Inspection Record
Step 20 — Record Actual Measurements, Not Only PASS
For important CTQs, a report is more useful when it records:
Actual: 219.6 mm
rather than only:
PASS.
Actual readings make it possible to:
- compare batches
- identify drift
- investigate claims
- evaluate repeat-order consistency
This is especially valuable for dimensions and thickness.
Step 21 — Use Photos as Evidence
Useful PSI photos include:
- product overview
- model / label
- dimensional measurement
- thickness measurement
- drain
- rim flatness check
- accessory fit
- underside
- finish
- packing
- carton mark
- pallet
Photos should support the inspection result rather than replace measurement.
Step 22 — Separate Product Defects From Packing Defects
A scratched sink could be:
- produced scratched
- scratched during packing
- scratched by accessories
- damaged during transport
The inspector should record where the issue is found and, where possible, identify whether it appears:
before packing
or:
after packed-product handling.
This makes later root-cause investigation easier.
A Practical Kitchen Sink PSI Structure
A. Shipment Verification
- PO
- SKU
- quantity
- model mix
- finish
B. Specification
- drawing revision
- material
- thickness
- CTQs
- tolerances
C. Workmanship
- forming
- welding
- polishing
- finish
- rim
D. Complete SKU
- drain
- accessories
- logo
- labels
E. Packing
- foam
- accessory layout
- carton
- barcode
- shipping mark
F. Evidence
- readings
- photos
- PASS / FAIL
- deviations
Pre-Shipment Inspection Checklist
| Inspection Area | What to Verify |
|---|---|
| PO / SKU | Correct model and quantity |
| Drawing | Latest revision |
| Material | Correct grade |
| Thickness | Correct basis and locations |
| Dimensions | CTQ measurements |
| Tolerance | Approved limits |
| Rim | Flatness / distortion |
| Handmade | Welding / polishing |
| Pressed | Forming / cracks / wrinkles |
| Finish | Approved appearance |
| Drain | Size / position / fit |
| Accessories | Quantity + fit |
| Underside | Pads / coating |
| Logo | Method / position |
| Label | SKU / barcode |
| Packing | Protection / configuration |
| Carton | Marks / condition |
| Evidence | Actual readings + photos |
What PSI Cannot Fix
PSI is the last control point before shipment.
It is not the best stage to discover that:
- drawing was never approved
- tolerance was never defined
- drain position was ambiguous
- accessory fit was never tested
- packaging was never sampled
Those decisions belong earlier in product development.
The role of PSI is:
verify execution against the approved standard
not:
create the standard after production is complete.
What Should Buyers Freeze Before PSI?
Before inspection, make sure the supplier and buyer have the same:
- model
- drawing revision
- material
- thickness basis
- finish reference
- accessory list
- logo
- packing specification
If these references are unclear, even a detailed inspection can produce arguments instead of useful results.
Common PSI Mistakes
“The surface looks good, so the shipment passes.”
Appearance is only one inspection area.
“The inspector checked dimensions.”
Which dimensions?
CTQs matter more than random measurements.
“All accessories are in the carton.”
That does not prove they fit the sink.
“The approved sample is enough.”
Not for measurable dimensions and tolerances.
“The carton looks strong.”
Packing should match the actual distribution route and approved configuration.
“PASS is enough. We do not need actual readings.”
Actual CTQ readings are much more useful for repeat-order comparison and claim investigation.
Buyer Takeaway
A good pre-shipment inspection should answer four questions:
Is this the correct SKU?
Does it match the approved specification?
Is the complete product configuration correct?
Is it packed correctly for shipment?
That means the inspection sequence should be:
SKU → Drawing → Material → CTQs → Workmanship → Accessories → Branding → Packing
not:
open carton → look for scratches → PASS.
Frequently Asked Questions
What should I inspect before accepting a kitchen sink shipment?
Verify SKU, quantity, drawing revision, material, thickness, critical dimensions, finish, accessories, labels and packing.
Should every sink dimension be measured during PSI?
Not necessarily. Prioritize critical-to-quality dimensions that affect fit, installation, plumbing and accessories.
Should thickness be checked during pre-shipment inspection?
If thickness is part of the agreed specification, yes. The measurement basis should be defined in advance.
Should workstation accessories be tested on the sink?
Yes. Count and fit should both be verified.
Is a golden sample enough for PSI?
No. Use the golden sample together with the approved drawing and written specification.
Should actual measurements be recorded?
For critical dimensions, yes. Actual readings provide stronger evidence than PASS / FAIL alone.
Should packaging be part of PSI?
Yes. Carton configuration, product protection, accessories, labels and shipping marks are part of the delivered SKU.
Preparing a Sink Shipment for Inspection?
Matrix’s Quality Control & Inspection outlines the product references used for material, dimensions, finish, accessories and packing.
For new programs, use the Kitchen Sink RFQ Checklist before development so the final inspection has a clear specification to follow.